


2-14 Chapter 2
Library Installation
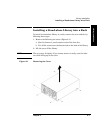
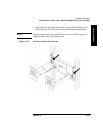
Installing the Library into a Rack (for Model 2/20, 4/40, and 6/60)
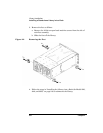
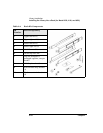
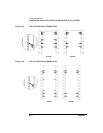
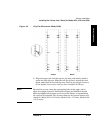
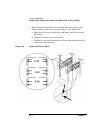
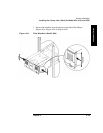
3. Align the lower (black/silver) rail with the lower two clip nuts, and
loosely install a 10-32 screw into each clip nut. (See Figure 2-6.)
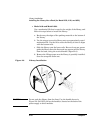
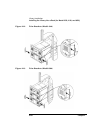
a. Slide the rail so that it equals the rack depth, and loosely install
the screws.
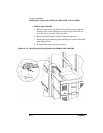
b. Tighten all screws to secure the rails.
c. Tighten the two pre-installed screws inside each mounting rail to
secure the rail in position.
Figure 2-6 Upper and Lower Rails