


Trim Ring Mount Kits for the TPS-6X-DSW Crestron TMK/WMKT-6X-DSW
Installation
This section provides an installation procedure for each Trim Ring Mount Kit. The
“TMK-6X-DSW Procedure” starts below and the “WMKT-6X-DSW Procedure”
starts on page 6. Be sure to review each procedure before starting.
TMK-6X-DSW Procedure
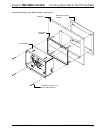
This section provides the necessary steps for the assembly of the TMK-6X-DSW
with either the BB-6X-DSW or PMK-6X-DSW. It is assumed that the BB-6X-DSW
or PMK-6X-DSW has been secured to the stud according to the instructions in the
latest revisions of their Installation Guides (Doc. 6728 and Doc. 6778 respectively).
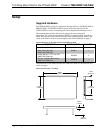
It is also assumed that drywall is in place and a cutout for the TPS-6X-DSW is made
in the drywall.
Complete the steps in the order provided. The only tool required and not supplied is
a level.
CAUTION: Allow an air gap of at least 12 inches (30.48 cm) in the wall cavity
above and below the TPS-6X-DSW for heat dissipation.
NOTE: When installing into the PMK-6X-DSW, verify that the 18 AWG bus wire
securing the cables for the wall mount docking station remains attached.
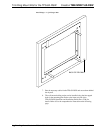
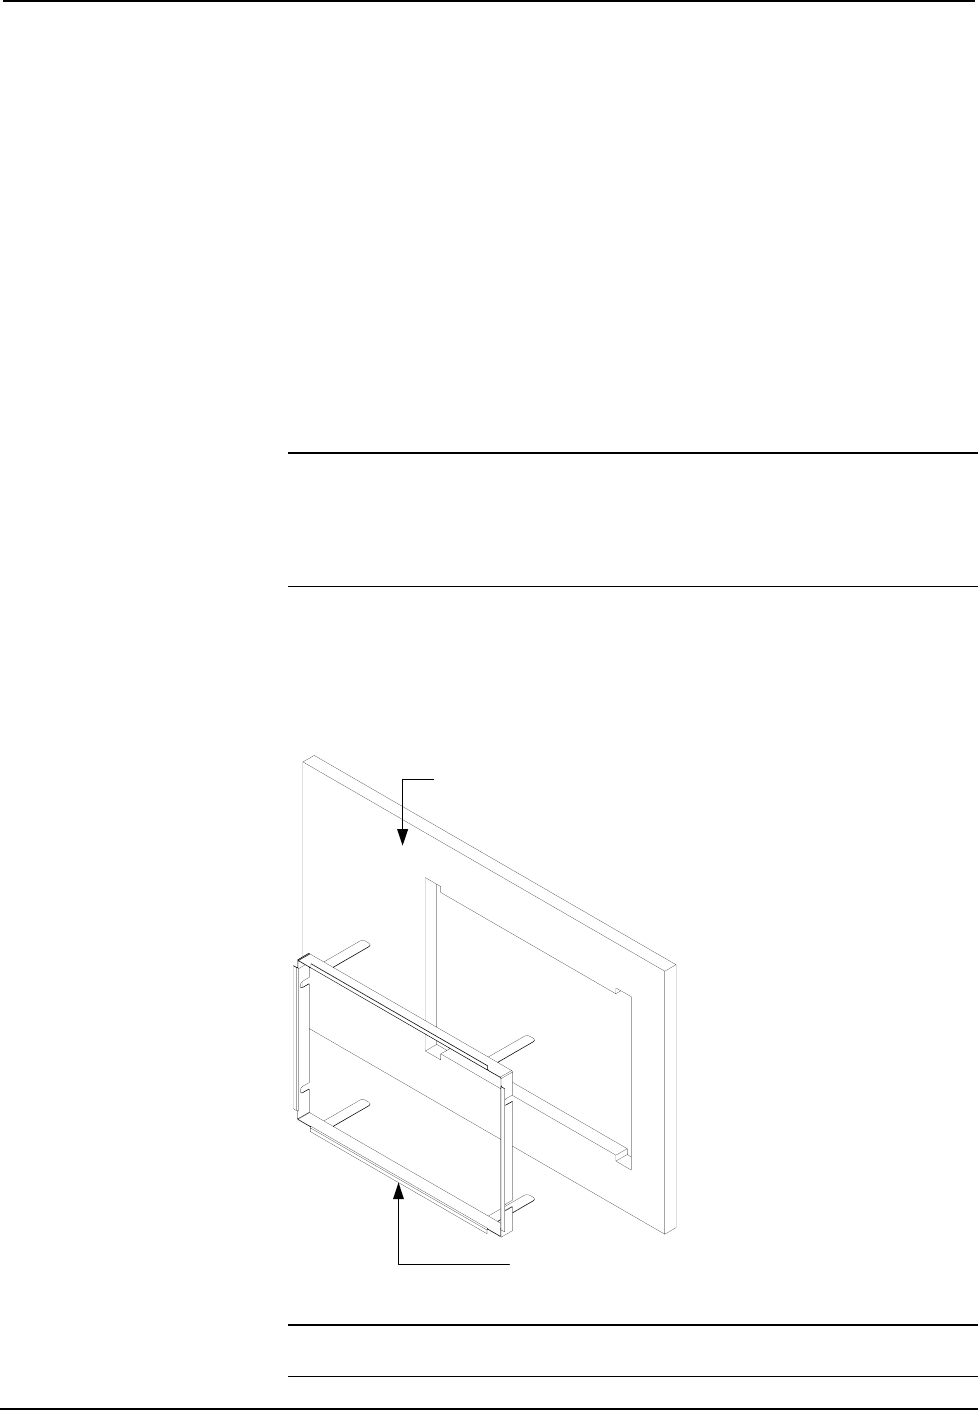
1. Verify that the cutout in the drywall is as level as possible.
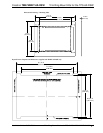
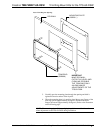
2. Insert the symmetrical trim ring into the opening, as shown in the
illustration below.
Insert Trim Ring into Opening
DRYWALL
TRIM RING
(2022808 )
IMPORTANT
MAKE DRYWALL CUTOUT
AS LEVEL AND CLEAN AS
POSSIBLE. THE TRIM RING
ONLY ALLOWS MINOR
ADJUSTMENTS OF THE
TPS-6X-DSW.
NOTE: The required PMK-6X-DSW or BB-6X-DSW is not shown in the
illustration above.
4 • Trim Ring Mount Kits for the TPS-6X-DSW: TMK/WMKT-6X-DSW Installation Guide – DOC. 6780A