Important Notice
All statements, technical information, and recommendations related to 3M’s products are based on information believed to be reliable, but the
accuracy or completeness is not guaranteed. Before using this product, you must evaluate it and determine if it is suitable for your intended
application. You assume all risks and liability associated with such use. Any statements related to the product which are not contained in
3M’s current publications, or any contrary statements contained on your purchase order shall have no force or effect unless expressly agreed
upon, in writing, by an authorized officer of 3M.
Warranty; Limited Remedy; Limited Liability.
This product will be free from defects in material and manufacture for a period of one (1) year from the time of purchase. 3M MAKES NO
OTHER WARRANTIES INCLUDING, BUT NOT LIMITED TO, ANY IMPLIED WARRANTY OF MERCHANTABILITY OR FITNESS FOR
A PARTICULAR PURPOSE. If this product is defective within the warranty period stated above, your exclusive remedy shall be, at 3M’s
option, to replace or repair the 3M product or refund the purchase price of the 3M product. Except where prohibited by law, 3M will not
be liable for any indirect, special, incidental or consequential loss or damage arising from this 3M product, regardless of the legal
theory asserted.
Communication Markets Division
3M Telecommunications
6801 River Place Blvd.
Austin, TX 78726-9000
800.426.8688
Fax 800.626.0329
www.3MTelecommunications.com
Recycled paper
40% Pre-consumer waste paper
10% Post-consumer waste paper
Litho in USA
© 3M 2006 78-8135-4353-1-A
3M, Scotchcast, Scotchlok and MS
2
are trademarks of 3M Company.
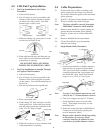
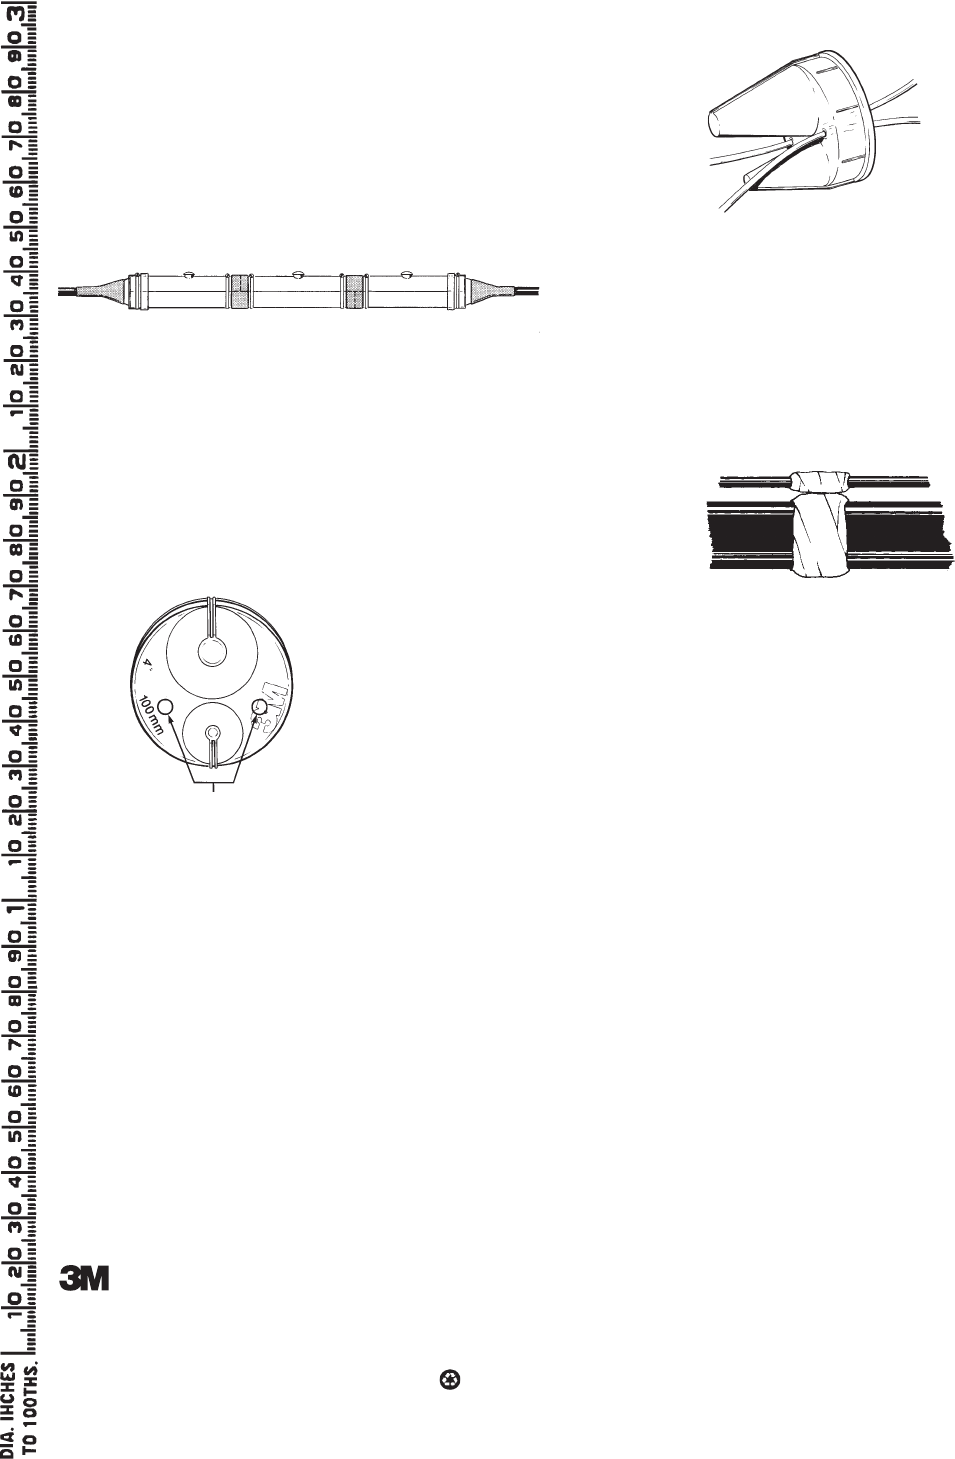
9.0 Adding Service Wires (2" - 5",
50mm - 125mm Closures)
9.1 Cut a small "+" pattern through the service
wire port.
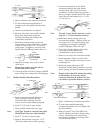
9.3 Scuff service wire sheath that will be located
inside closure. Build a sealing collar on
each service wire. Service wire collars are
one wrap of 3/4" B sealing tape completely
overwrapped with highly stretched DR tape
(white side out). Align the service wire
sealing collars directly over the outer sheath
sealing collars on main cable.
883661
883661
DR Tape
Service Wire
Sealing Collar
812027
9.4 Bond per standard procedure.
9.5 Install end cap. (See Section 4). Tighten hose
clamps.
9.6 Complete closure assembly per Sections 5
and 6.
9.2 Force service wire through port.
8.0 Closure Extension
8.1 Cut a closure body in half using a cable saw
or similar tool. Cut grooves are provided on
closure bodies.
8.2 Assemble the closure by staggering the cut
sections. Position hose clamps. Tape seams
with LR tape or vinyl tape.
8.3 Fill closure with compound as outlined in
Sections 6.4 - 6.11.
Half Body Top Full Body Top
Full Body Bottom Half Body Bottom
75350


