


6
e. Splice conductors per standard procedure.
f. To insure thorough encapsulation of
conductors, do not tightly bind the splice
bundle.
g. Install second bond bar if required.
h. Remove vinyl tape from scuffed sheaths.
Keep these areas clean during the
following bonding and sealing collar
construction operations.
i. Build outer sheath sealing collars just
beyond ends of strain relief bar(s). Sealing
collars are one wrap of 3/4" (19 mm) B
sealing tape. Completely overwrap with
highly stretched DR tape (white side out.)
j. Install hose clamps over ends of strain
relief bar(s).
Note: Rotate hose clamps so heads will not
obstruct fill ports on body.
k. Overwrap strain relief hose clamps with DR
tape to keep hose clamps tails from flagging.
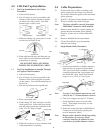
5.8 Double Sheath Cables Procedure:
B Sealing Tape
883657
DR Tape
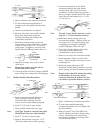
a. Remove outer sheath and shield for a
splice opening no greater than the
maximum splice opening listed for
closure size in closure dimension guide.
b. Scuff 6" (152 mm) of outer sheath.
c. Wrap scuffed sheath with vinyl tape.
Note: Vinyl Tape should be removed from under
Shield Bond Connector when installed.
d. Scuff 2" (51 mm) of inner sheath.
e. Remove inner sheath, except for 1-1/2"
(38 mm) at both ends of splice opening.
180°
Double Sheath
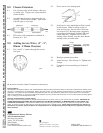
Note: Use only 1 (one) shield connector on each
cable for 2" (51 mm) diameter closures.
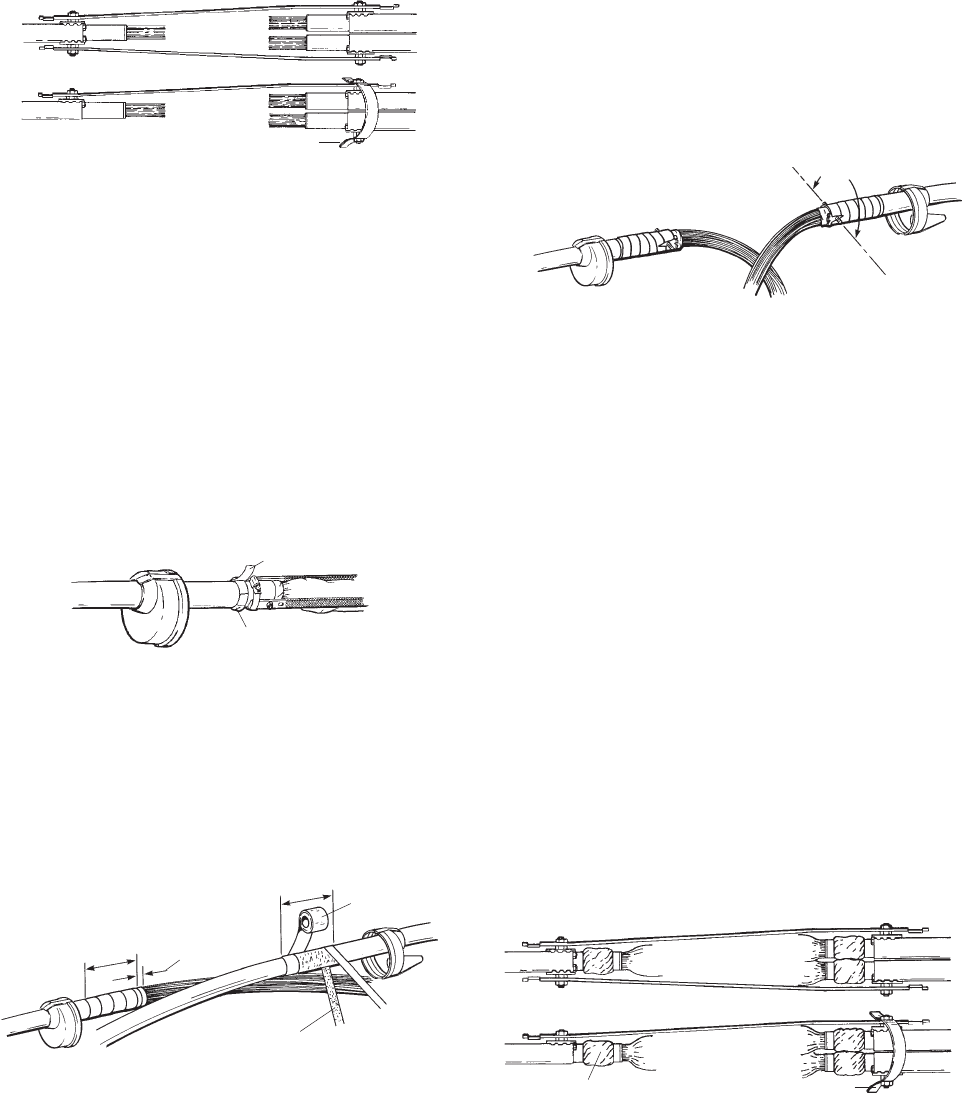
g. Build inner sheath sealing collars on
exposed inner sheaths. Sealing collars are
one wrap of 3/4" (19 mm) B sealing tape
completely overwrapped with highly
stretched DR tape (white side out).
h. Cover inner sheath sealing collars with
vinyl tape to protect them from
contamination of grease and dirt.
i. Remove core wrap even with inner sheath.
j. Install insulation sleeve on strain relief
bar(s). Trim to length if necessary to clear
mounting holes.
k. Install one strain relief bar on 3M
™
Scotchlok
™
Shield Bond Connectors (to hold
splice opening and provide temporary bond).
Note: Branch cables should be bonded according
to illustrations. If necessary, shield
connector studs may be trimmed to clear
cover halves of smaller diameter closures.
3" – 9" Kits
2" Kit
Strain Relief
Bars
Bonding Braid
883658
Inner Sheath Sealing Collar
l. Splice conductors per standard procedure.
m. To insure thorough encapsulating
compound penetration, do not tightly bind
the splice bundle.
n. Remove Scotch
®
Vinyl Tape 88T from
scuffed sheath(s) and inner sheath sealing
collars. Keep these areas clean during
the following bonding and sealing collar
construction operations.
883658
Sheath Scuff
88T
6" (152mm) Scuff
883658
Inner Sheath
1-1/2" (38 mm)
6" (152mm)
Scuff
883657
3" – 9" Kits
Bonding Braid
2" Kit
Strain Relief Bar
Strain Relief Bar
f. Insert base assemblies of the shield
connectors between the inner sheath
and the shield, 180° apart. Insert base
assemblies of shield connectors between
the core wrapper and the shield 180° apart.
Install first nut and torque to 45 ± 5 in-lbs
(5.2 ± 0.6 kg·m).