


7
6.0 Closure Assembly
Note: Make sure all vinyl tape has been removed
from splice encapsulation area.
6.1 Center lower closure half on splice bundle and
attach upper half (upper half has fill ports)
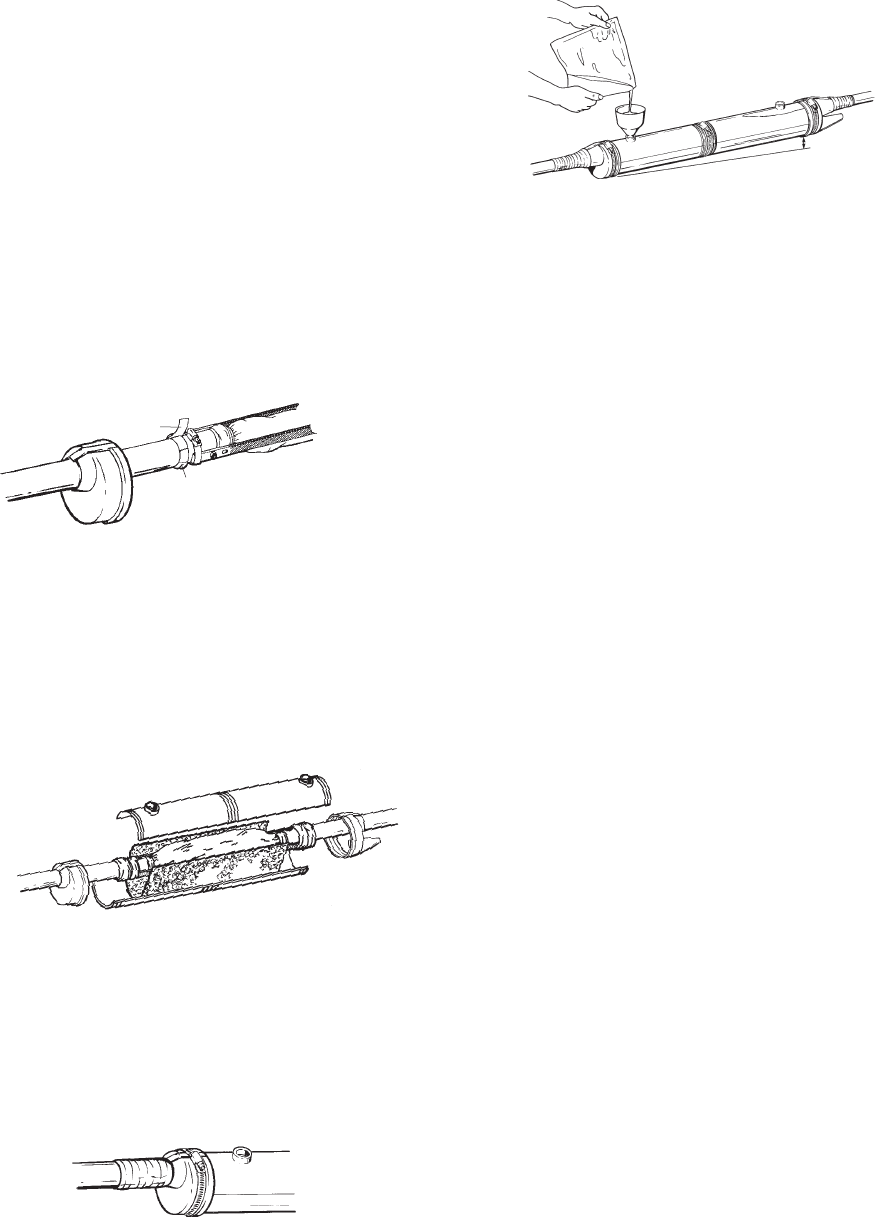
mating the tongue and groove.
7.0 Closure Reentry
7.1 Remove hose clamps from closure and end
caps. Remove any tape from end caps.
7.2 With a twisting motion, pull end caps from
closure and slide down cable.
7.3 Grasping closure at one end, slowly separate
halves from encapsulant.
7.4 Remove spacer web from splice and discard.
DO NOT REUSE THIS SPACER WEB.
7.5 Tear cured encapsulant away, as necessary, to
access splice.
7.6 After completion of repair, place 3M
™
Scotchcast
™
Spacer Web 4430 around splice
and reassemble closure as outlined in Section
6.1 - 6.3. End caps and sleeves can be
reused.
Note: If original end caps are reused, place a
small piece of B-sealing tape in slots on
inside of caps.
Note: Be sure that the spacer web 4430 does not
block the fill ports.
7.7 Fill closure with new compound as outlined in
Sections 6.4 - 6.11.
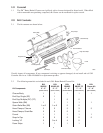
6.2 Place one large hose clamp around center of
closure and tighten.
6.3 Set end caps in grooves on closure body ends
and secure with large hose clamps. Seal end
caps to cable sheaths with 2 half-lapped layers
of vinyl tape. Start the half-lap layers on the
cable and tape up the cone.
883659
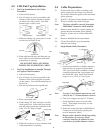
6.4 Position closure for burial on firmly packed
earth. Avoid sharp bends or kinks in the cable.
6.5 Slightly incline one closure end about 1/2"
(13 mm). Properly place supports under the
closure for compound filling.
6.6 Insert funnel into lower closure fill port.
(During filling, air will escape from higher
end.)
DR Tape
B Sealing Tape
883659
6.7 Mix compound according to instructions.
Note: Carefully follow health, safety and
environmental information on product
label or Material Data Sheet for
encapsulating compound being used.
6.8 Position closure in final position to be buried,
then fill closure with compound. Continue
mixing and pouring compound until closure is
completely filled and trapped air is removed.
6.9 Close fill ports with the snap-in caps.
6.10 Check for any compound leaks. If leaks are
observed, tighten hose clamps and retape as
required.
6.11 Closure can be buried immediately.
o. Install second bond bar if required.
p. Install hose clamps over ends of strain
relief bars.
Note: Rotate hose clamps so heads will not
obstruct fill ports on body.
q. Overwrap the strain relief hose clamps
with DR tape to prevent hose clamp tails
from flagging.
r. Build outer sheath sealing collars just
beyond ends of strain relief bars. Outer
sheath sealing collars are one (1) wrap of
3/4" (19 mm) B sealing tape completely
overwrapped with highly stretched DR
tape (white side out).
1/2"
13mm
883659
883660