Chapter 2 Installation and Setup
33
2
Followtheprocedurebelow.
1
Double click the [APD] icon and start the installation.
2
The Install ShieldWizard screen appears. Click the [Next] button.
3
The “License Agreement screen” appears. Read the content and select
"I accept the terms of the license agreement". Then click the [Next]
button.
4
The “Setup Type” screen appears. Select "Standard", then click the
[Next] button.
5
The “Printer Configuration” screen appears. Click the [Add] button.
6
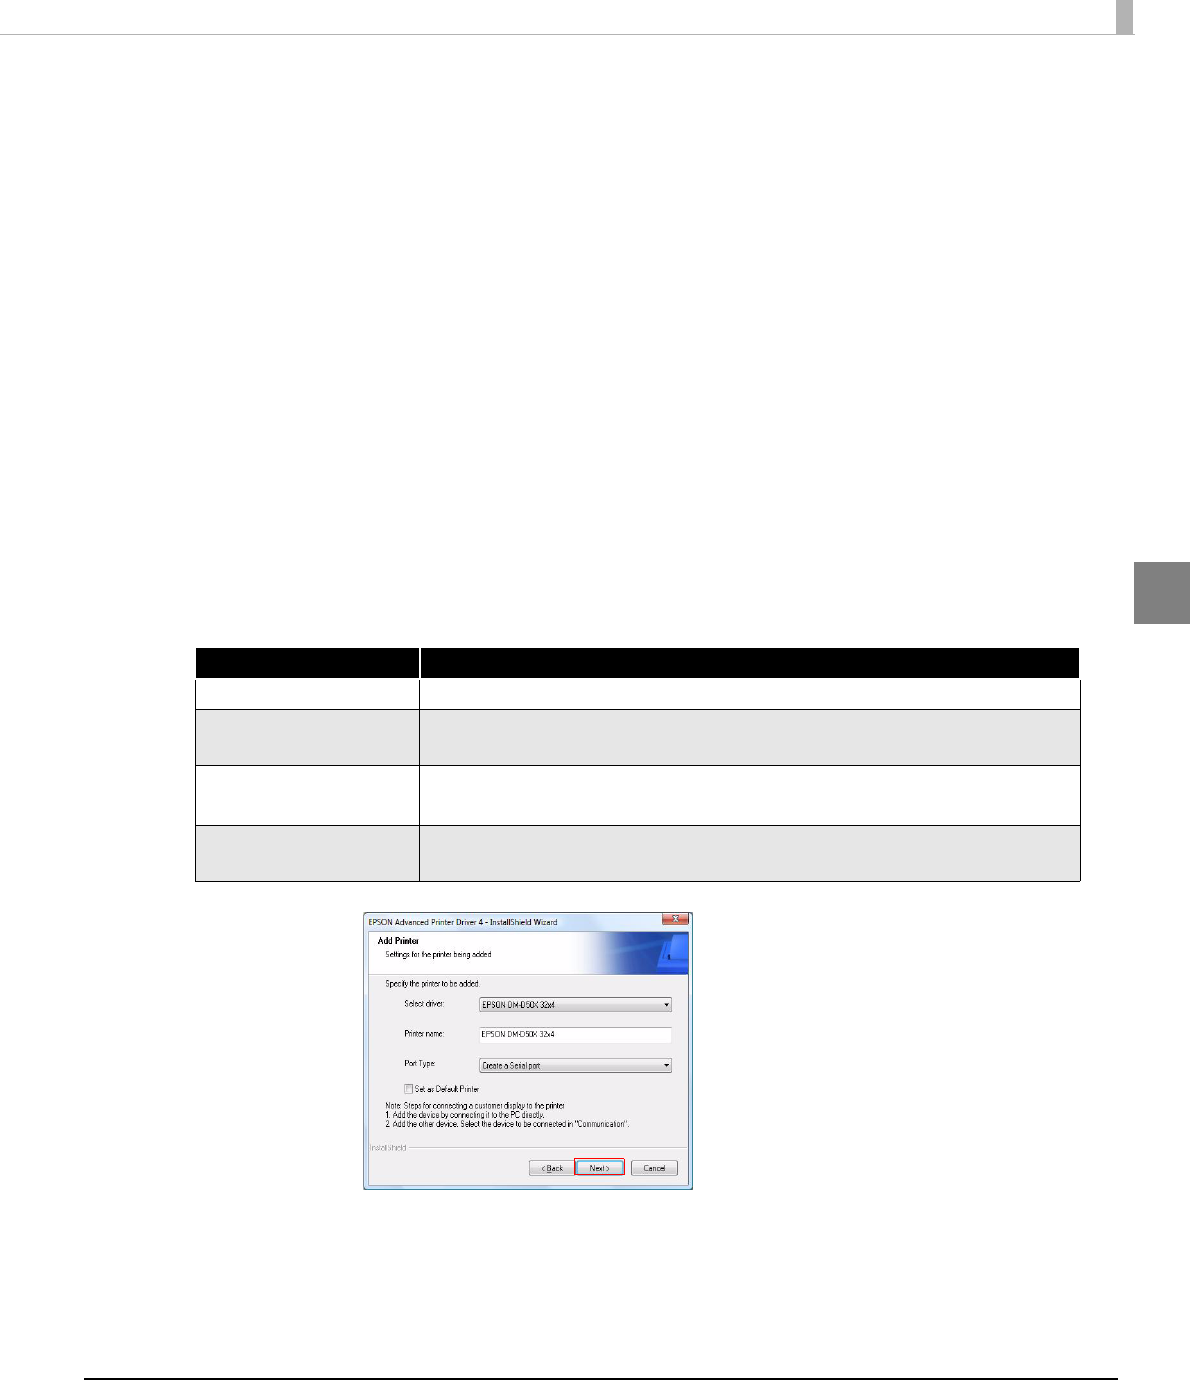
The “Add Printer” screen appears. Select a printer driver and port to be
used for the Customer Display, and click the [Next] button.
Setting Description
Select driver Select the printer driver for the Customer Display.
Printer name The name of the driver for the Customer Display.
Do not use Unicode/2-byte characters for the name.
Port Type Select an interface to use for connecting the Customer Display.
Select "Create a Serial port".
Set as Default Printer Check when configuring the printer as that normally used from the
Windows applications.


