


3
6
Set Up
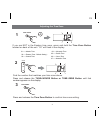
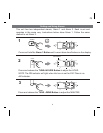
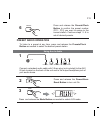
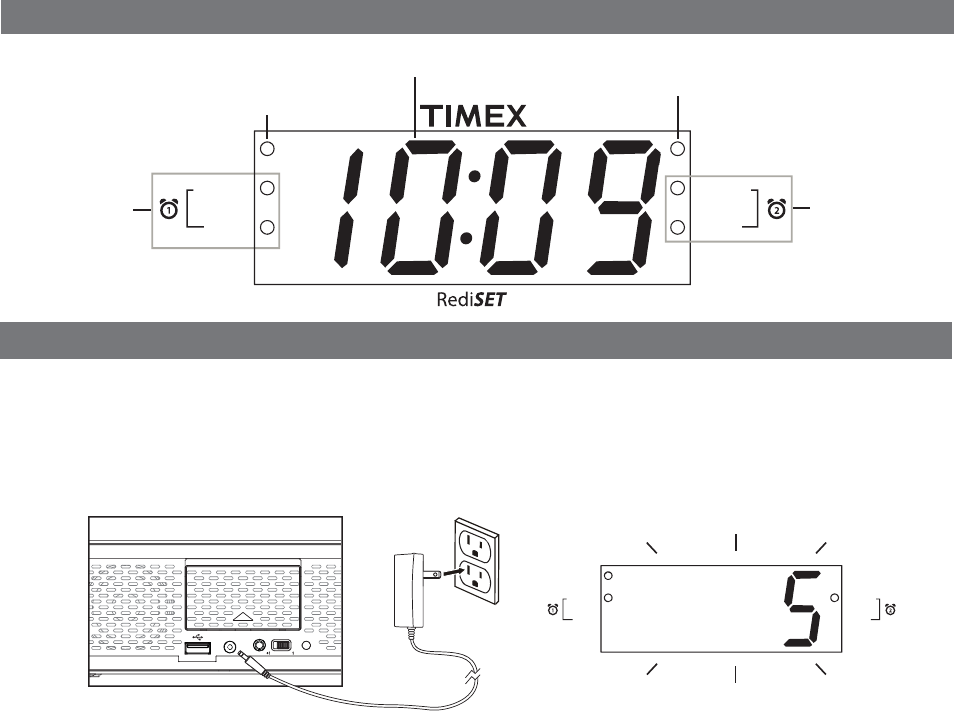
Connecting to Power Source
Connect the AC adaptor to the DC jack located on back of the unit. Connect plug into
a working wall outlet that is not controlled by a wall switch. The unit does not operate
on batteries (the battery backup system maintains clock settings during power failures).
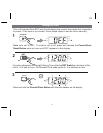
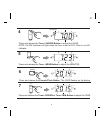
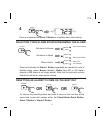
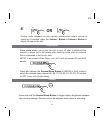
Redi-SET
This unit has a Redi-SET™ clock feature. When connected to power, the display
begins counting down 5-4-3-2-1, then the year flashes, followed by the month/date
and then the time. By default, the unit sets itself to Eastern Standard Time. If
Daylight Saving Time is in effect slide the DST switch on the back panel to the “+1”
position to move the display ahead by one hour.If you live in a different time zone
refer to the Time Zone Adjustment procedure on page 4. You only need to adjust the
Time Zone once and your new zone setting becomes the new default.
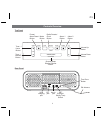
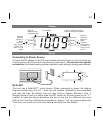
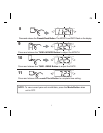
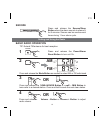
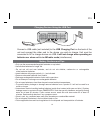
Display
When lit,
indicates
Buzzer or
Radio
is Alarm 2
alarm source.
If neither is lit,
Alarm 2 is not
armed
When lit,
indicates
Buzzer or
Radio
is Alarm 1
alarm source.
If neither is lit,
Alarm 1 is not
armed
When lit, indicates backup
batteries should be replaced
When lit,
indicates time
displayed is PM
Time display
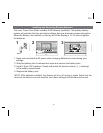
AUX-IN
DC 5V
TIME ZONE DST
PM
BUZZER
RADIO
BATT LOW
BUZZER
RADIO
PM
BUZZER
RADIO
BATT LOW
BUZZER
RADIO