8.9 Network:
Your home network may use a router that allows computers to be networked and to
share files. WAP-4500 can playback Internet Radio through network connection.
WAP-4500 can also playback audio files from any of the computers in the network,
as long as they provide acces by a Media server software as provided on the
installation CD.
Attention: WAP-4500 cannot find and playback your audio files, stored on a
networked PC without the audioserver installed. Before playback from network
computers, ensure properly installed media server software!
The default settings for the WAP-4500 and the instructions below are designed to
make accessing a wireless network easier. If you need to change the settings on
your router to access it, be sure the settings you choose are secure. Refer to the
router user documentation for more information.
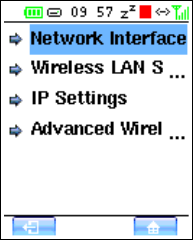
8.9.1 Network Interface
You have the choice between LAN (wired) and WLAN
(wireless). Scroll to the required setting and press OK (7). To
return to network settings screen, push the softbutton “return
to previous screen” (2). Dependant from your selected
network type, the appropriate setting items are shown, not
available items are greyed out..
8.9.2 Wireless Connection (WLAN)
Back to network settings screen, you have the choice to
setup your WLAN guided by the assistance of a wizard or
setup the items manually.
By default, most routers are set to DHCP (Dynamic Host Configuration Protocol).
This means the router assigns IP addresses automatically to the network devices,
you do not have to manually assign (static) IP addresses. The wizard is based on
DHCP system.
Note: if your network is not based on DHCP but requires static IP settings, you can
direcly scroll down to IP Settings and continue. See IP Settings.
8.9.3 Wireless Lan Setting Wizard
move the cursor to Wireless Lan Setting Wizard and press OK (7). The wireless
LAN site survey starts automatically
Scroll down to the appropriate secure WLAN AP (SSID) for your desired WLAN
connection, if prompted for confirmation press OK (7).
Enter the security key on the WEP Key screen (the key is the same as the key for
your router). You have to input the key by the screen keyboard, operated by the
cursor buttons. Please care for correct key (upper or lower case letters etc.)! Each
letter confirm by OK (7). When the key is complete, move to the ENTER symbol in
the screen and press OK (7). Then you will be prompted whether the key is ASCII
(common) or Passphrase type. Select and press OK (7). The wizard is finished
here. You will be back on settings main screen and a display window confirms the
WLAN setting is finished.
You may also open the Security Setting of Advanced WLAN Setting to configure
the WLAN security setting.
22


