User's Manual
9
Mounting onto dry wall
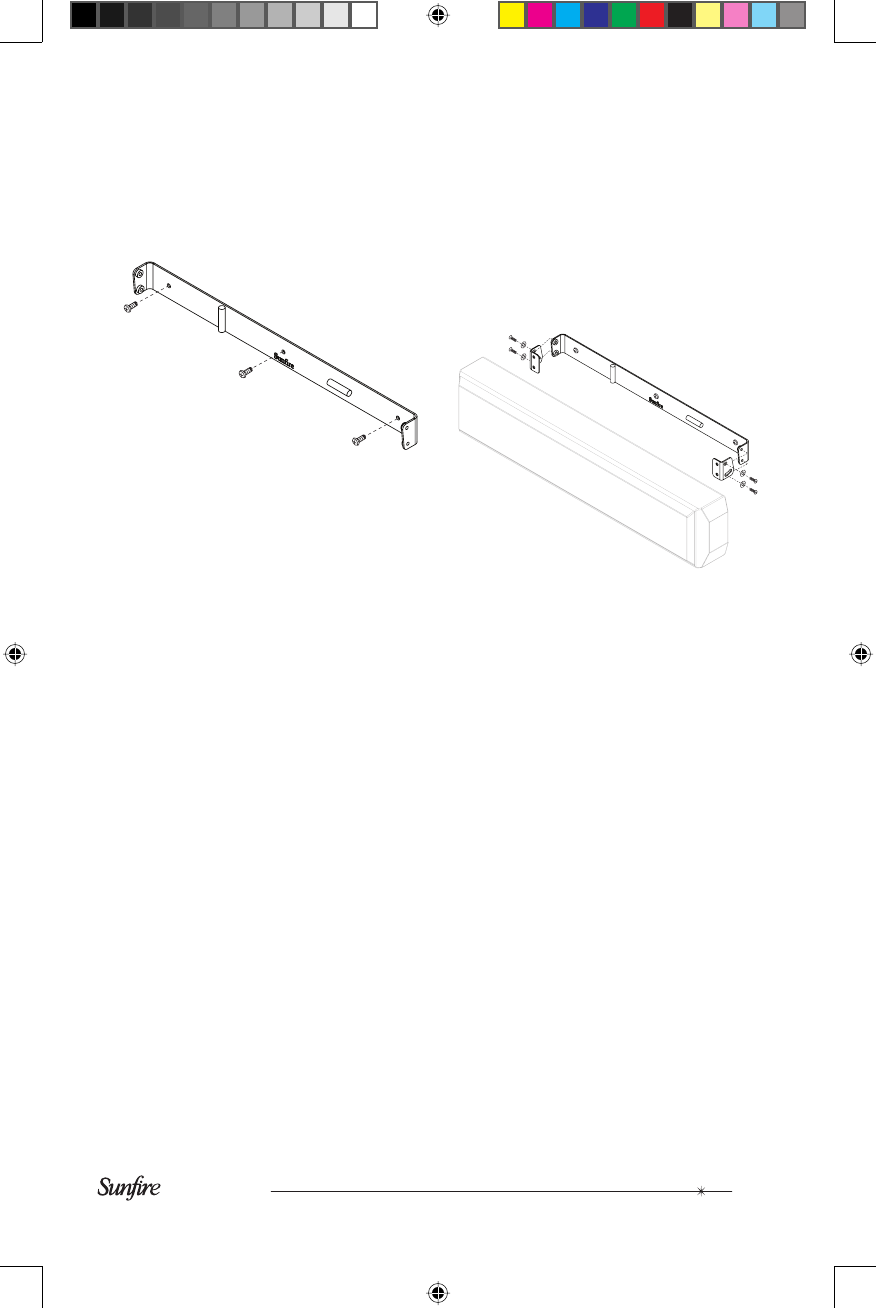
• Place the wall bracket in position
on the wall. Use your pencil to mark
the three holes. Use the built-in
bubble level to make sure the
bracket is level.
• With a 3/8" drill bit, drill three
through-holes into the marked posi-
tions on the wall. Remove any dust
or particles.
• Press a dry wall anchor into each
hole, and gently tap them in fl ush.
• After tapping the anchors fl ush,
each screw needs to be fully
tightened so the anchor collapses
and holds itself to the wall. Then
remove the screws and offer up the
wall bracket.
• Fit the wall bracket to the wall and
tighten the three screws fi rmly by
hand, so the bracket is secured to
the wall (and so the loudspeaker
will not vibrate on the wall).
Final Procedure
• Connect your speaker wires to the
back of the loudspeakers, making
sure of the correct polarity.
• Hold the loudspeaker in place, so
the side holes in the loudspeaker
brackets line up over the side holes
of the bracket on the wall.
• Have your assistant insert the four
screws with nylon washers, and
loosely secure the loudspeaker
brackets to the wall mount bracket.
• Adjust the tilt as desired, and then
tighten the four screws securely.
• Test the loudspeakers and enjoy!


