


User's Manual
9
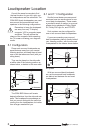
Read the details on page 6 to help
determine the best position for your
loudspeakers.
Tools required:
• Phillips screwdriver
• Pencil or other marker
• Electric drill and 5/16" drill bit
• Level
• Safety glasses
• Step ladder if needed
• Electronic stud nder if needed
Preliminary steps:
• Clear the area where you are going
to work, so it will be safe.
• Make sure there is no wiring, or
gas or water pipes behind the wall
where you are going to drill!
• If you have to mount the bracket
onto a masonry wall, we recom-
mend that you consult with your
hardware supplier to buy suitable
masonry hardware. The loud-
speaker weighs 8 lb (3.6 kg), but
you should allow a good safety
margin. If in doubt, please contact
your Sunre dealer for professional
installation.
Mounting onto sheetrock
1. Choose the best location for your
CRM-2BIP loudspeakers.
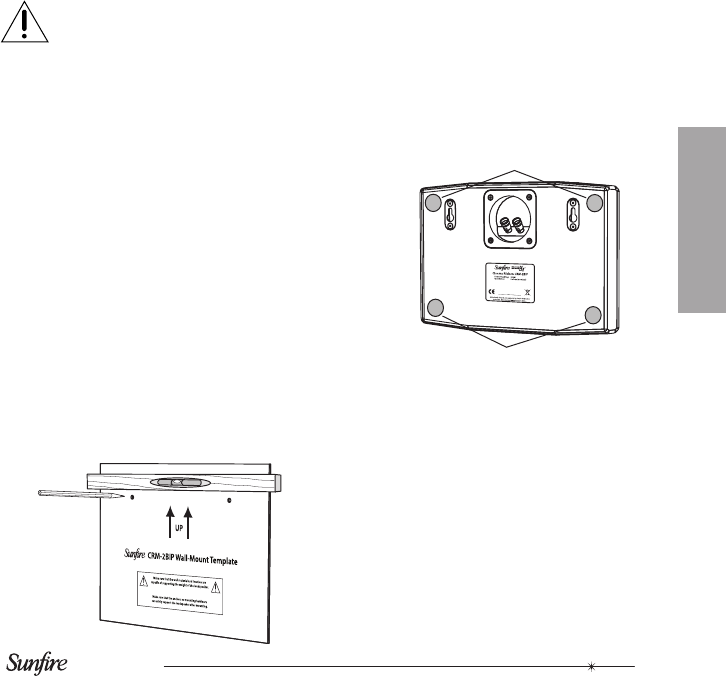
2. Hold the wall mount template onto
the wall surface. Use a level to
make sure that the two holes are
horizontal.
Installation
3. Mark the wall with a pencil in the
location of the two holes, and
remove the template.
4. Put on your safety glasses. With
a 5/16" drill bit, drill two holes into
the marked positions on the wall.
Remove any dust or particles.
5. Press a dry wall anchor into each
hole, and gently tap them in ush.
6. Tighten the screws by hand, until
the heads are sticking out approxi-
mately 1/8".
7. Connect your speaker wires to the
back of the loudspeakers, making
sure of the correct polarity. Gently
pull on the wires to make sure of a
good connection. Secure the wires
so their weight is not pulling against
the terminals.
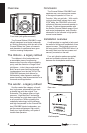
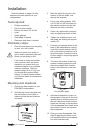
8. To reduce the chance of the loud-
speaker vibrating against the wall,
place the supplied anti-vibration
pads in four locations on the rear
panel.
9. Hold the loudspeaker in place, so
the keyholes in the rear of the loud-
speaker line up with the screws on
the wall. Make sure that the screw-
heads are securely in the keyholes.
If the loudspeaker feels loose, drive
the screws in further and remount
the loudspeaker.
10. Enjoy your new loudspeaker. See
page 8 regarding the break-in pe-
riod required before the loudspeak-
ers will sound their best.
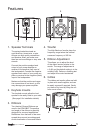
Anti-vibration pads