26
B
Connecting your CD player
Connecting a stereo
system
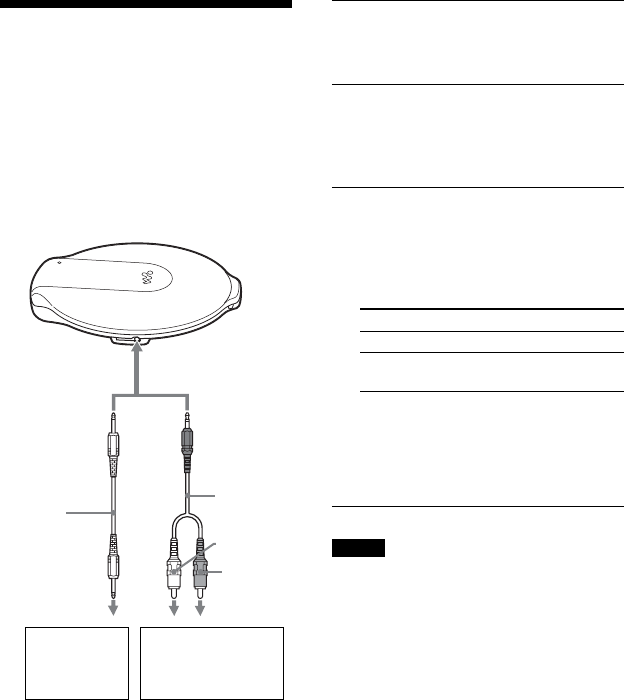
You can listen to CDs through a stereo
system and record CDs on a cassette tape or
a MiniDisc. For details, see the instruction
manual that comes with the device you want
to connect.
Be sure to turn off all devices before making
connections.
Stereo system,
cassette recorder,
radio cassette
recorder, etc.
MiniDisc
recorder, DAT
deck, etc.
Optical
digital
connecting
cord
to i/LINE OUT
(OPTICAL)
Left (white)
1
While play is stopped, press
DISPLAY until the display
changes.
2
Flick the jog lever toward . or
> to select “AUDIO OUT,” then
press the jog lever to enter the
selection.
3
Flick the jog lever toward . or
> to select the setting
appropriate for the connected
device, then press the jog lever to
enter the selection.
Connected device* Setting
Headphones “HP”
Device connected using “LINE”
the connecting cord
* When you connect the device using the
optical digital connecting cord, you do not
have to choose the setting. The setting will
be switched to that for an optical connection
automatically.
Notes
• When using the optical digital connecting cord,
you cannot check the track number, etc. on this
CD player. Check the display of the connected
device.
• Before you play a CD, turn down the volume of
the connected device to avoid damaging the
connected speakers.
• Use the AC power adaptor for recording. If you
use the rechargeable battery or dry battery as a
power source, the battery may become
completely depleted during recording.
• Adjust the volume properly on the connected
device so that the sound will not be distorted.
• This CD player uses the Serial Copy
Management System, which allows only first-
generation digital copies to be made.
• When recording or playing an ATRAC CD/MP3
CD using a connected device, use only the analog
connecting cord.
• If you change the connected device, make sure to
change the “AUDIO OUT” setting.
Connecting
cord
(minijack)
Right (red)


