


Editing Recorded MDs
20
Editing Recorded MDsPlaying MDs
Notes on Editing
You can edit the recorded tracks after recording, using
the following functions:
• Erase Function allows you to erase recorded tracks
simply by specifying the corresponding track
number.
• Divide Function allows you to divide tracks at
specified points so that you can quickly locate those
points afterwards, using the AMS function.
• Combine Function allows you to combine two
consecutive tracks into one.
• Move Function allows you to change the order of
tracks by moving a specific track to a track position
you want.
• Title Function allows you to create titles for your
recorded MDs and tracks.
If “Protected” appears in the display
The deck could not edit because the record-protect slot on
the MD is open. Edit after closing the slot.
When “TOC” flashes in the display
Do not move the deck or pull out the AC power cord. After
editing, “TOC” lights continuously until you eject the MD or
turn off the power. “TOC” flashes while the deck is
updating the TOC. When the deck finishes updating the
TOC, “TOC”goes off.
Erasing Recordings
(Erase Function)
Do the procedures below to erase following:
• A single track
• All tracks
• Parts of a track
Note, however, that once erased, MD data cannot
be recovered.
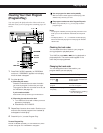
Useful Tips When Recording
From MDs to Tape
g
The Auto Space and Auto Pause Functions described in
this section make recording from MDs to tape more
easy.
Inserting blank spaces while recording to
tape (Auto Space)
The Auto Space Function inserts a 3-second blank
space between each track while recording from MDs to
tapes, allowing you to use the AMS function during
later playback.
Press A.SPACE repeatedly until “A.SPACE” appears in
the display.
To cancel Auto Space
Press A.SPACE repeatedly until “A.SPACE” disappears.
Note
If the Auto Space Function is on while recording a selection
containing multiple track numbers, (for example, a medley
or symphony), blank spaces will be inserted within the
selection whenever the track number changes.
Pausing after each track (Auto Pause)
When the Auto Pause Function is on, the deck pauses
after playing each track. Auto Pause is convenient
when recording single tracks or multiple, non-
consecutive tracks.
Press A.SPACE repeatedly until “A.PAUSE” appears
in the display.
To restart playback
Press fl ( · or P).
To cancel Auto Pause
Press A.SPACE repeatedly until “A.PAUSE” disappears.
Note
If you turn off the deck or disconnect the AC power cord, the
deck will recall the last setting of the Auto Space and Auto
Pause Functions the next time you turn on the deck.
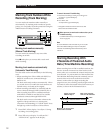
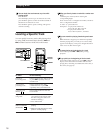
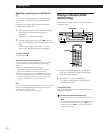
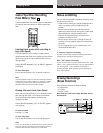
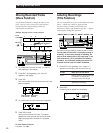
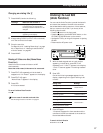
≠ AMS ± YESEDIT/NO
•
•
•
•
•
•
•
•
•
•
•
•
•
•
•
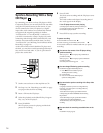
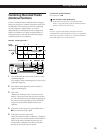
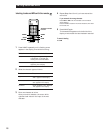
p
·∏
r
§
0
)
6
pP·
A.SPACE