14
Labelling a CD
— Disc Memo (With an optional CD unit with
the CUSTOM FILE function)
<RXFDQODEHOHDFKGLVFZLWKDFXVWRPQDPH
'LVF0HPR<RXFDQHQWHUXSWRFKDUDFWHUV
IRUDGLVF,I\RXODEHOD&'\RXFDQORFDWHWKH
GLVFE\QDPHSDJH
$VDGLVSOD\LWHPWKH'LVF0HPRDOZD\VWDNHV
SULRULW\RYHUDQ\RULJLQDO&'7(;7LQIRUPDWLRQ
Caution
'RQRWXVHWKH&86720),/(IHDWXUHZKLOH
GULYLQJRUSHUIRUPDQ\RWKHUIXQFWLRQZKLFK
FRXOGGLYHUW\RXUDWWHQWLRQIURPWKHURDG
1
Start playing a disc you want to label.
2
Press (MENU).
3
Press < or , repeatedly to select
“Edit.”
4
Press (ENTER).
5
Press M or m to select “Name Edit.”
6
Press (ENTER).
7
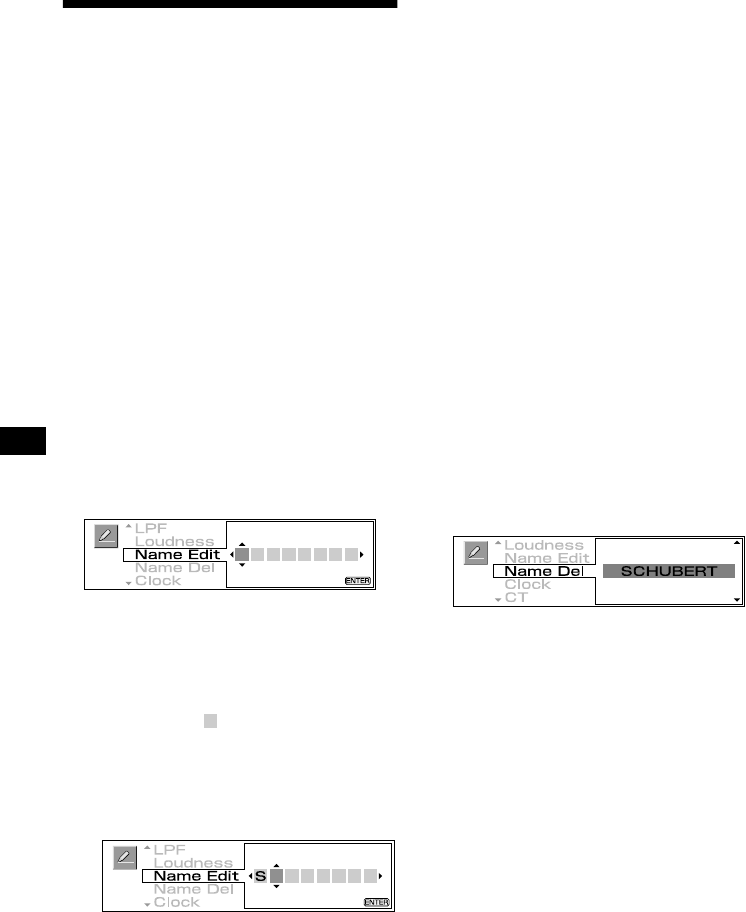
Enter the characters.
1Press M
1
repeatedly to select the
desired character.
A
t
B
t
C
t
0
t
1
t
2
t
+
t
–
t
t
2
t
A
For reverse order, press m.
blank space
2Press , after locating the desired
character.
,I\RXSUHVV
<
\RXFDQPRYHEDFNWRWKH
OHIW
3Repeat steps 1 and 2 to enter the
entire name.
8
Press (ENTER).
7KHGLVSOD\UHWXUQVWRWKHWRSPHQXGLVSOD\
9
Press (MENU).
7KHGLVSOD\UHWXUQVWRWKHQRUPDOGLVSOD\
Tips
• Simply overwrite or enter a blank space to correct or
erase a name.
• You can label CDs on a unit without the CUSTOM
FILE function if that unit is connected along with a
CD unit that has the function. The Disc Memo will be
stored in the memory of the CD unit with the
CUSTOM FILE function.
Note
Repeat/shuffle play is suspended until the Name Edit
is complete.
Erasing the Disc Memo
1
Press (SOURC E) repeatedly to select
“CD.”
2
Press (MOD E) repeatedly to select the
CD unit with the CUSTOM FILE
function.
3
Press (MENU).
4
Press < or , repeatedly to select
“Edit.”
5
Press (ENTER).
6
Press M or m to select “Name Del.”
7
Press (ENTER).
7KHVWRUHGQDPHVZLOODSSHDU
8
Press M or m repeatedly to select the
disc name you want to erase.
9
Press (ENTER) for 2 seconds.
7KHQDPHLVHUDVHG
5HSHDWVWHSVDQGLI\RXZDQWWRHUDVH
RWKHUQDPHV
10
Press (MENU).
7KHGLVSOD\UHWXUQVWRWKHQRUPDOGLVSOD\
Notes
• When the Disc Memo for a CD TEXT disc is erased,
the original CD TEXT information is displayed.
• If you cannot find the Disc Memo you want to erase,
try selecting a different CD unit in step 2.
Tips
• In step 7, if there is no Disc Memo, the display will
return to the normal display automatically.
• If all the Disc Memo is deleted in step 9, the display
will return to the normal display automatically.
