


11/5/12 10_HF151PH_EN.fm
E-6
10
9
8
7
6
5
4
3
2
1
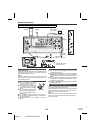
General control
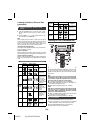
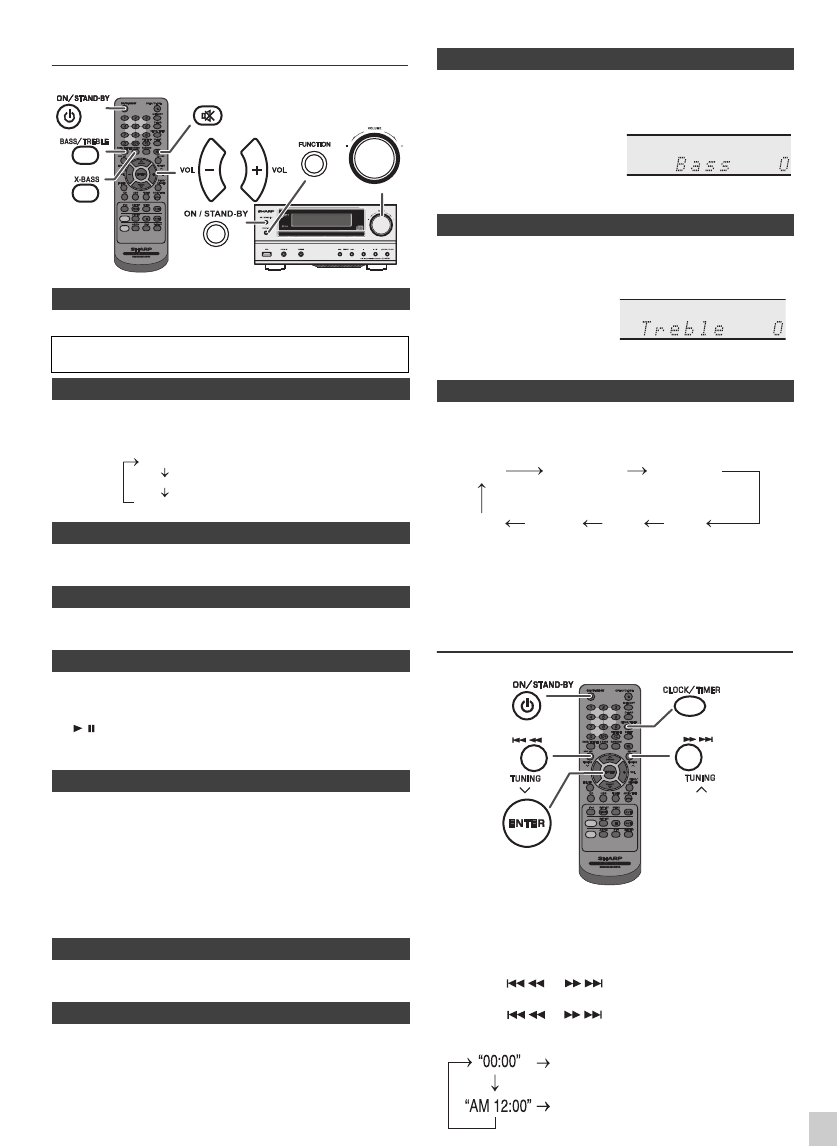
Press the ON/STAND-BY button to turn the power on.
To dim the display brightness, press the DEMO/DIMMER button on
the remote control.
If you turn off and on the main unit with the volume set to 17 or higher,
the volume starts at 16.
Turn the volume knob towards VOLUME +/– (on main unit) or press
VOL +/– (on remote control) to increase or decrease the volume.
When you press any of the following buttons, the unit turns on.
●
iPod, CD, USB, AUDIO / LINE (INPUT), TUNER on the remote
control: Selected function is activated.
●
/ button on the main unit: The unit turns on and playback of
the last function will start (CD, TUNER, USB, iPod, AUDIO IN,
LINE IN)
The main unit will enter the stand-by mode (when iPod or iPhone is
not docked) after 15 minutes of inactivity during:
iPod: No connection.
AUDIO IN / LINE IN: No detection of input signal or very low sound
audibility.
CD / USB: In the stop mode.
Note:
However, if iPod or iPhone is docked, the unit will begin charging.
“Charge Mode” will be displayed during standby mode.
The volume is muted temporarily when pressing the MUTE button on
the remote control. Press again to restore the volume.
When the power is first turned on, the unit will enter the extra bass
mode which emphasises the bass frequencies, and “X-BASS” will
appear. To cancel the extra bass mode, press the X-BASS button on
the remote control.
1
Press the BASS/TREBLE button to select “Bass”.
2
Within 5 seconds, press the VOLUME (+ or –) button to adjust the
bass.
1
Press the BASS/TREBLE button to select “Treble”.
2
Within 5 seconds, press the VOLUME (+ or –) button to adjust the
treble.
When the FUNCTION button on main unit is pressed, the current
function will change to different mode. Press the FUNCTION button
repeatedly to select desired function.
Note:
The backup function will protect the memorised function mode for a
few hours should there be a power failure or the AC power lead
becomes disconnected.
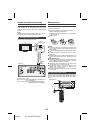
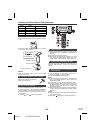
Setting the clock (
Remote
control only)
In this example, the clock is set for the 24-hour (00:00) display.
■ To turn the power on
After use:
Press the ON/STAND-BY button to enter the power stand-by mode.
■ Display brightness control
■ Volume auto set-in
■ Volume control
■ Auto power on function
■ Auto power off function
■ Muting
■ X-Bass control
CD/USB
RDS
Dimmer 1
Dimmer 2
Dimmer off
(Display is dim).
(Display gets dimmer).
(Display is bright).
■ Bass control
■ Treble control
■ Function
1
Press the ON/STAND-BY button to turn the power on.
2
Press the CLOCK/TIMER button.
3
Within 10 seconds, press the ENTER button. To adjust the day,
press the or button and then press the ENTER
button.
4
Press the or button to select 24-hour or 12-hour
display and then press the ENTER button.
The 24-hour display will appear.
(00:00 - 23:59)
The 12-hour display will appear.
(AM 12:00 - PM 11:59)
- 5 ↔ - 4
........
↔ + 4 ↔ + 5
- 5 ↔ - 4
........
↔ + 4 ↔ + 5
FM STEREO
FM MONO
USB
iPod
Audio In
Line In
CD
CD/USB
RDS