


13
TIMER settings
You can programme up to 7 TIMERS within any 31-day (1
month) period. You can select between a one-off, daily or
weekly recording.
The settings you made in the BASIC and ALARM SETTINGS
menu will apply.
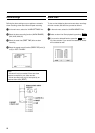
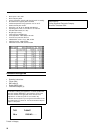
You will then see a chart of all programmed TIMERS with
their dates, start times and stop times, recording speed,
TIMER on or off.
1 In the main menu select the ’TIMER SETTINGS’ line.
DATE START STOP MOD TIM
y -- --:-- --:-- --- ---
------------------------
vw CL OK/MENU
2 To activate a new TIMER line, press button
OK
.
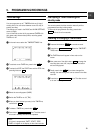
3 To select the DATE, the START time and the STOP time,
press digit buttons
0-9
.
DATE START STOP MOD TIM
19 17:00 17:01 12H ON
------------------------
v1 v2 v37 8
w4Sw5 w6 OK/MENU
4 Select the recording speed (’MOD’).
5 Switch the TIMER on or off (’TIM’).
6 When you have finished your entry in the TIMER line,
confirm with
OK
.
7 To delete a TIMER line, press button
S/CL
.
8 Press button
MENU/TRACKING
twice. The video record-
er is now in standby and cannot be operated.
Notes:
* If a timer is programmed, ’DATE’, ’START’, ’STOP’,
’TIMER’ will appear in the display on the video recorder.
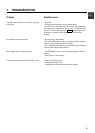
Interrupting a TIMER recording and
standby mode
You cannot operate the video recorder manually while a
programmed recording is being made.
To interrupt the programmed recording, press button
hSTOP
and hold for a few seconds.
Checking or changing a TIMER block
1 Press and hold button
hSTOP
for several seconds.
2 Press button
MENU/TRACKING
. Select the TIMER SET-
TINGS menu.
3 The TIMER blocks will appear in time order on the
screen.
4 Now press one of the digit buttons
0-9
to change the
recording date, start time, stop time, TIMER-activation
and recording speed.
5 Finally press button
OK
. If you have changed the
settings, the new settings will now be stored in the video
recorder.
6 Press button
MENU/TRACKING
twice. The video record-
er is now in standby.
5. PROGRAMMING RECORDINGS