


12 EN
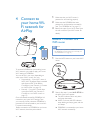
4 Connect to
your home Wi-
Fi network for
AirPlay
To connect DS9800W to your existing home
Wi-Fi network, you need to apply your home
Wi-Fi setting to DS9800W.
You can do this in two ways (depending on
which type of Wi-Fi router you use):
Automatically - if your Wi-Fi router is
WPS (Wi-Fi Protected Setup)-enabled
and supports PBC (Push Button
Connection) (see 'Scenario 1: Connect
to a WPS router' on page 12)
Manually - if your Wi-Fi router does
not support WPS (see 'Scenario 2:
Connect to a non-WPS router' on
page 13)
Once connected successfully, DS9800W will
remember your home Wi-Fi settings. Then
you can enjoy AirPlay whenever DS9800W is
powered on and connected to your home Wi-
Fi network automatically.
Before connection of DS9800W to you home
Wi-Fi network, check the points below.
1 Make sure that your Wi-Fi router is
powered on and working properly.
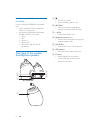
2 Make sure that DS9800W has been
powered on and booted up successfully
(see 'Turn DS9800W on' on page 11).
3 Identify the type of your Wi-Fi router (see
the user manual of your Wi-Fi router for
details).
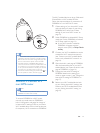
Scenario 1: Connect to a
WPS router
Note
Before you press any button on DS9800W, make sure
that DS9800W has been booted up successfully (see
'Turn DS9800W on' on page 11).
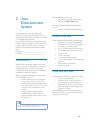
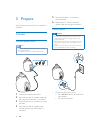
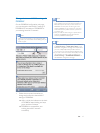
1 Press the WPS button on your home Wi-Fi
router.
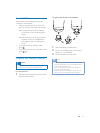
2 Shortly after step 1, press Wi-Fi SETUP on
the back of the main speaker.
» The LED indicator blinks red, yellow
and green alternately.
» Within 2 minutes, the LED indicator
stops blinking and stays green, and the
unit beeps.
» DS9800W is connected to your home
Wi-Fi network successfully.
WPS