8
Connecting the ND-S1
Connect the ND-S1 to a digital audio input on
your Onkyo amp or AV receiver that can be
assigned to an input selector whose Input Dis-
play can be set to “DOCK.” Setup varies
depending on your particular amp or AV
receiver model. Refer to the Digital Input Setup
and Changing the Display sections of your amp
or AV receiver’s instruction manual for details.
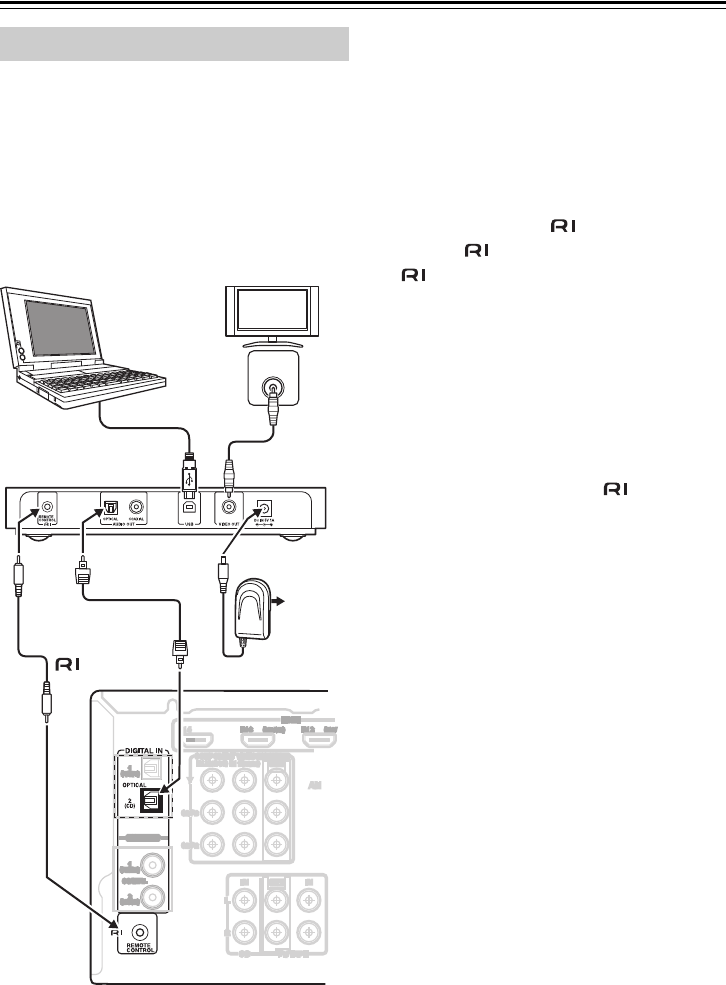
1. Using the included optical audio cable,
connect the ND-S1’s OPTICAL AUDIO OUT
jack to an optical digital audio input jack
on your amp or AV receiver.
2. If your iPod supports TV out, use the
included video cable to connect the
ND-S1’s VIDEO OUT jack to a composite
video input on your TV or AV receiver.
3. Using the included cable, connect the
ND-S1’s REMOTE CONTROL jack to an
jack on your amp or AV receiver.
4. Connect the included AC adapter to the
ND-S1’s DC IN 5V 1A jack, and plug the AC
adapter into a suitable wall outlet.
Notes:
• The ND-S1’s audio outputs are digital out-
puts. If the digital audio input on your amp or
AV receiver cannot be assigned to an input
selector whose Input Display can be set to
“DOCK,” do not connect the cable, other-
wise a malfunction may occur.
• Do not place the ND-S1 on top of a compo-
nent that gets warm or one with has air vents
on top, as it may interfere with that compo-
nent’s cooling or cause the component or
ND-S1 to overheat. Place it next to the com-
ponent, use an audio rack, etc.
Connecting an Amp or AV Receiver
VIDEO
INPUT
Video
cable
AC adapter
Optical digital
audio cable
ND-S1
cable
To
wall
outlet
USB cable
TV
PC
AV receiver


