61
5
EN
Menu setting method
Menu setting method
+−
button
9 0 button
OK
`/
MENU
button
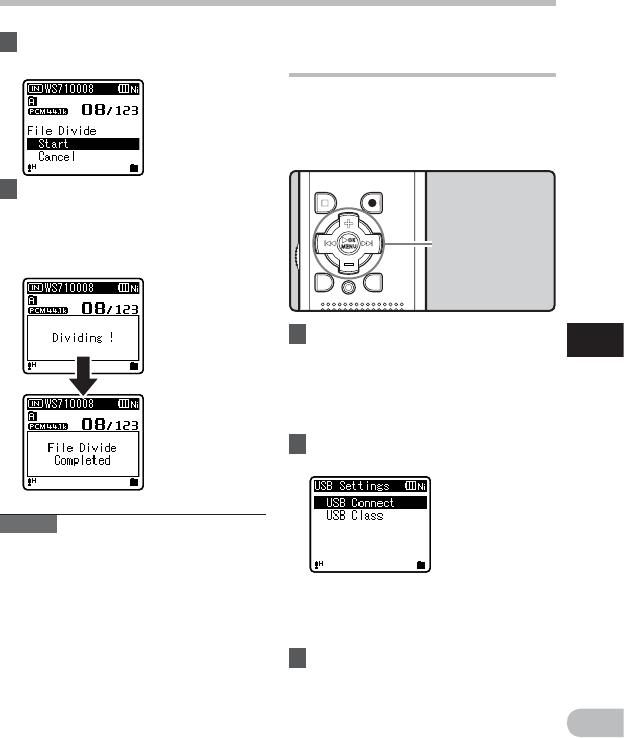
3 Press the + button to select
[Start].
Notes
• The le divide cannot be done when the
le list is displayed.
• The recorder cannot divide les when the
number of les in the folder exceeds 199.
• Locked les cannot be divide (☞ P.49).
• After a le has been divided, the original
le will be renamed [File name_1.wav]
and the new le will be named [File
name_2.wav].
• If a le has an extremely short recording
time, it may not be divided even if it is a
MP3 le or PCM le.
• Do not remove the battery during
dividing le. This may damage the data.
4 Press the
OK
`/
MENU
button.
• [Dividing!] will appear and file
dividing will start.
• File dividing is completed when [File
divide completed] appears.
Changing the USB class
[USB Settings]
Besides setting to [PC] (Connect to PC to
transfer files) or [AC Adapter] (Connect to
AC adapter to recharge the battery), you
can switch the USB class according to your
usage.
2 Press the + or − button to select
[
USB Connect
] or [
USB Class
].
[USB Connect]:
Setting for connecting to the PC.
[USB Class]:
Setting for USB class.
3 Press the
OK
`/
MENU
or 9
button.
• If you select [USB Class], proceed to
the operation of Step 6.
1 While the recorder is during stop
mode, select [
USB Settings
] from
the menu on the [
Device Menu
].
• For details on how to enter the menu
settings, see “Menu setting method”
(☞ P.47).
