


16
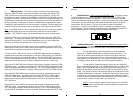
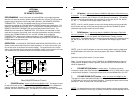
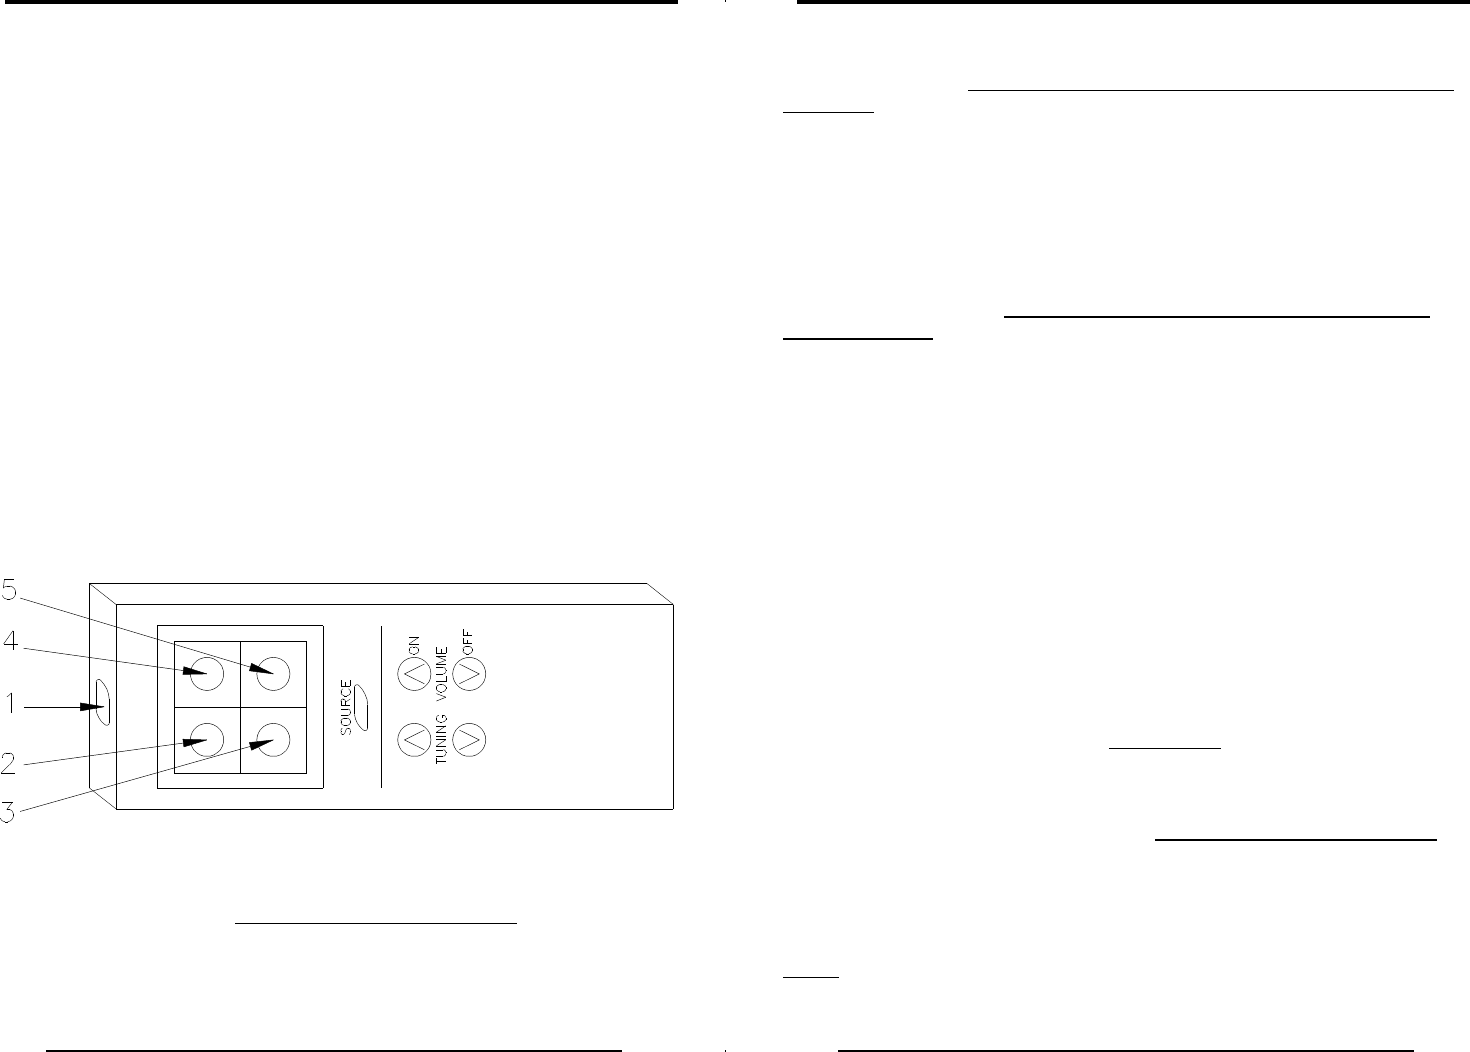
Hand Held RF Remote Control
OPTIONAL
HAND HELD
RF REMOTE CONTROL
PROGRAMMING -
Upon initial power up of the MC602 or upon applying power
after the unit loses its memory (power outages greater than 2 hours), the unit must be
programmed or taught the unique code that is present in the REMOTE CONTROL
TRANSMITTER. To do this, the MC602 must be put into its test mode by
momentarily pressing the VOLUME UP and SOURCE buttons at the same time. The
display on the MC602 should show TEST. Now press the TUNING UP button on the
REMOTE CONTROL TRANSMITTER until the display flashes SAVE twice. The
MC602 has now learned the TRANSMITTER. If more than one transmitter is to be
used with the system, the second, third, and fourth transmitters must be learned by
pressing the TUNING DOWN, VOL UP, and VOL DOWN on the respective
TRANSMITTER. Always press a different button for each TRANSMITTER to be
programmed. The test mode is exited by momentarily pressing the VOLUME UP and
POWER buttons at the same time.
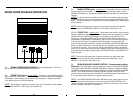
OPERATION - Your MUSICAL INTERCOM HAND HELD CONTROLLER is an RF
remote control which means that it will work anywhere in or around your house (you
do not have to be in the same room as the master). The system also has a unique
code in the transmitter that is learned by the MC602, virtually insuring that no one else
can interfere with your system and you will not interfere with anyone else.
1. SOURCE button - active only when the MC602 is ON. This button is used
to select the audio source (FM, AM, AUX input, or TAPE input) which the MC602 will
output to the Music Speakers. Each time the SOURCE button is momentarily
pressed, the audio source changes. The sequence is FM, AM, AUX, TAPE, and back
17
to FM.
2. UP button - active only when the MC602 is ON and the FM or AM source
is selected. This button is used to scan up through the FM or AM memory presets. To
go up to the next preset, the UP button is simply pressed momentarily. The MC602
will tune in the next preset station (the sequence is A1, A2, A3, A4, B1, B2, B3, B4,
A1, A2, ...). The band will not change (stays in AM or FM).
NOTE: If the P1 and P2 jumpers are set to the strong station scanning mode then
the UP button will scan to the next strong station just like the TUNING UP button
[automatic search] (See section 8) on the master.
3. DOWN button - active only when the MC602 is ON and the FM or AM
source is selected. This button is used to scan down through the FM or AM memory
presets. To go down to the next preset, the DOWN button is simply pressed
momentarily. The MC602 will tune in the previous preset station (the sequence is B4,
B3, B2, B1, A4, A3, A2, A1, B4, B3, ...). The band will not change (stays in AM or
FM).
NOTE: If the P1 and P2 jumpers are set to the strong station scanning mode then
the DOWN button will scan to the next strong station just like the TUNING DOWN
button
[automatic search] (See section 7) on the master.
Note: To change the function of the TUNING UP and DOWN buttons to select all
strong stations, instead of memory presets, select the SCAN STATIONS mode as
shown in Appendix B.
4. VOLUME UP [ON] button - always active. This button is used to
increase the audio level of the selected source (FM, AM, AUX, or TAPE) which is sent
to all the Music Speakers. Pressing this button also turns the MC602 ON if it is OFF.
5. VOLUME DOWN [OFF] button - active only when the MC602 is ON.
This button is used to decrease the audio level of the selected source (FM, AM, AUX,
or TAPE) which is sent to all the Music Speakers. Pressing this button also turns the
MC602 OFF when its audio level is all the way down.
NOTE: For best performance, the individual music speaker volume controls should
be turned to maximum volume (fully clockwise) and then the volume adjusted with the