8
NAMES AND
FUNCTIONS
BASIC
OPERATIONS
ADVANCED
OPERATIONS
TROUBLESHOOTING
OTHERS
ENGLISH
BASIC
OPERATIONS
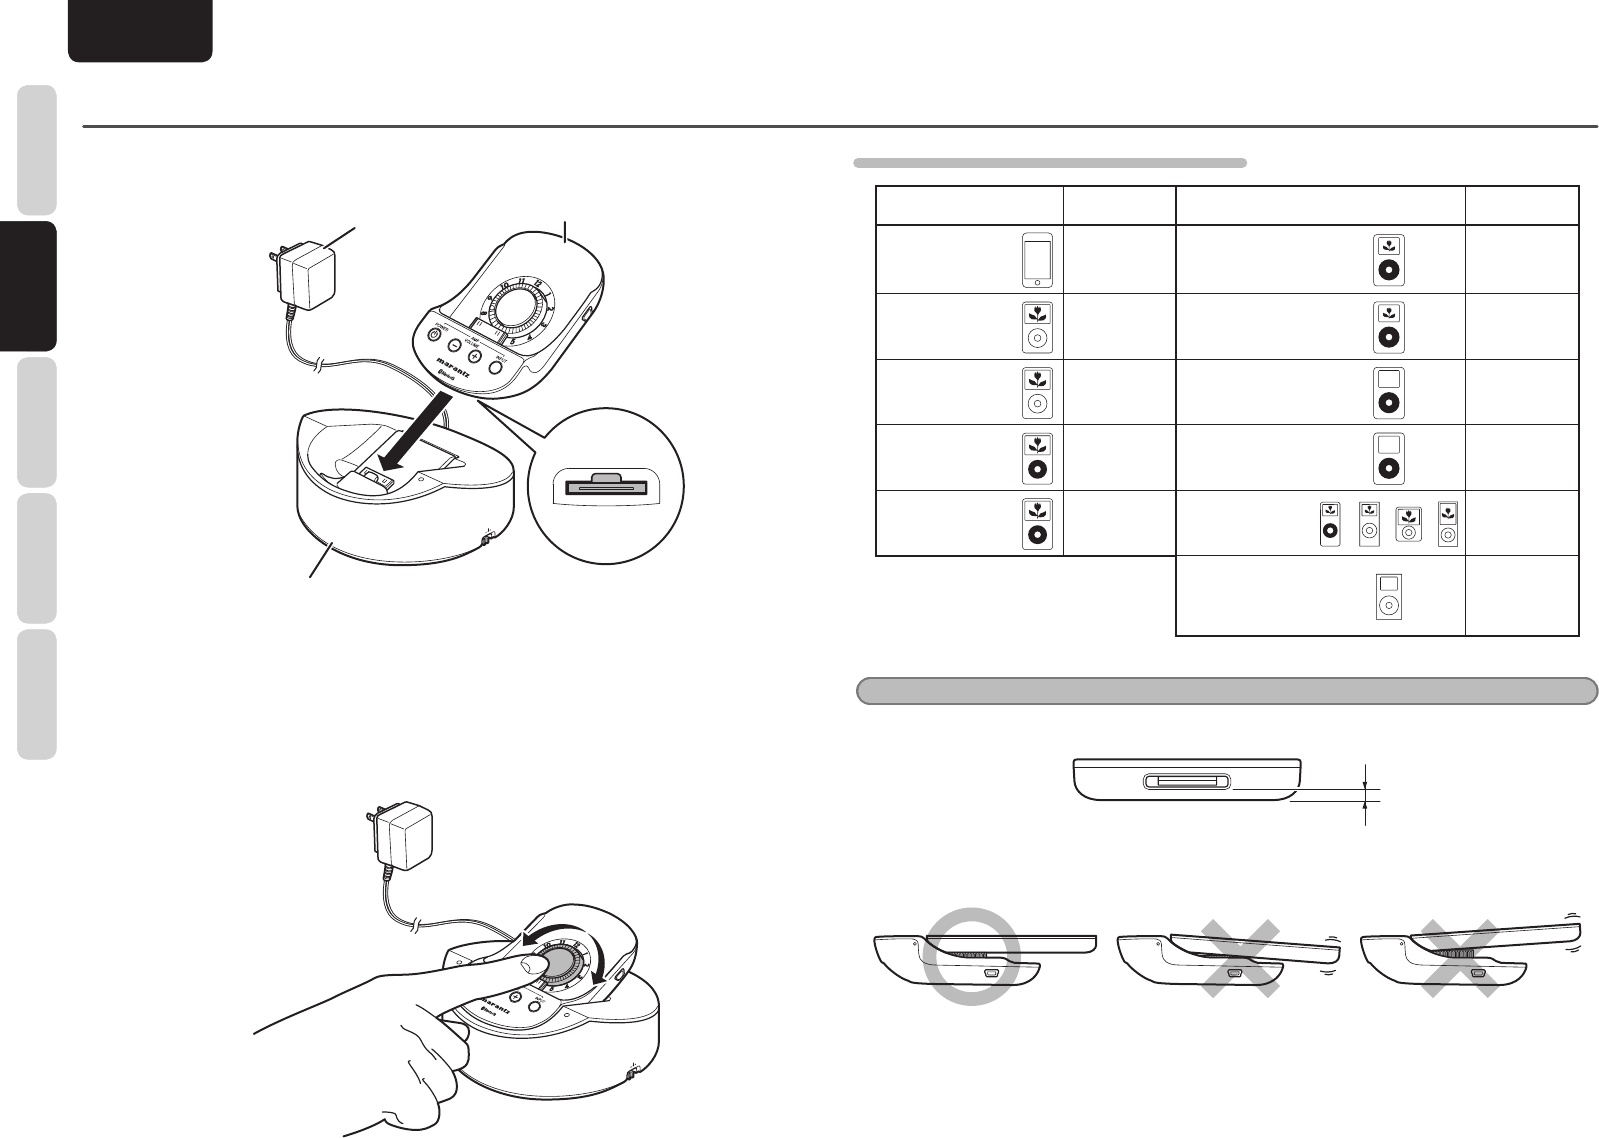
w CONNECTING THE HANDSET TO THE BASE UNIT
1.
Attach the handset to the base unit, as shown in the fi gure below.
VIDEO
COMPONENT
S-VIDEO
USB
AC adaptor
Base unit
Handset
2.
Connect the supplied AC adaptor to the AC adaptor terminal of the base unit.
(For details, see “PREPARATION OF THE AC ADAPTOR”. (page 6))
e CONNECTING iPod TO THE HANDSET
1.
Turn the Thickness adjustment knob of the handset, according to the type of your iPod. For
details on the positions of the knob, see the “LIST OF THICKNESS ADJUSTMENT KNOB
POSITIONS” table.
VIDEO
COMPONENT
S-VIDEO
USB
BASIC OPERATIONS
LIST OF THICKNESS ADJUSTMENT KNOB POSITIONS
iPod
Positions of
the knob
iPod
Positions of
the knob
iPod touch
1G/2G
3
iPod 4G Photo
20GB/30GB
7
iPod classic
160GB
9
iPod 4G Photo
40GB/60GB
12
iPod classic
80GB/120GB
4 iPod 4G 20GB 6
iPod 5G Video
60GB/80GB
9 iPod 4G 40GB 11
iPod 5G Video
30GB
4
iPod nano
1G/2G/3G/4G
1
G in the table stands for Generation of
iPod products.
Example:
iPod 5G (iPod, 5th generation)
iPod mini 7
Notes
• The location of the docking connector on an iPod product varies, according to the generation, type, and capacity
of products.
• Before attaching an iPod, be sure to turn the Thickness adjustment knob to an appropriate position. If an iPod
is plugged/unplugged without adjusting the thickness to an appropriate position, damage to the connectors may
result.


