


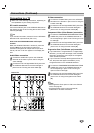


DVR HOOKUP
19
Before Operation (Continued)
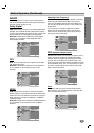
To Add or Erase Channels from Memory
This feature allows you to add to or erase channels
from memory manually.
11
Follow steps 1-3 as shown above to the previ-
ous page (Auto Channel Set).
22
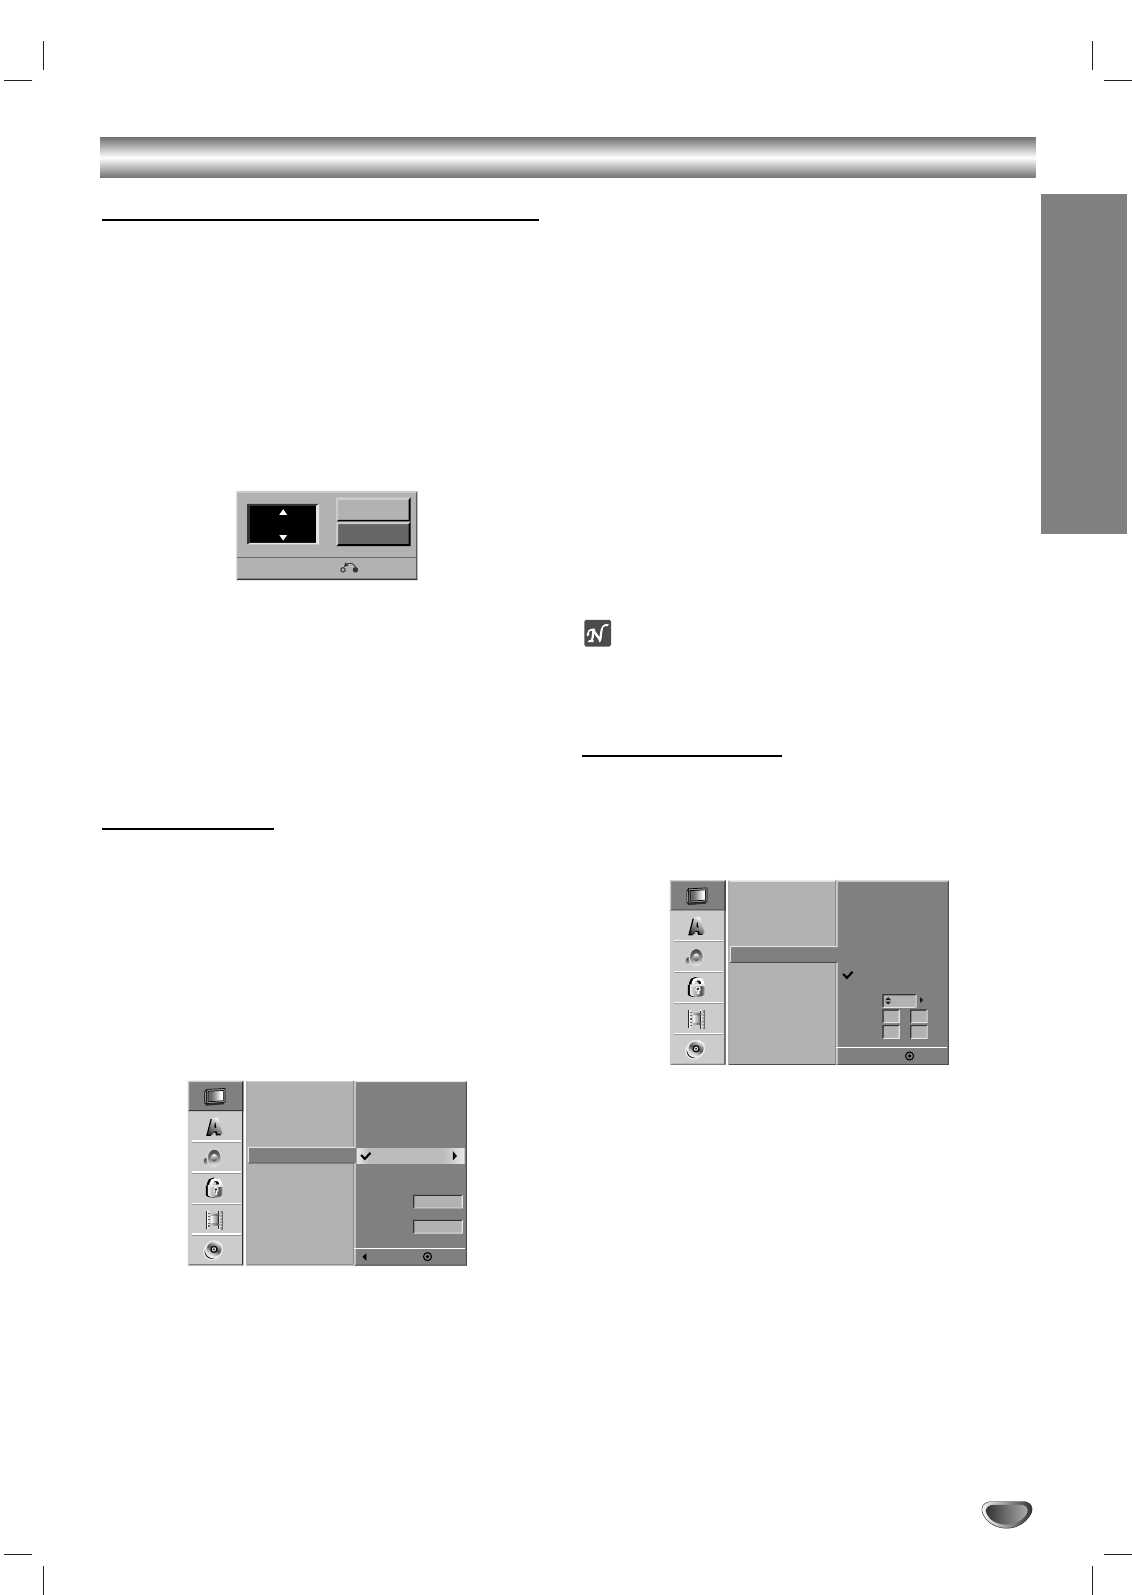
Use v / V to select the CH. Add/Del option.
33
Press B to move to the third level.
Edit icon is highlighted.
44
Press ENTER.
The Channel Edit menu appears.
55
Use v / V or number buttons to select a channel
to add or delete then press ENTER.
Add or Delete icon is highlighted.
66
Press ENTER to confirm your setting.
77
Repeat steps 5-6 to add or erase additional
channels.
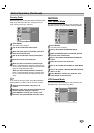
Auto Clock Set
The VCR/DVD Recorder gives you two ways to set the
time and date: the Auto Clock Feature or manually. The
Auto Clock Feature enables the VCR/DVD Recorder to
set up the clock when the VCR/DVD Recorder is turned
off.
The Clock Set feature is set to Auto at the factory. In the
“Auto” setting, the VCR/DVD Recorder looks for a chan-
nel carrying XDS (Extended Data Services) information.
XDS updates the clock using the Coordinated Universal
Time.
11
Press SETUP.
The Setup menu appears.
22
Use v / V to select the GENERAL menu.
33
While the GENERAL menu is selected, press B
to move to the second level.
44
Use v / V to select the Clock option.
55
Press B to move to the third level.
66
Use v / V to select the Auto option then press
ENTER.
The Auto option is set at the factory. In the Auto option,
the VCR/DVD Recorder looks for a channel carrying XDS
(Extended Data Services) information. XDS updates the
clock using the Coordinated Universal Time.
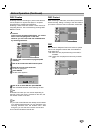
77
Use v / V to choose your Time Zone.
You can set your local Time Zone manually. When
Timezone is set to Auto, the VCR/DVD Recorder will use
XDS information to determine the proper setting.
88
Use B to choose the Daylight Savings option.
Use v / V to choose Auto, On, or Off.
You can turn Daylight Savings On or Off manually. When
it is set to Auto, the VCR/DVD Recorder will use XDS
information to determine the proper setting.
99
Press ENTER to confirm your setting, then
press SETUP to exit the Setup menu.
ote
If your local TV station does not send date and time informa-
tion, or sends incorrect information, you can
set the clock man-
ually.
Manual Clock Set
11
Follow steps 1-5 as shown above to the left
(Auto Clock Set).
22
Use v / V to select the Manual option then
press ENTER.
33
Enter the necessary information for date and
time.
b / B (left/right): Moves the cursor to the previous
or next column.
v / V (up/down): Changes the setting at the current
cursor position.
44
Press ENTER to confirm your setting, then
press SETUP to exit the Setup menu.
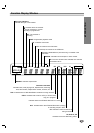
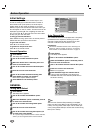
Tuning Band
Auto Channel Set
CH. Add/Del
Clock
TV Aspect Ratio
Progressive Scan
Factory Setting
Time Zone
Manual
Auto
Auto
Daylight
Savings
Auto
Prev.
Select
Tuning Band
Auto Channel Set
CH. Add/Del
Clock
TV Aspect Ratio
Progressive Scan
Factory Setting
AM
Manual
Auto
Year
Date
Time
Select
12
2003
00
11
/
:
Ch. 2
Delete
Add
0-9 Input
Return