8
E. DATE SETTING
Note:
When the WWVB signal is found, that date will over-ride the manually set
date.
1. Hold down the “MODE/+” button for 2 seconds (the selected time zone
will flash), press the “AL” button three times until the year flashes.
2. Press the “MODE/+” button to select the year.
3. Press the “AL” button to confirm the year and move to the month setting.
4. Press the “MODE/+” button to select the month.
5. Press the “AL” button to confirm the month and move to the day setting.
6. Press the “MODE/+” button to select the day.
7. Press the “AL” button to confirm the day and move to the 12/24 Hour
display setting, or press the “SNOOZE” button to confirm the date and
return to the display mode.
F. 12/24-HOUR MODE
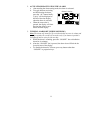
1. Hold down the “MODE/+” button for 2 seconds (the selected time zone
will flash), press the “AL” button six times until “ :12” flashes in the time
display.
2. Press the “MODE/+” button to toggle between 12 and 24-hour time
display.
3. Press the “AL” button to confirm the time display setting and move to the
Daylight Saving Time setting, or press the “SNOOZE” button to confirm
the time display setting and return to the display mode.
G. DAYLIGHT SAVINGS TIME
Note:
The DST default is “On”, meaning that the WWVB will
automatically change the time according to Daylight Saving Time in the
spring and fall. For areas that do not recognize DST changes (Arizona and
parts of Indiana) turn the DST to “OFF”.
1. Hold down the “MODE/+” button for 2 seconds (the selected time zone
will flash), press the “AL” button seven times until “ON” flashes in the date
display area and “DST” flashes above the U.S. map.
2. Press the “MODE/+” button to toggle between “ON” and “OFF” modes.
3. Press the “AL” button to confirm the DST setting and complete the set-up.
FEATURES & OPERATIONS
A. FEATURES
1. Radio-controlled time and date
2. Projection of time
3. LCD light
4. Three modes of date/seconds display
5. Time alarm


