


Note:
When the 433MHz signal is received correctly, do not re-open the battery cover of either the transmitter or Temperature station, as the batteries may spring free from the
contacts and force a false reset. Should this happen accidentally then reset all units (see Resetting below) otherwise transmission problems may occur.
The transmission range is around 25 m from the transmitter to the Temperature station (in open space). However, this depends on the surrounding environment and
interference levels. If no reception is possible despite the observation of these factors, all system units have to be reset (see Resetting below).
The transmitter’s transmitting range may be affected by exposure to extreme cold condition (-25°C) for long periods of time due to the nature of Alkaline batteries. Should this
happen, the 433MHz signal may be weakened and therefore result in a shorter transmitting distances caused by temperature level.
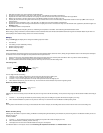
Resetting:
1. Remove batteries from both the outdoor transmitter and the Temperature station.
2. Wait at least 30 seconds and then repeat the procedures specified in Setting up (above).
Note:
Always wait at least 30 seconds after removing the batteries before reinserting, otherwise start up and transmission problems may occur. Also, remember when insertting, that
both units have to reset and to always reinsert the batteries to the transmitter first.
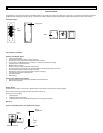
Positioning the temperature transmitter:
The new Temperature Transmitter is supplied with a holder that may be attached to a wall with the three screws supplied. To attach to the wall, please follow the steps below:
1. Mark the wall using a pen through the holes in the holder to obtain the exact drilling position.
2. Drill holes in the wall at the points marked.
3. Screw holder onto wall.
There is also double sided tape included with the wall mount. This can be used instead of drilling. Please mount this on a smooth surface instead of
a brick one. The surface can, however, affect the transmission range, for example: if the unit is attached to a piece of metal, it may then either
reduce or increase the transmitting range. For this reason, we recommend not placing the unit on any metal surfaces or in any position where a
large metal surface is in the immediate proximity (garage doors, double glazing etc.). Before securing in place, please ensure that the Temperature Station can receive the
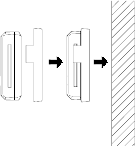
signal from the Temperature Transmitter at the positions that you wish to situate them. The Temperature Transmitter clicks in or out of the holder easily. When inserting or
removing the Temperature Transmitter from the wall holder please hold both units securely.
Positioning the Weather Station:
The Weather Station should be wall mounted once it is operational. There are 2 options to wallmount as follow:
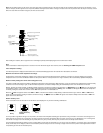
Option 1 – using the hanging hole
(picture of the Weather station)
1. Fix a screw (not supplied) into the desired wall, leaving the head extended out by about 5mm.
2. Using the Weather Station’s hanging hole, carefully hang it onto the screw. Remember to ensure that it locks into place before releasing.
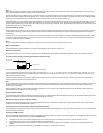
Option 2 – using four permanent fixing screws
(picture of Weather station)
1. Carefully remove the front cover as described in Setting up (above)
2. Hold the Weather Station level against the wall and using a sharp object or pen, mark the four points.
3. Now drill holes of the correct size in the four marked positions for the mounting screws.
4. Align the Weather Station to the four holes ass indicated above and screws into place.
Important notes:
• Avoid placing the units where they can be exposed to sudden changes in temperatures; i.e. direct sunlight, extreme cold and wet/moist conditions. This will help avoid
any inaccurate readings and any possible damage to the unit.
• Should the unit be exposed to extreme and sudden temperature changes, it will lead to rapid changes in its forecast reading and thereby reduce its accuracy.
• Should the unit be moved to another location that is significantly higher or lower than its standing point (for example from the ground floor to the first floor of a house),
then either reset the units or discard the readings weather forecasts for the next 12-24 hours. By doing so, this will allow sufficient time for the unit to operate at a
constant altitude and thus enabling a more accurate forecest.
Care and Maintenance: