45
Distance: It may also be that the distance between the transmitter and
the receiver is too great or has too many obstacles between the units to
allow the signal to reach the transmitter.
Rain is inaccurate
Interference: Are there sources of radio frequency or electromagnetic
interference near the Base or the Rain sensor? Ham radios, Baby
monitors, Cordless Phones, etc can cause loss of signal or erratic
readings.
Mounting: Is the rain gauge mounted level? If mounted with screws
through the base, please be sure they are only snug and not too tight.
Accuracy Test:
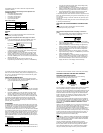
To test any La Crosse Technology rain gauge, follow these steps:
1. Erase the Total rainfall or make note of this amount.
2. Pour water into the gauge very slowly until it clicks exactly ten
times
3. Allow a minimum of ten minutes for this "rainfall" to accumulate,
and check the amount listed on the Total rainfall counter
4. Your total should be .19 inches.
Please follow the Proper Restart listed above.
Wind Sensor
Wind speed inaccurate: Is the wind speed reading 0.00 or dashes or
something else? Do the cups spin freely? Are the cups clear of insect
nests leaves etc? Do all the other sensors work properly?
Mounting: Where is your wind sensor mounted and how high is it
above the ground? In most cases, the sensor needs to be 3-4ft above
the highest point on your roof in order to clear nearby obstructions and
read accurately. The wind cups need to be installed below the
mounting bracket. If possible please also email a few pictures of your
sensor installation and the surrounding area to this address
support@lacrossetechnology.com
.
Cord: Check that the wind cord is in good repair, free of cuts, animal
bites, pinch marks etc. Be sure it is secured from blowing around, by
twist ties or zip ties. Do not use staples. Did you shorten, lengthen,
splice or modify the cord in any way?
Check that the port on the Thermo-hygro sensor where the wind cord
plugs in free of corrosion or bent wires.
Interference: Are there sources of radio frequency or electromagnetic
interference near the Base or the Wind sensor? Ham radios, Baby
monitors, Cordless Phones, etc can cause loss of signal or erratic
readings.
Direction is stuck but speed is correct:
46
Check that nothing is binding the wind vane. Is it sticking in one
particular direction? Check sources of interference above.
Direction is incorrect speed is fine:
Be sure to observe the Directions listed on the sensor (N, S, E, W) The
point of the vane will tell you where the wind is coming from.
The large arrow on the compass rose of the base station will tell you the
average of where the direction was coming from in the past 4.5 second
update. The smaller arrows if they appear, indicate the directional
changes during that same period.
Direction is fine but there is no Wind speed:
Check that the cups are there and spinning freely.
Please follow the Proper Restart listed above.
– Minimum and Maximum Records
The Weather Center will record the Minimum and Maximum value of
Outdoor Temperature, Dew Point, Wind Chill, and Relative Air Pressure
with Time and Date of recording automatically. The Weather Center will
also record Maximum Wind Speed, Wind Gust, and 24 hour Rain with
Time and Date of recording automatically.
MIN/MAX weather data can be viewed by pressing the MIN/MAX key in
normal display mode. Keep pressing to toggle through the different Min
and Max readings.
Reset the Min/Max data
To reset the MIN/MAX weather data, you shall need to reset each of the
data independently.
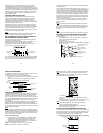
1. Press MIN/MAX key to show the desired weather data.
2. Press and hold the SET key for about 2 seconds, then the
"RESET" icon will appear at the bottom part of the LCD.
3. Press the PLUS key once, and then the stored value will be reset
to the Current value and Current time.
4. Press the ALARM key to return to normal display mode.
Reset Total Rainfall
In normal display mode, press the MIN/MAX key 14 times to show the
total rainfall value. The "RESET" icon will also be shown at the same
time.
To Reset the Rainfall reading, press the PLUS key once when the
Rainfall value and "Reset" icon is shown. Then the total rainfall amount
will be reset to 0, and the time updated to Current time.
Alarms
47
Setting The Time Alarm
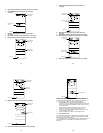
Press and hold ALARM button for about 5 seconds until the alarm time
shows in the date area.
Press and hold the SET button until the Alarm Hour flashes. Use the
PLUS or the MIN/MAX button to set the alarm hour. Press the SET
button and the Alarm Minutes will start flashing. Use the PLUS or the
MIN/MAX button to set the alarm minutes. Press ALARM when done to
save the setting. You will see an Alarm Icon ((●)) showing in front of
the alarm time. This indicates the time alarm is ON.
Turning off the Time Alarm:
An alarm icon ((●)) will appear in the upper right area of the Base
means that Time Alarm is turned on. The time at which an alarm is set
to ring will also be displayed. Press and hold ALARM button for about 5
seconds until the alarm time shows in the date area. Press and release
the SET button so the icon ((●)) disappears.
Storm Alarm
In the Set Up Menu-Press and release the SET button 13 times until
you see the up and down arrow and a number in the pressure area
flashing. Use the PLUS or MIN/MAX buttons to select a value from the
range of 0.09 to 0.27. This value is used to trigger a Storm Warning
Alarm based on a drop in air pressure. Press and release the SET
button once to move to turn the Storm Alarm on or off.
Turning Storm Alarm ON or OFF: Use the PLUS or MIN/MAX buttons
to select AOF (Alarm Off) or AON (Alarm On). When the pressure falls
by the Storm Warning Threshold Value you have selected, an alarm (if
on) will be triggered.
Alarms for Outdoor Temperature, Humidity, & Wind Speed:
To set the weather data Alarms you shall need to set each alarm
independently.
Press and hold ALARM button for about 5 seconds until the alarm time
shows in the date area. Press and release the ALARM button to move
to Outdoor Temperature high alarm, Outdoor Temperature low alarm,
Outdoor Humidity high alarm, Outdoor Humidity low alarm, and Wind
Speed high alarm.
To set the alarm in each of these areas, Press and hold the SET button
until the alarm flashes. Use the PLUS or the MIN/MAX button to set the
alarm value. Press ALARM when done to save the setting. You will
see an Alarm Icon ((●)) showing in front of the alarm time. This
indicates the alarm is ON.
Turn Alarms ON or OFF: An alarm icon ((●)) will appear next to the
alarm value set. This indicates the alarm is turned ON. To turn the
alarm off Press and hold ALARM button for about 5 seconds until the
alarm time shows in the date area. Press and release the ALARM
48
button to move to Outdoor Temperature high alarm, Outdoor
Temperature low alarm, Outdoor Humidity high alarm, Outdoor
Humidity low alarm, and Wind Speed high alarm. In each area press
and release the SET button so the icon ((●)) disappears.
Master Buzzer
The Master Buzzer may be used to silence the alarms. The Buzzer will
not sound but we can still see the alarm icon ((●)) flashing on the base
for the Alarm. When any weather alarm is activated, the particular
weather digits will flash to show user that the Alarm is triggered, yet the
buzzer will not sound.
To switch off the Buzzer:
1. In normal display mode, press and hold the SET key until the icon
"BUZZER OFF" is shown at the right side above the Wind
direction scale. The base will change to setting mode.
2. Press ALARM key once to return to the normal display mode. The
"BUZZER OFF" icon will still be shown.
To re-enable the Buzzer:
1. When the BUZZER OFF icon is shown on base, press the SET
key shortly and the BUZZER OFF icon will disappear.
2. Press ALARM key once to return to the normal display mode. The
"BUZZER OFF" icon will no longer be shown. Then the alarm will
sound normally.
- History
The Weather Center can store up to 140 sets of weather data (not
min/max values) which are recorded automatically at 3-hour intervals
after the weather center is powered up, at the nearest time of 0:00,
03:00, 06:00, 09:00, 12:00, 15:00, 18:00 and 21:00.
Each History record includes the Wind Direction, Wind Speed in
Beaufort Scale, Wind Chill Temperature, Wind Speed, Wind Gust,
Outdoor Temperature and Humidity, Relative Pressure, 24 hour
Rainfall, Total Rainfall, Pressure History and Weather Tendency. The
Time and Date of history recording will be displayed.
Note:
In order to acquire the correct time of recording of the history records,
the Time and Date should be manually set as soon as installing
batteries to the Weather Center.
To view the Weather History:
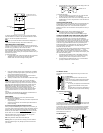
1. Press the HISTORY key. The latest weather record will be shown
with the date and time of recording. The "HISTORY" icon will be
displayed at the bottom of the LCD. HISTORY icon


