


10
English
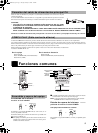
■
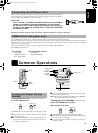
1. Press the POWER button to turn on the Unit.
■
2. Setting the ON time (Example: AM7:00)
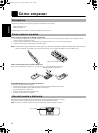
1. Press the CLOCK/TIMER button on the Unit and hold for
more than 2 seconds.
2. Turn the JOG dial until the “ ” indicator blinks on the
display.
3. Press the CLOCK/TIMER button.
The current ON time blinks on the display.
4. Turn the JOG dial to set the time you want the Unit to come on.
Turn the JOG dial to the right or left to advance or decrease
the time.
Turning it rapidly advances or decreases the time faster.
■
3. Setting the OFF time (Example: AM10:15)
1. Press the CLOCK/TIMER button on the Unit.
The “ ” indicator lights up and the current OFF time
blinks on the display.
2. Turn the JOG dial to set the time you want the Unit to be
turned off.
■
4. Setting the volume level
1. Press the CLOCK/TIMER button on the Unit.
The Timer indicator is lit and the current volume setting
blinks on the display.
2. Turn the JOG dial to the right or left to increase or decrease
the volume level.
Volume setting range: 0 - 25 or –.
■
5. Press the CLOCK/TIMER button on the Unit.
The timer setting is completed and the display returns to the dis-
play before you set the timer. The Timer indicator stays lit.
■
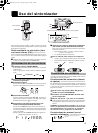
6. Before turning off the Unit, prepare the
music source.
Tuner: Tune in to the desired station.
CD: Load a CD.
Tape: Load a prerecorded cassette tape.
■
7. Press the POWER button to turn off the
Unit.
To confirm the timer settings (ON/OFF time and volume
level), turn on the power, press the CLOCK/TIMER button for more
than 2 seconds, and press the CLOCK/TIMER button repeatedly.
To change the timer setting, repeat the setting procedure from
the beginning.
CAUTION: If the Unit is unplugged, or a power fail-
ure occurs, the timer setting will be lost after ap-
prox. five minutes. You will need to reset the
clock first, then the timer.
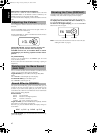
To cancel the Daily Timer, turn off the Timer indicator as follows:
■
1. Press the CLOCK/TIMER button on the Unit
for more than 2 seconds.
■
2. Turn the JOG dial until the “ ” indicator
blinks on the display.
■
3. Press the CLOCK/TIMER button .
The Timer indicator and the CLOCK indicator go out.
To re-activate the cancelled timer, repeat the same steps as for
setting the Daily Timer.
Use the Sleep Timer to turn the Unit off after a certain number of
minutes when it is playing. By setting the Sleep Timer, you can fall
asleep to music and know that your Unit will turn off by itself rather
than play all night.
■
You can only set the Sleep Timer when the Unit is on and a
source is playing.
■
1. Play back a CD, tune in to a desired sta-
tion, or play back a tape.
■
2. Press the SLEEP button on the Remote
Control.
The “SLEEP” indicator lights up.
■
3. Set the length of time you want the source
to play before shutting off.
• Each time you press the SLEEP button, it changes the
number of minutes shown on the display in this sequence:
= 30 = 60 = 90 = 120 = Cancelled = (back to the begin-
ning)
The display will stop blinking after 5 seconds and return to the dis-
play before you set the Sleep Timer.
The Unit is now set to turn off after the number of minutes you have
set.
To Confirm the Sleep Time
When the SLEEP button is pressed, the remaining sleep time is dis-
played. After 5 seconds the original display returns.
To Cancel the SLEEP Timer Setting
Press the SLEEP button until the “SLEEP” indicator goes off on the
display.
Turning off the Unit also cancels the SLEEP Timer.
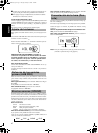
■
If you are setting the Daily Timer, the Unit will be turned on at
the set time to wake you up.
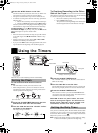
Cancelling the Daily Timer
Setting the SLEEP Timer
(Hold for 2 seconds)
(2 time)
Rc-BZ6BU(J)-e.fm Page 10 Tuesday, February 22, 2000 4:47 PM