


– 57 –
English
Erasing All Albums—ALL ERASE
All data in the HDD will be erased.
On the remote control ONLY:
1
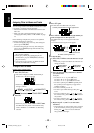
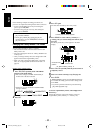
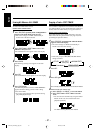
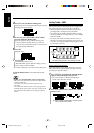
Press TITLE/EDIT repeatedly until “ALBUM EDIT?”
appears in the main display, then press SET.
• The source changes to “HDD” automatically if
another source has been selected.
2
Press SELECT ¢ or SELECT 4 to select “ALL
ERASE?,” then press SET.
The confirmation screen appears in the main display.
3
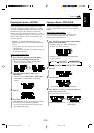
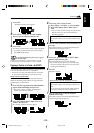
Press ENTER.
The following warning screen appears in the main
display.
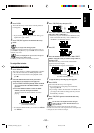
4
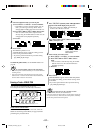
Press SET.
The reconfirmation screen appears in the main display.
5
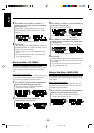
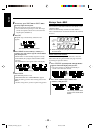
Press ENTER again.
The HDD lamp flashes in red and “HDD WRITING”
appears while the editing you have made is being
stored in the HDD.
• If you have performed the above procedure during
play, HDD playback stops.
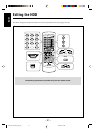
Copying a Track—COPY TRACK
You can make a duplication of a track in the same album or
in a different album. A newly duplicated track will become
the last track in an album where you copy the track into.
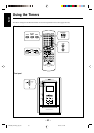
On the remote control ONLY:
If the HDD includes many albums and tracks, select the
album and track using Search Mode (see page 34) before
performing the procedure below.
1
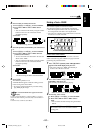
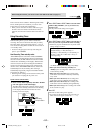
Press TITLE/EDIT repeatedly until “TRACK EDIT?”
appears in the main display.
• The source changes to “HDD” automatically if
another source has been selected.
• Each time you press TITLE/EDIT, Title/Edit Modes
change as follows:
2
Press SET.
3
Press SET again.
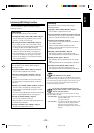
4
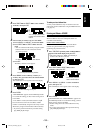
Select a track you want to copy.
1) Press ALBUM + or ALBUM – to select the album.
2) Press SELECT ¢ or SELECT 4 to select the
track.
• You can select the track directly using the number
buttons. In this case, the selected track starts
playback repeatedly.
The currently selected track of the current album flashes.
TITLE?
LIB. EDIT?
(Library edit)
TRACK EDIT?Canceled
ALBUM EDIT?
Ex. When selecting Album 5, then Track 9
EN51-57_NX-HD10[J_C]f.pm6 02.6.15, 0:57 PM57