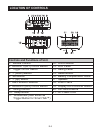
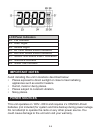
7. Press SET BUTTON (#5) to proceed to AL2 settings following steps
#1 to 6 above. AL2 indicators (#26) will respond to the features
chosen.
8. Press SET BUTTON (#5) to proceed to TIME settings following
steps #1 to 4 above.
9. Press SET BUTTON (#5) to proceed to Sleep Sound settings.
10. Use the > (UP) (#6) or < (DOWN) (#4) BUTTONS to choose a Sleep
Sound - Ocean, Rain, Brook or Radio.
11. Except in alarm, snooze or sleep modes, you may cycle through and
review the set alarm time, alarm sound and sleep sound settings by
pressing the SET BUTTON (#5) repeatedly.
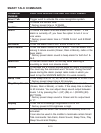
USING SMART TALK™
For correct operation of SMART TALK, please be sure to operate the
unit in the following conditions:
- The ambient condition is fairly quiet.
- The radio or alarm sound is not playing.
- The TRIGGER SWITCH (#3) is set to ON. The “Voice” indicator
(#29) will turn on.
- You are within 6 – 24 inches from the built-in MICROPHONE
located on the top of the unit right behind the SET BUTTON (#5).
(Remarks: the farther away from the mic, the louder you have to
say the voice commands.)
E-9


