


9
Clock: Using the Alarm
This unit can store two different wake up times that can be used independently or simultaneously.
Alarm1
Time Setting
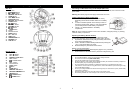
1. In standby mode, press and hold AL1 / MEM- for 3 seconds. The hour digit will begin to blink.
2. Press
or to adjust to the desired hour and AM/PM setting.
3. Press AL1 / MEM- to save the hour setting. The minute digit will begin to blink.
4. Press
or to adjust your desired minute digit.
5. Press AL1 / MEM- to complete the wake up setting.
Alarm1
Wake-Up Mode
Press AL1 / MEM- to set the Wake-Up Mode for Alarm1 (
Buzzer / Radio/ iPod).
Wake to Buzzer
Press AL1 / MEM- until
and are visible.
Wake to Radio
1. Press AL1 / MEM- until
and are visible.
2. Press
STANDBY button to turn the unit on.
3. Follow the procedure in “TUNER OPERATION” to select your desired radio station.
4. Press
STANDBY button to turn the unit off. The radio will automatically turn on at the
alarm time.
Wake to iPod
1. Press AL1 / MEM- until
and are visible.
2. Press
STANDBY button to turn the unit on.
3. Follow the procedure in “iPod OPERATION.”
4. Press
STANDBY button to turn the unit off. The iPod will automatically start playing at
the set alarm time.
Alarm2
Time Setting & Wake-Up Mode
Follow the steps above, using AL2 / MEM+ instead.
Note: When Alarm1
and Alarm2 are both set, the corresponding icons will flash, alternating
between alarms.
Turning Off the Alarm
Using the Snooze Feature (temporary deactivation)
When the alarm sounds, pressing the SNOOZE / dimmer button will temporarily deactivate the
alarm. The alarm will automatically sound again after a period of 9 minutes.
Note: After pressing the snooze button, the active alarm icons will flash.
Deactivating the Alarm (permanent deactivation)
Press the corresponding AL1 / MEM- or AL2 / MEM+ button until the
/ icon disappears.
Adjusting the Display Dimmer
While in standby mode, press the SNOOZE / Dimmer Button to adjust the dimmer to LO/MID/HI.
Note: After turning on the unit, the dimmer will automatically be set to high backlight.
10
Troubleshooting
Symptom Solution
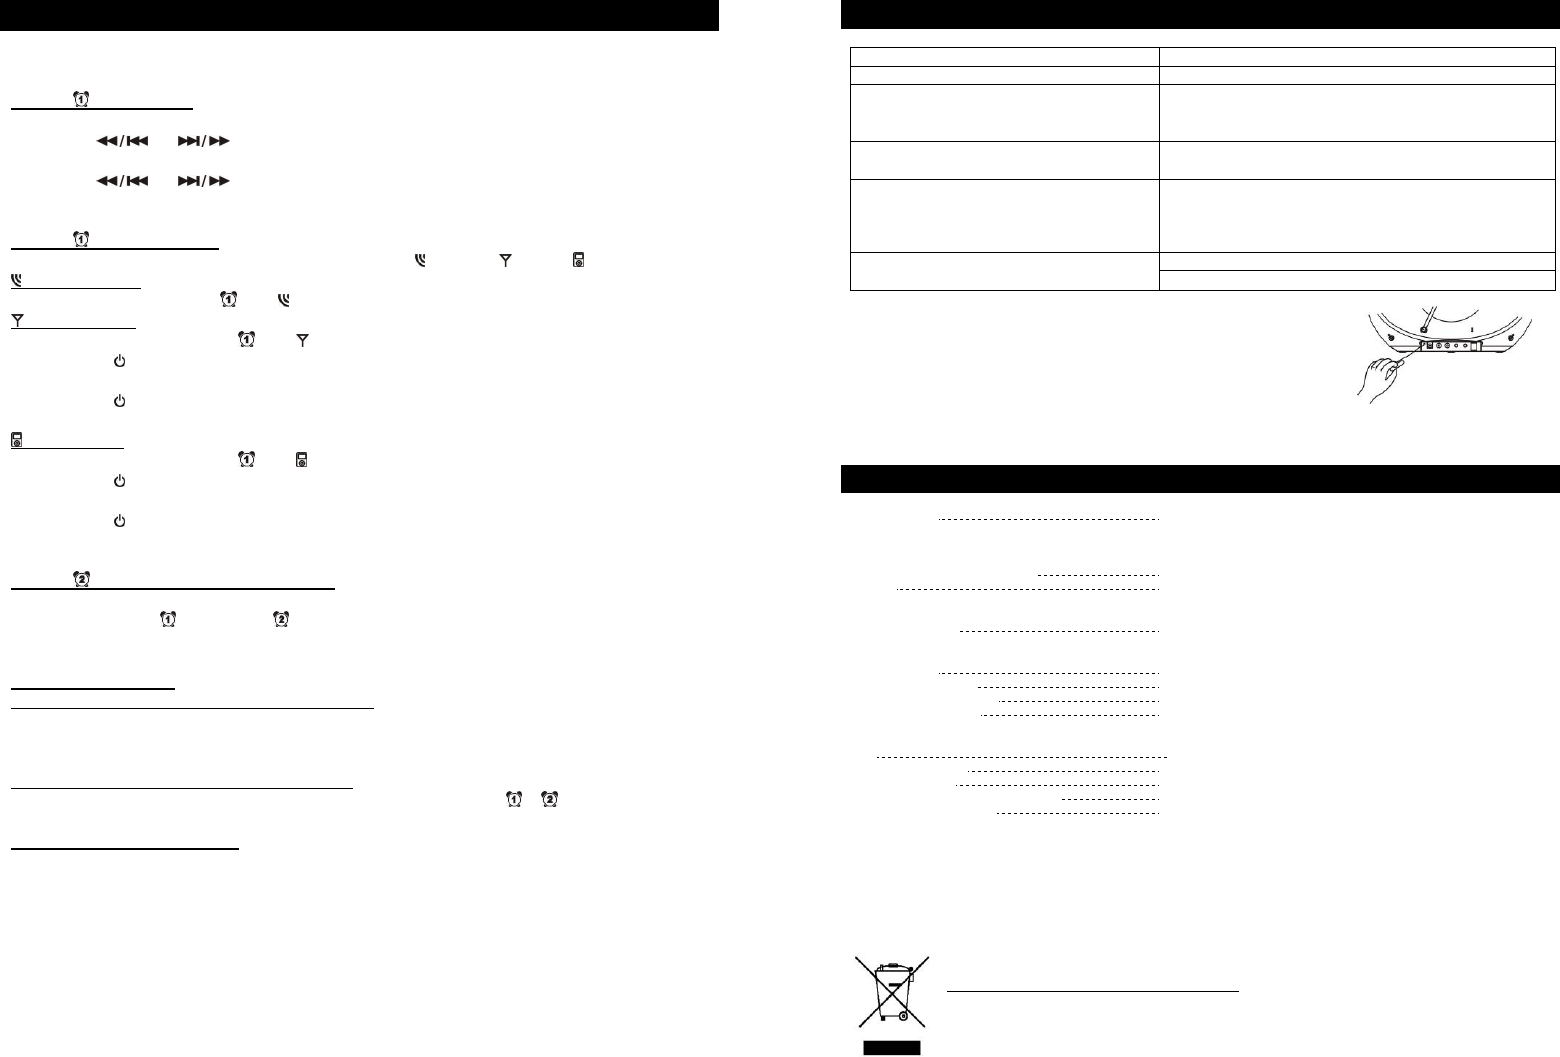
Display / Controls not operating properly Use a sharp tipped object to press the reset switch (17)
Radio Noise/Distortion Extend FM Rod Antenna completely and reposition it.
Rotate the unit until best reception is obtained.
Manually scan to the AM or FM broadcast station
FM STEREO icon does not appear on
display
Select another FM station. The current station may not
have a stereo signal.
No sound Make sure the unit is turned on.
Make sure the correct play mode is selected.
Try increasing the volume level of the unit. If in “AUX”
mode, also try increasing the audio device’s volume.
iPod will not play Make sure “iPod” play mode is selected.
Re-insert the iPod into the dock
Note: Use a toothpick, straightened paperclip, or similar object to
depress and hold the reset button for few seconds.
Customer Service:
For further assistance with your product, call Innovative Technology at 516-883-8220
Specifications
GENERAL
Power source DC 12V / 500mA
8 x “C” alkaline batteries (not included) for main unit
2x “AAA” alkaline batteries (not included) for memory back-up
3V “CR2025” lithium battery (included) for remote
Dimension (W x D x H in mm)
306 x 227 x 240 mm
Weight
1.32kg
TUNER SECTION
Frequency range
FM: 87.5 - 108MHz
AM: 522 - 1620 KHz
AUDIO SECTION
Power Output
2x 1.5 Watts @10% THD per Channel
Speaker impedance 4 ohms
Headphone Impedance 8 – 32 ohms
AUX input sensitivity
300 mV
ACCESSORIES
AC Adaptor 1
pc
Instruction Manual 1 pc
Remote handset 1 pc
iPod dock adapter and dust cover
1 kit (5 adapters &1 dust cover.)
Remote Control Range 6 meters
You can help protect the environment!
Please remember to respect your local regulations: Turn in non-working electrical
equipment to an appropriate waste disposal centre.