Error Log
Diagnostic errors are printed on the printer that is attached
to the parallel port when the error is detected. The error is
also logged in the system memory.
Do the following to display the errors:
1. End the test, if it is running.
2. Press Ctrl+A to select the advanced diagnostic mode.
3. Press Esc to exit the &tpad. FRU Connections
screen.
The keyboard test screen appears.
4. Press Ctrl+Pause to exit the keyboard test screen.
5. Press Ctrl+E.
6. The error log appears.
7. To exit the screen, select the cancel icon or press
Esc.
The error log is not saved when the system is powered-off.
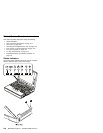
Checking the Installed Devices List
If a device is installed but the icon appears in a gray shade
rather than a dark shade on the basic diagnostics screen,
the device is defective. Reseat the device connectors. If
the symptom remains, replace the device or the system
board. If needed, adjust the contrast control to clearly
distinguish the shades of the icon.
If a device that is not installed appears in a dark shade (for
example, FDD-2 appears in a dark shade when
NO
second FDD is installed), do the following:
1. Replace the first device in the configuration, such as
an FDD-1.
2. If the problem remains, replace the system board.
The Parallel, and Serial icons are always displayed in a
dark shade because the icons represent subsystems of the
system board and not the attachment of the devices.
The FDD-1 and PCMCIA-1 icons represent the drive in the
computer. The FDD-2 and PCMCIA-2 icons represent the
devices in the port replicator or that is attached through the
port replicator.
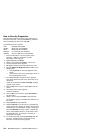
How to Run a Low-Level Format
Do the following to format the hard disk.
Warning: Make sure the drive address to be formatted is
correct. This procedure erases all information on the disk.
1. Power off the computer.
2. Insert the ThinkPad Hardware Maintenance
Diskette Version 1.30 into diskette drive A and
power on the computer.
3. Select Format the hard disk from the main menu.
4. Select the drive from the menu.
5. Follow the instructions on the screen.
ThinkPad 380, 380D, 385, 385D (2635)
213


