


8
© 2003 Directed Electronics, Inc
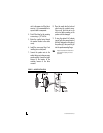
against the panel and mark the two
holes at the rear of the housing.
3. Drill the smaller center hole using a
1/8" drill bit. This is the mounting
screw hole.
4. Drill the larger off-center hole using a
3/8" drill bit, insert a grommet and
route the speaker wire from the
crossover through the grommet.
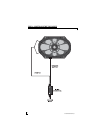
5. After removing the surface mount
tweeter assembly trim ring, route
the tweeter wires through the larger
hole in the housing and connect to
the speaker wires from the
crossover. (See Figure 5.)
6. Insert the excess speaker wire into
the hole and position the housing so
the housing will not pinch the wires
after final mounting.
7. Attach the housing using the
supplied screws of the correct length
for a solid mount.
8. Insert the tweeter into the housing
and attach the trim ring.
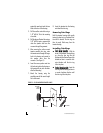
Removing Trim Rings
Hold the tweeter housing while gently
turning the trim ring in a clockwise direc-
tion until it releases. The trim ring can
then be easily lifted away from the
tweeter housing.
Installing Trim Rings
FFlluusshh MMoouunntt AAsssseemmbbllyy
- With the
arrow in the tweeter housing facing
up, place the trim ring into the
housing with the Directed logo at the
bottom and turn in a counter clock-
wise direction until the trim ring
clicks into place.
SSuurrffaaccee MMoouunntt AAsssseemmbbllyy
- Insert the
trim ring into the housing and turn in
a counter clockwise direction until
the trim ring clicks into place.
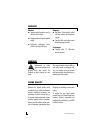
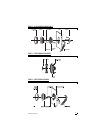
DRW-12
FLUSH MOUNT
TWEETER
ASSEMBLY
PRESSURE
RING
WIRING HARNESS
TWEETER WIRE
FIGURE 2—FLUSH MOUNTING REMOVED PANELS