


Section Two - Editing Functions
Editing/Creating Presets
Creating your own signature sound with the RP300A is easy and intuitive. The RP300A lets
you create your own Presets, or fine tune existing Presets to suit your needs. When creating
or editing a sound, you must first start with one of the User, Artist Factory, or Factory
Presets. It is not possible to start with a completely empty Preset. The Preset number does
not necessarily need to be the location which you intend to have it reside, as you can save
your creation to any User Preset location during the store process.
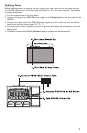
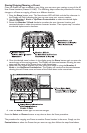
To edit or create a Preset:
1. Use the Up or Down Footswitches to select a Preset which will be your starting
point.
2. Once you have found a Preset that you wish to edit, press the Select button once. This
will take you into the Editing mode.
3. Use the Select button in conjunction with the Matrix LEDs to choose the effect you
wish to edit. Successive presses of the Select button will advance to the next Effect in
the Matrix.
4. Use the 5 Knobs to change parameter values.
5. Store your edited Preset. See page 9 for more on the Store procedure.
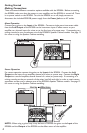
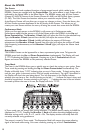
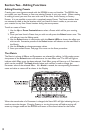
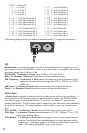
The Matrix
The Matrix is where all Effects and Parameters are selected for editing. In Edit mode, succes-
sive presses of the Select button will advance to the next Effect row. The LED will light to
indicate which Effect group has been selected. Each Effect group will have up to 5 Parameters
which can be modified. The Knob directly below each column is used to change the
Parameter value of the selected Effect. As a Knob is rotated, the corresponding Parameter’s
name and value or status will be shown in the Display.
When the stored value of a Parameter is changed, the Store LED will light indicating that you
need to store the changes. Changing Presets, or turning the power off before storing will
erase any changes made and the RP300A will revert to the stored values for the Preset.
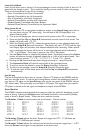
RHYTHM30
8