


Audio Expander Crestron Adagio™ AAE
Fuse Replacement
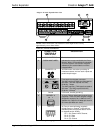
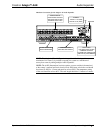
If the AAE does not power up when it is plugged into an AC outlet, the fuse may
need to be replaced. The fuse holder is located on the top-right of the rear panel (next
to the power cord connector). To replace the fuse:
• Disconnect power to the AAE.
• Use a flat-head screwdriver to push in the fuse holder.
• While pushing in the fuse holder, turn screwdriver counterclockwise until
the fuse holder pops out.
• Remove the fuse from the fuse holder and insert a new fuse.
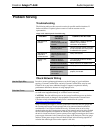
CAUTION: Only use the specified type of fuse when replacing a blown fuse.
Failure to do so may cause damage to the AAE.
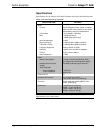
AAE MODEL REQUIRED FUSE TYPE
AAE
(US & Canada)
T8AH (¼” x 1¼”, 250V, 8A,
time-lag, high-rupture rated)
AAEI
(International/230VAC)
T4AH (5mm x 20mm, 250V, 4A,
time-lag, high-rupture rated)
• Insert the fuse holder into the AAE.
• Push in the fuse holder with a flat head screwdriver. While pushing in the
fuse holder, turn the screwdriver clockwise until the fuse holder sinks in.
• Push in the fuse holder a little further and turn the screwdriver clockwise
until the fuse holder locks in place.
• Connect power to the AAE.
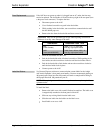
Label the Buttons
Use Crestron Engraver software to create and print custom labels for the Adagio
AAE Audio Expander’s front panel room buttons. Crestron recommends printing on
100-pound paper. Paper less than 100 pounds will tend to crumple while sliding in,
while paper more than 100 pounds may not fit.
NOTE: When printing custom labels, some experimentation may be required for
optimum results.
To install the label:
• Remove the label cover with a small, flat-head screwdriver. The label cover
is magnetically attached to the front panel of the AAE.
• Slide out any existing labels from the label cover.
• Slide the new labels into the holders on the label cover.
• Install label cover on to AAE.
8 • Audio Expander: Adagio AAE Operations Guide – DOC. 6460A