


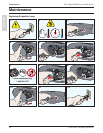
12
3M
™
Digital Media System 800 Series
© 3M 2007. All Rights Reserved.
ENGLISH
Installation and System Setup
Installation & System Setup
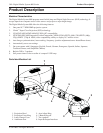
Setting Up the Projector
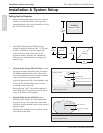
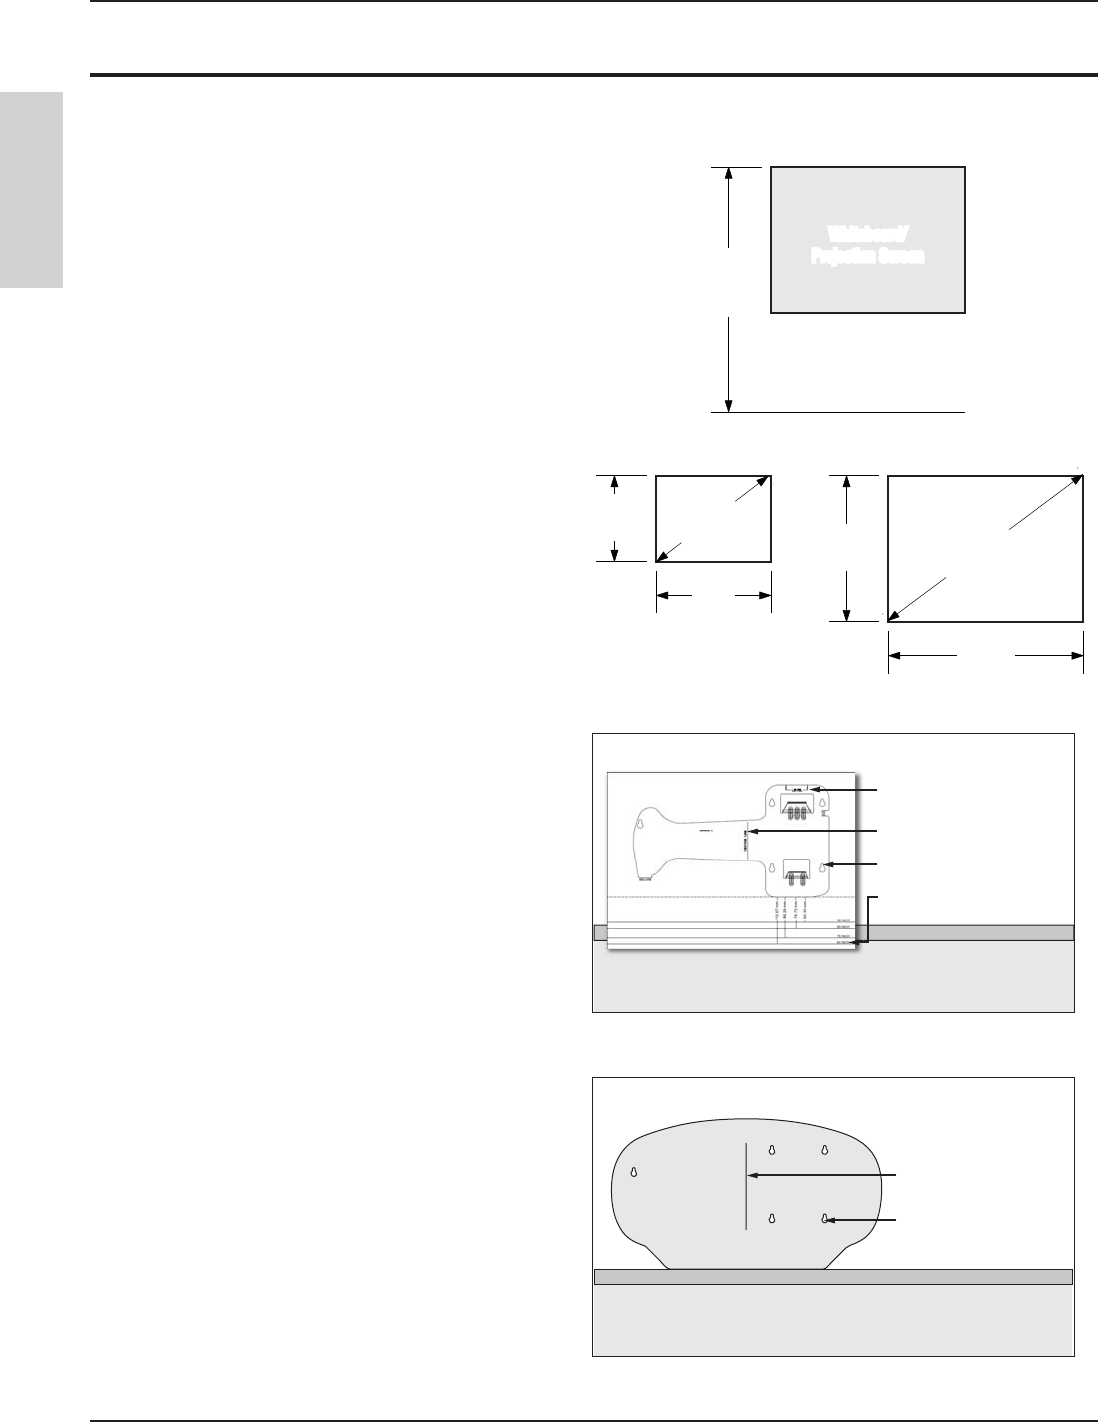
1. Mount whiteboard/projection screen in desired
location on wall if necessary. The top of the
whiteboard/projecction screen should be at least
86" (2.18 m) from the floor.
86"
(2.18 m)
to floor
Whiteboard/
Projection Screen
Whiteboard/
Projection Screen
2. The Digital Media System 800 Series can
project an image size between 50" (1,270 mm)
and 85" (2,160 mm), measured diagonally
(when mounted on the same plane as the
projected surface). Measure the whiteboard
if necessary to determine the size image you
intend to use.
30"
(762 mm)
40"
(1016 mm)
50"
(1270 mm)
51"
(1295 mm)
68"
(1728 mm)
85"
(2160 mm)
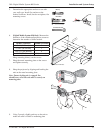
3. (Digital Media System 800, 815 Only) Attach
the paper mounting template to the wall above
the whiteboard/projection screen. The center
line of the template should be aligned with the
center of the desired projection area.
Align the appropriate line on the template with
the top of the whiteboard/projection screen
according to the image size.
Ensure that the "level" line on the template is
level. Mark the five mounting screw locations
on the wall. Remove the template.
Whiteboard/Projection Screen
Wall
Level
Align center line
Alignment for desired image size
Mounting screw location (1 of 5)
Mounting Template
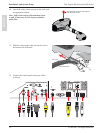
4. (Digital Media System 810 Only) Rest a
mounting shim on the top of the whiteboard/
projection screen. The center line of the shim
should be aligned with the center of the desired
projection area.
Mark the five mounting screw locations on the
wall. Remove the shim.
Whiteboard/Projection Screen
Wall
Align center line
Mounting screw location
(1 of 5)
Shim