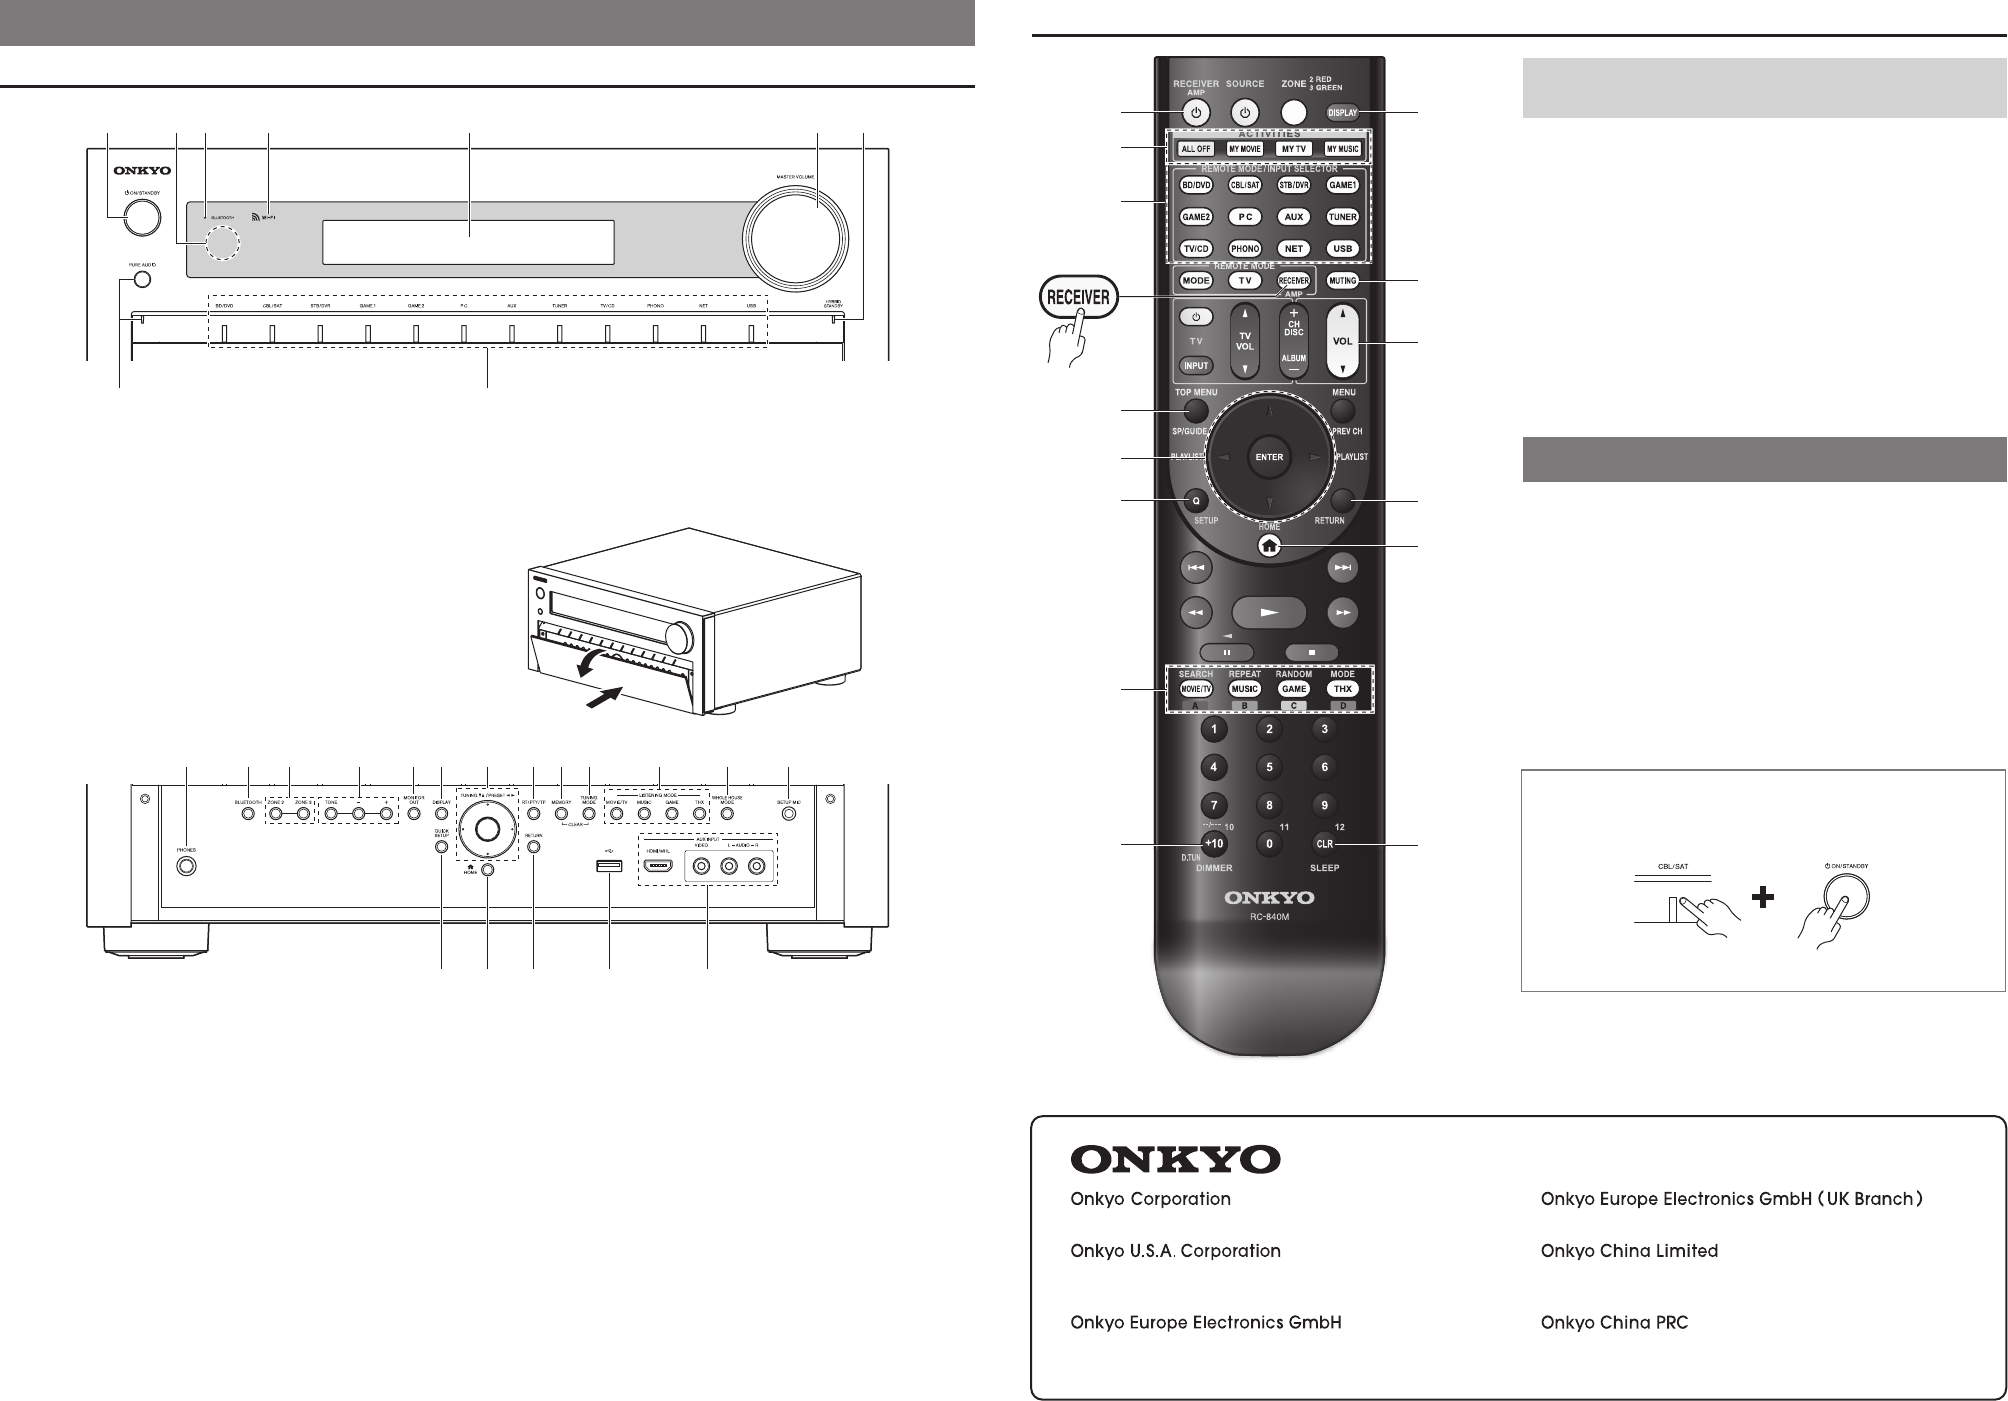
Remote Controller
To control the AV receiver, press RECEIVER to select
Receiver mode.
a
Sets the AV receiver to On or Standby.
b
Used f
or the Macro function.
c
Selects the remote controller modes or the input sources
.
d
Selects the speak
er layout.
e
Selects and adjusts settings.
f
Accesses the quic
k setup menus.
g
Selects listening modes
.
h
Adjusts the displa
y brightness.
i
Displa
ys various information about the currently selected
input source.
j
Mutes or unm
utes the AV receiver.
k
Adjusts the v
olume.
l
Retur
ns to the previous menu.
m
Accesses the HOME men
u.
n
Used for the Sleep function.
7. Troubleshooting
Can’t turn on the AV receiver.
Make sure that the power cord is properly plugged into the wall outlet.
The AV receiver turns off unexpectedly.
The AV receiver will automatically enter standby mode when Auto Standby is set
and launched.
There’s no sound, or it’s very quiet.
Make sure that the proper digital source is selected.
There’s no picture.
Make sure that all video connecting plugs are pushed in all the way.
If you can’t resolve the issue yourself, try resetting the AV receiver before
contacting your Onkyo dealer.
To reset the AV receiver to its factory defaults, turn it on and, while holding
down CBL/SAT, press
8
ON/STANDBY. “Clear” will appear on the
AV receiver’s display and the AV receiver will enter standby mode.
Note that resetting the AV receiver will delete your radio presets and
custom settings.
http://www.onkyo.com/
Tel: 800-229-1687, 201-785-2600
http://www.us.onkyo.com/
Tel: +49-8142-4401-0
http://www.eu.onkyo.com/
Tel: +44-(0)8712-00-19-96
Tel: 852-2429-3118
http://www.hk.onkyo.com/
(Hong Kong)
(Mainland)
Tel: 86-21-52131366
http://www.cn.onkyo.com/
- 7 -
6.
Getting to Know the AV receiver
Front Panel
Each input selector button (BD/DVD, GAME, etc.) selects the input terminal with the same name on the rear panel.
Note that these default assignments can be changed. For details, please refer to the instruction manual.
a
Sets the AV receiver to On or Standby.
b
The remote control sensor receives signals from the
remote controller.
c
Lights when connected to Bluetooth-enab
led devices.
d
Connection to your Access Point starts and Wi-Fi
indicator flashes.
e
Displa
ys various information.
f
Adjusts the v
olume.
g
Lights depending on the AV receiver’s setting status.
h
Selects the Pure Audio listening mode.
The indicator lights when this mode is selected.
i
Selects the input sources.
Gently push on the lower end of the front panel to open the flap.
j
Connects a standard pair of stereo headphones.
k
Performs pairings with Bluetooth-enabled devices.
l
Selects Zone 2/3.
m
Adjusts the tone.
n
Sets the “Monitor Out” setting.
o
Displays various information about the currently selected
input source.
p
When the AM or FM input source is selected, TUNING
q
/
w
are
used to tune the tuner, and PRESET
e
/
r
are used to select
radio presets.
When used with onscreen menus, they work as cursor buttons
to select and set items. The enter (middle) button is also used
with onscreen menus.
q
(North American models)
DIMMER: Adjusts the display brightness.
(European and Australian models)
RT/PTY/TP: Used for RDS (Radio Data System)
RDS works only in areas where RDS broadcasts are available.
r
Stores or deletes radio presets.
s
Selects the Auto or Manual tuning mode.
t
Selects listening modes.
u
Selects the whole house mode.
v
Connects the speaker setup microphone.
w
Accesses the setup menus.
x
Accesses the HOME menu.
y
Returns to the previous menu.
z
Connects a USB storage or portable player for playback of
music files.
A
Connects a camcorder or similar for audio/video playback.


