E45
Reference Section
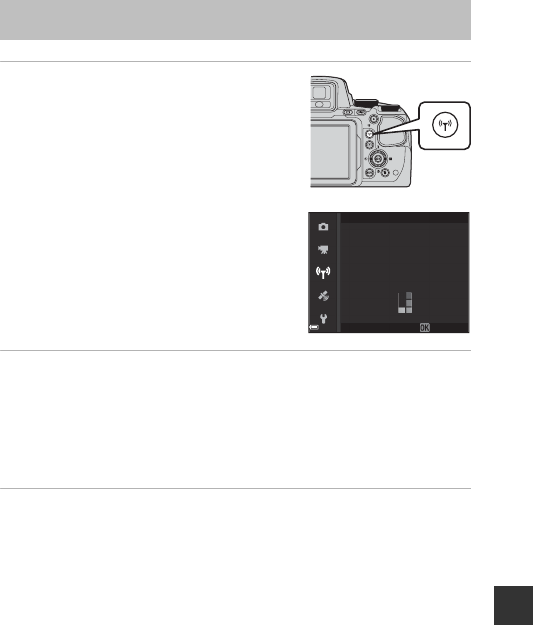
1 Press the q (Wi-Fi) button on the
camera.
• The screen shown on the right is displayed.
• If no connection confirmation is received
from the smart device within 3 minutes, the
message No access. is displayed and the
camera returns to the Wi-Fi options screen.
• You can also select Connect to smart
device in the Wi-Fi options menu to
display the screen shown on the right.
2 Set the Wi-Fi setting on the smart device to On.
• Check the user’s manual provided with your smart device for further details.
• After the network names (SSIDs) that can be used for the smart device are
displayed, select the SSID displayed on the camera.
• When the Auth./encryp. is set to WPA2-PSK-AES in the Wi-Fi options
menu, the message for entering a password is displayed.
Enter the password that is displayed on the camera.
3 Start the “Wireless Mobile Utility” installed on the smart
device, while Negotiating... Please wait. is displayed on
the camera.
• The screen for selecting “Take photos” or “View photos” is displayed.
• When the message “Cannot connect to camera.” is displayed, return to step
1 and retry the procedure.
• See “Installing the Software on the Smart Device” (A60).
C When Take photos Is Selected
You can capture still images using the two methods described below.
• Release the shutter on the camera and save the captured images to a smart device.
• Use a smart device to remotely release the camera shutter and save images to the
smart device.
Connecting to a Smart Device (Wi-Fi)
XXXXXXXXXXXXXXXXXX
XXXXXXXXXXXXXXXXXX
XXXXXXXXXXXXXXXXXX
Cancel
Password:
SSID:
Connect to smart device


