Model 380974 V1.8 Sept 2003
5
Meter Operation
Measurement Preparation
1. Use the rotary selector switch to choose the appropriate range and function. Ensure
that the selected range matches the measurement to be taken.
2. If the measured current is higher than the selected range for long periods of time,
overheating can result which may damage the meter.
3. Do not measure current on high voltage conductors (> 600V).
AC Current Measurements
Warning: Ensure that all test leads are disconnected from the meter’s terminals before
proceeding.
1. Set the Rotary selector
switch to the 40, 400 or
1000 Amps AC (~ A)
range.
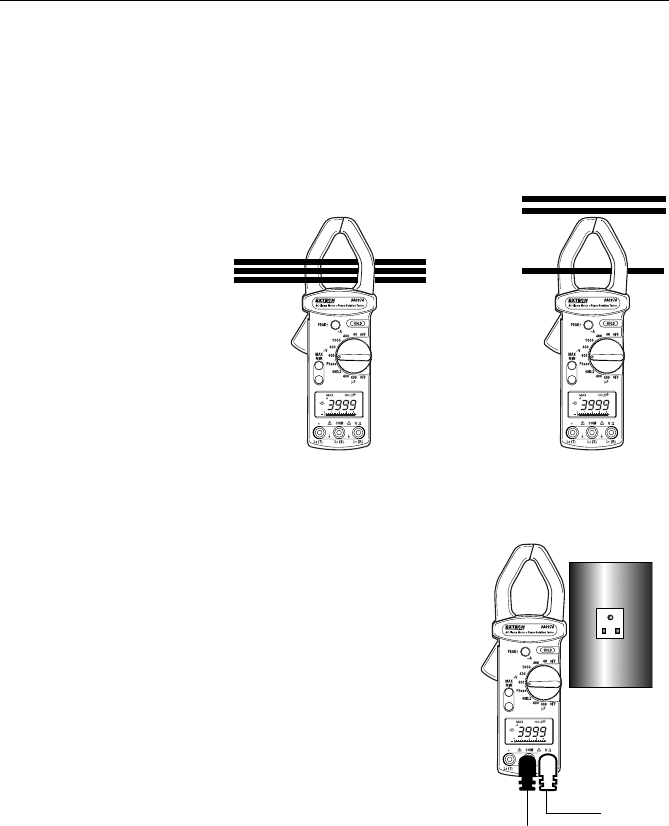
2. Open the jaw via the
trigger and clamp
around one of the
conductors (see
diagram). Close clamp
completely around the
conductor.
3. Read the displayed
measurement value.
AC Voltage Measurements
Warning: Maximum AC
input voltage is 600V. To
avoid electrical shock or damage to the instrument, do not attempt to measure any voltage
exceeding this limit.
1. Set the rotary selector switch to AC Volts (~ V).
2. Connect the black test lead to the COM terminal and the
red test lead to the V/Ω terminal.
3. Connect the other ends of the test leads to the circuit,
component, or other device under test. See diagram.
4. Read the displayed measurement value on the LCD.
Frequency Measurements
Note: Current (with clamp) and voltage (with test leads)
frequency measurements are possible with this instrument. At
least 10A (minimum threshold) must be available when
measuring the frequency of a current signal with the clamp.
1. Set the rotary selector switch to a voltage or current
position. Then Press the Hz button.
2. For measuring the frequency of a voltage (using test
leads), connect the black test lead to the COM terminal
and the red test lead to the V/Ω terminal. Note that in the 400V range, the minimum
threshold is 30V.
3. Connect the other ends of the test leads to the circuit, component, or other device
under test
4. For measuring the frequency of a current signal (using the clamp), fully enclose the
conductor under test in the jaws.
5. Read the displayed measurement value on the LCD.
CAT III
600V
CAT III
600V
CAT III
600V
CAT III
600V
INCORRECT CORRECT
CAT III
600V
CAT III
600V


