


User's Manual
9
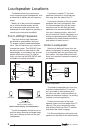
Read the details on page 6 and 7 to
help determine the best position for your
loudspeaker.
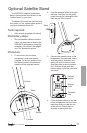
The loudspeaker can be wall-mounted,
or simply placed on bookshelves or
on top of TV cabinets. If you are not
wall-mounting the loudspeaker, then we
recommend that you add the supplied
anti-vibration pads to the bottom surface.
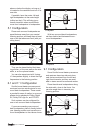
To wall-mount the loudspeaker, please
follow the instructions below.
Tools required:
• Phillips screwdriver
• Pencil or other marker
• Electric drill and 5/16" drill bit
• Level
• Safety glasses
• Step ladder if needed
• Electronic stud nder
• Wood screws and dry wall anchors
with screws are supplied
Preliminary steps:
• Clear the area where you are going
to work, so it will be safe.
Make sure there is no wiring, or
gas or water pipes behind the wall
where you are going to drill!
• Temporarily remove any wall-
mounted at screen display if you
will be working close to it.
• We recommend mounting the loud-
speakers into a wall stud.
• If you have to mount the loud-
speakers onto a masonry wall, we
recommend that you consult with
your hardware supplier to buy suit-
able masonry hardware.
The HRS-SAT4 weighs 7.0 lb. (3.2
kg) and the HRS-SAT4C weighs
12.0 lb. (5.4 kg). You should allow
a good safety margin. If in doubt,
please contact your Sunre dealer
for professional installation.
Installation
Wall-mounting the HRS-SAT4
Into a wall stud
1. Use a studnder to nd the location
of a wall stud. Mark the wall with a
pencil on the centerline of the stud,
at the height of the keyhole bracket
of the loudspeaker.
2. Put on your safety glasses. With a
5/16" drill bit, drill through the dry
wall at this mark, without going into
the wall stud. Remove any dust.
3. Screw in the supplied woodscrew
into the wall stud by hand, until the
head is sticking out approximately
1/8". Jump to step 8 below.
Into dry wall
4. Find the best location, and mark
the wall with a pencil in the location
and height of the keyhole.
5. Put on your safety glasses. With
a 5/16" drill bit, drill a hole through
the dry wall at this mark. Remove
any dust or particles.
6. Press a dry wall anchor (supplied)
into the hole, and gently tap it in
ush.
7. Tighten the screw by hand, until the
head is sticking out 1/8".
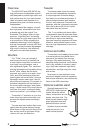
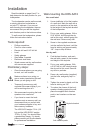
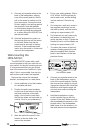
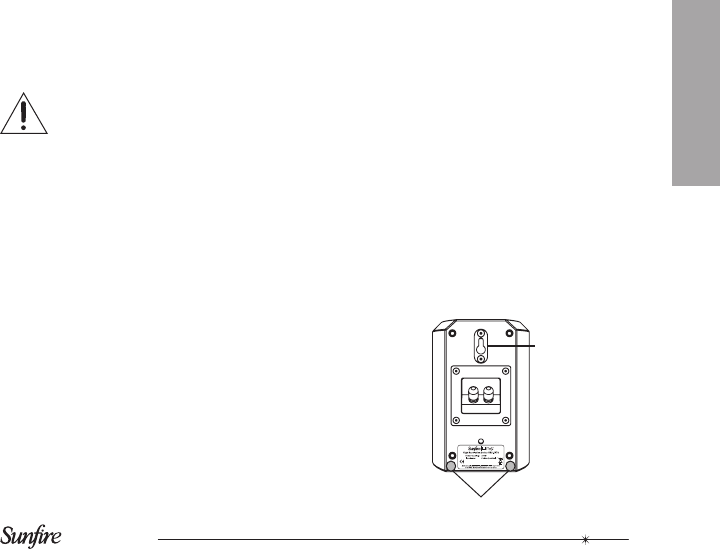
8. To reduce the chance of the loud-
speaker vibrating against the wall,
place the supplied anti-vibration
pads in two locations on the rear
panel.
Anti-vibration pads
Keyhole bracket