1-4
19
Playing songs on the Music Clip Player
Before operating the Music Clip Player, disconnect it
from the computer and the USB cable. The Music Clip
Player is deactivated while it is connected to your
computer.
1
Connect the headphones (supplied).
2
Press Nx (play/stop).
Playback begins.
Adjust the volume with the VOL +/– buttons.
To stop playback
Press Nx (play/stop).
locate the next song
locate the beginning of the
current song
locate previous songs
To Press
> once
. once
. repeatedly
z Tip
The Music Clip Player
does not have a power
switch. The Music Clip
Player automatically
turns off about 10 seconds
after it stops playing.
Press Nx (play/stop)
again to start playback.
The Music Clip Player
starts playing from the
song you last played on it.
It starts playing from the
first song stored if you
replace the battery or
after connecting to a
computer.
Nx (play/stop)
./>
VOL +/–
20
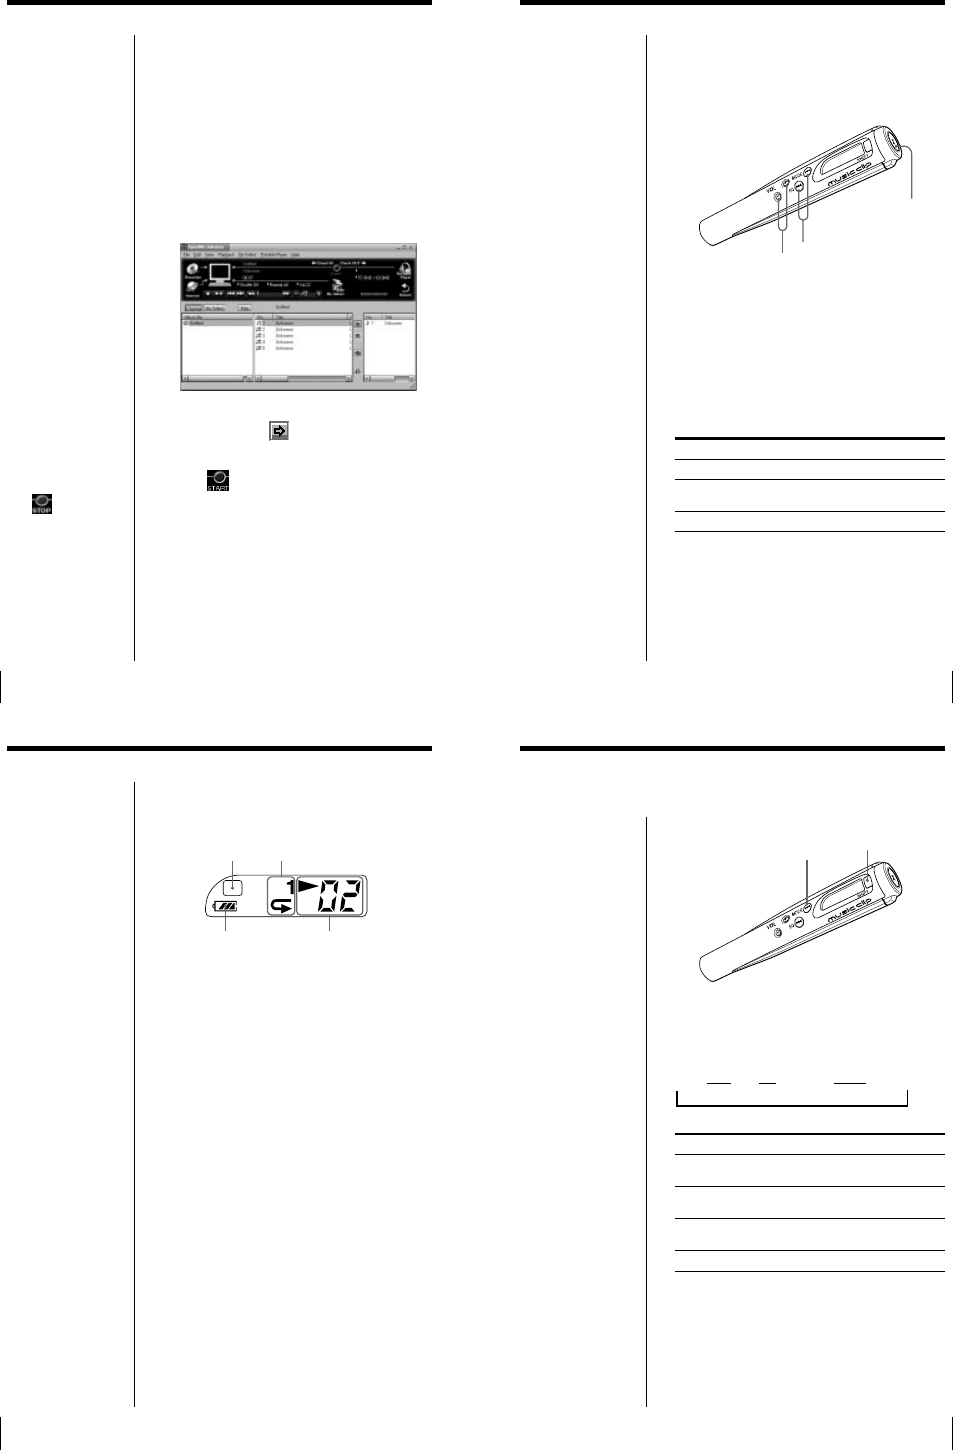
Using the display information
You can check play status, battery life, and other
information on the Music Clip Player display.
Repeat mode
(page 21)
Remaining
battery life
EQ (page 22)
Play/Volume indicators
While playing, the N icon
and the song number appear.
While changing the volume,
VOL and the volume level
appear.
Note
The display turns off
about 10 seconds after
playback stops.
S1
21
Playing songs repeatedly (MODE)
Additional operations
Note
The repeat mode is reset
to the factory setting (no
indicator) if the battery is
removed.
> (MODE)
SHIFT
R
1
F
You can play all songs or a specific song repeatedly.
To play songs repeatedly, while holding down the
SHIFT button, press > (MODE) repeatedly. Each
time you press the > (MODE) button, the repeat
mode indicator changes as follows:
t F t SHUF F t (no indication)
Repeat mode indicator
1
F
F
SHUF F
No indicator
To cancel Repeat Play
While holding down the SHIFT button, press >
(MODE) repeatedly until the repeat indicator
disappears.
The player repeats
the current song (1 Repeat)
all songs continuously
(All Repeat)
all songs in random order
(Shuffle Repeat)
Repeat mode off
18
Transferring the songs to the Music
Clip Player (Check out)
1
Click “Portable Player” on the OpenMG Jukebox
main window.
The Portable Player window appears on the right
side in the main window.
2
Select the desired album in the Album titles
column, and click
.
The song names in the selected album appear in
the Song Title list of the Portable Player window.
3
Click .
Check out begins.
When Check out is complete, the kicon changes
to 9, and the shaded Song list area in the Portable
Player window returns to its normal state.
To cancel checking out
Click .
To transfer songs from
the Music Clip Player to
your computer
See “Checking in a
checked-out song (Check
in)“ in OpenMG Jukebox
Help.
Note
Before transferring songs,
make sure the Music Clip
Player is connected to
your computer.
You can choose the bitrate from the “Settings” dialog
box displayed by selecting “Settings” from the
“Control” menu. In the “Settings” dialog box, click the
“Setting Option” tab, and choose from the “ATRAC3
Bitrate” list. See “Changing other recording settings”
in OpenMG Jukebox Help.


