


HOOKING UP YOUR SPEAKERS
IDENTIFYING “+” AND “-”
You need to be able to discriminate between the two conductors of
the speaker wire. If your wire has transparent insulation, this is easy:
One conductor will be copper-colored and the other silver-colored.
Generally, professionals denote the copper one as POSITIVE (+) and
the silver one as NEGATIVE (-).
If you’ve used wire which has an opaque insulation, there are still dif-
ferentiating markings. Examine the wire closely and look for:
1. A series of ribs or grooves on one conductor
2. A painted stripe or dotted line
* Denote any of these as the POSITIVE (+) conductor for similar
connections on both ends.
NOTE: It is important that you label your wires left and right
when you run them to eliminate future confusion.
AT THE SPEAKER END
1. Cut off excess wire, leaving about 2 feet extending through the
speaker cut-out hole.
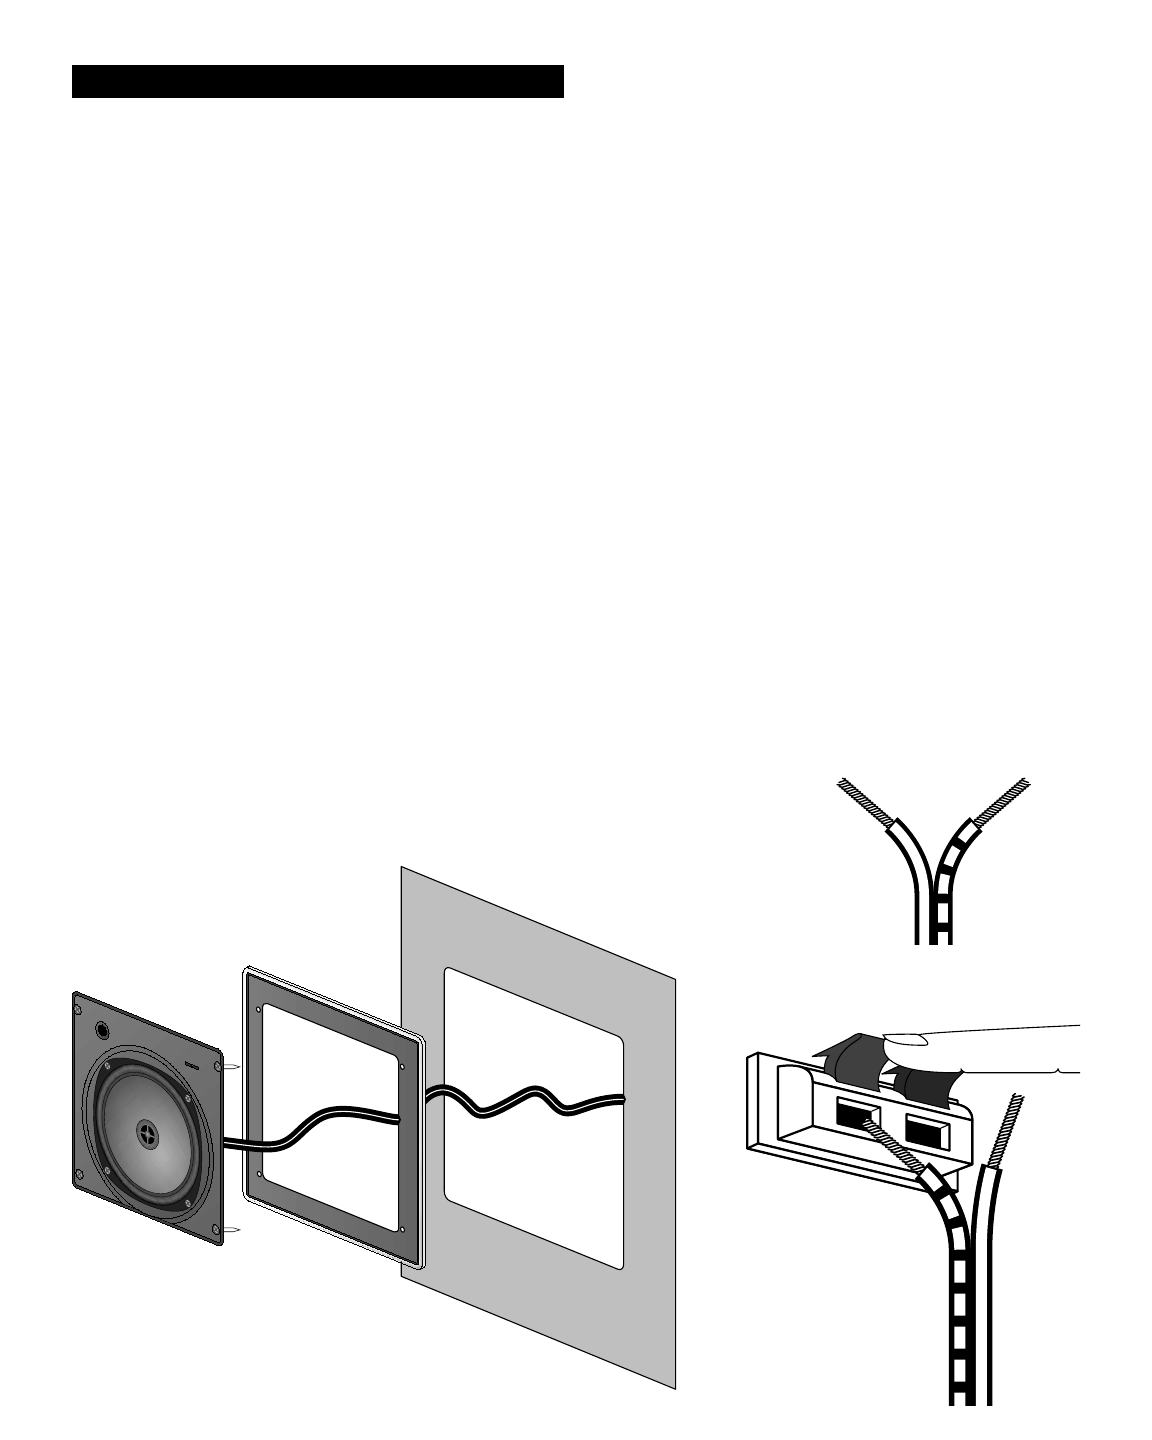
2. Pull the conductors apart so they’re separated for the first two
inches from their ends.
3. Using a wire stripper, diagonal pliers or a knife, remove 1/2 inch of
insulation from each conductor.
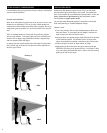
4. Twist the tiny strands in each conductor into tight spirals, as
shown in Drawing 4.
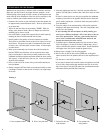
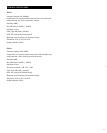
5. IMPORTANT: Route the speaker wire THROUGH the sheetrock as
shown in Drawing 5.
6. Attach the speaker wires to the red and black speaker terminals.
Press down on the protruding levers while inserting the wire into
the hole.
* Correct the POSITIVE (+) conductor to the RED terminal and the
NEGATIVE (-) conductor to the BLACK speaker terminal.
* Make sure that no stray strands of wire have gotten detached and
are touching the other main wire.
7. Repeat Steps 1 through 6 for the other Russound In-Wall Speaker.
AT THE AMPLIFIER END
1. Cut off excess wire, leaving enough to comfortably reach from the
hole in the wall to your stereo system. If there’s a possibility that
you’re going to move the amplifier to another part of the room,
consider leaving some excess wire coiled up. If you’ve used suffi-
ciently thick wire, this extra length will not affect speaker per-
formance and could make re-routing easier if the room is
rearranged later.
2. Pull the conductors on both speaker wires apart so they’re separat-
ed for the last two inches.
3. Using wire strippers, diagonal pliers or a knife, remove 1/2 inch of
insulation from each conductor.
4. Twist the tiny strands in each conductor into tight spirals.
5. Attach the speaker wires to the red and black speaker terminals on
the amplifier or receiver.
* Connect the POSITIVE (+) conductor to the RED terminal and the
NEGATIVE (-) conductor to the BLACK speaker terminal of the
receiver/amplifier.
* Make sure that no stray strands of wire have gotten detached and
are touching the other main wire.
Repeat Steps 1 through 5 for the other speaker.
7
Drawing 4
Drawing 5