


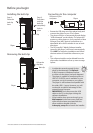
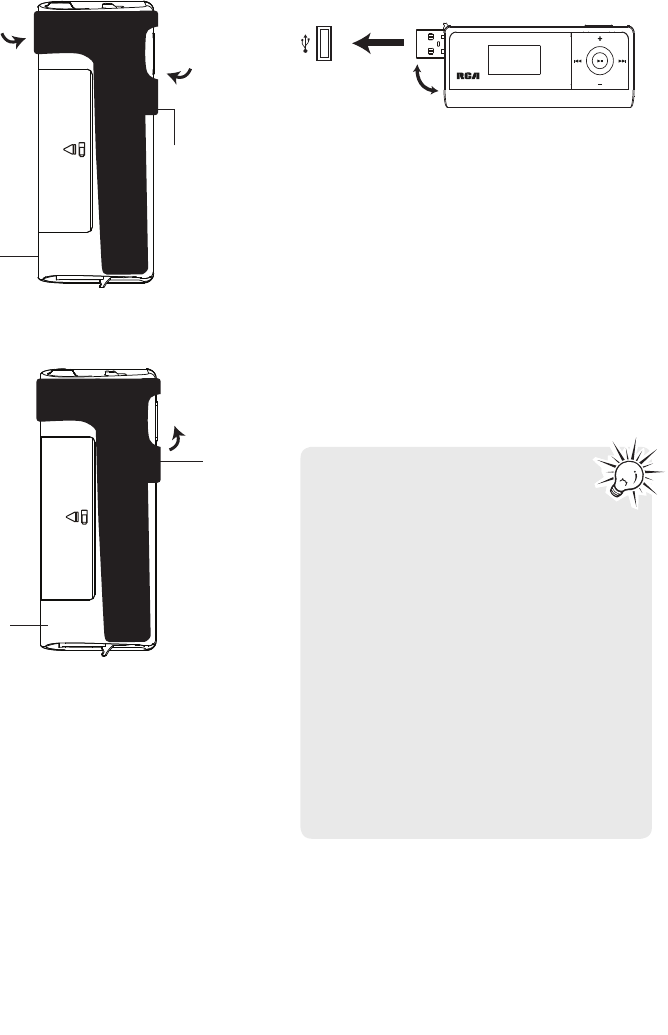
Installing the belt clip
Removing the belt clip
9
Before you begin
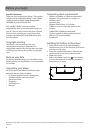
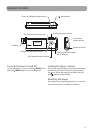
Connecting to the computer
• Rotate the USB plug out of the player body and
connect the player to your PC as shown.
• The player will turn on automatically and display
"USB connected" on the display. The player will
appear as a drive letter on your computer, a Mass
Storage Class (MSC) device, and behave as a
detachable drive for file transfer in one or both
directions.
• The RCA easyRip™ Media Software installer
(stored in the player*) will launch automatically.
Click NEXT to begin the installation and follow
the instructions to install the software on your
PC.
• The software installer can be deleted from the
player after installation to free up more storage
spaces.
• It might take several seconds for the
player to be detected. Click Refresh
in My Computer or Windows Explorer
to make sure the player has been detected.
• The player is capable of transferring files at
USB 2.0. If USB 2.0 port is available on your
computer, use it to connect to your player.
The player is still backward compatible with
the older USB 1.1 ports. However, you will
not be able to take full advantage of the
potential speed increase.
• IMPORTANT: Don’t disconnect the USB
cable to the PC or the player during the
software installation.
• If the installer does not auto-launch, go to
MyComputer in the Start menu, find and
open the drive letter associated with the
player and then double-click the
rcaeasyrip_setup file to launch the installer.
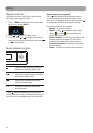
Player
USB port of your
computer
* The latest software can be downloaded from www.rcaaudiovideo.com.
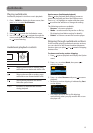
Belt clip
Player
Lift up the
clip here
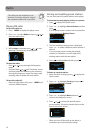
Belt clip
Player
Step 1:
Place the
belt clip
here
Step 2:
Push here
until the
belt clip
completely
locks in
place