


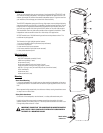
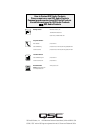
Wiring
Connect the amplifier’s + and - outputs directly to the loudspeaker’s + and - termi-
nals. The screw terminals accept wire or spade terminals. Use only wire connec-
tions when using the input cover. The terminals are spaced (0.38”) (9.66 mm).
Maintain proper speaker and amplifier connection polarity
throughout the entire system. All positive-marked loudspeaker ter-
minals should be connected to positive-marked amplifier output
terminals. This will provide the best possible low-frequency out-
put from your system.
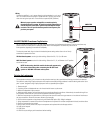
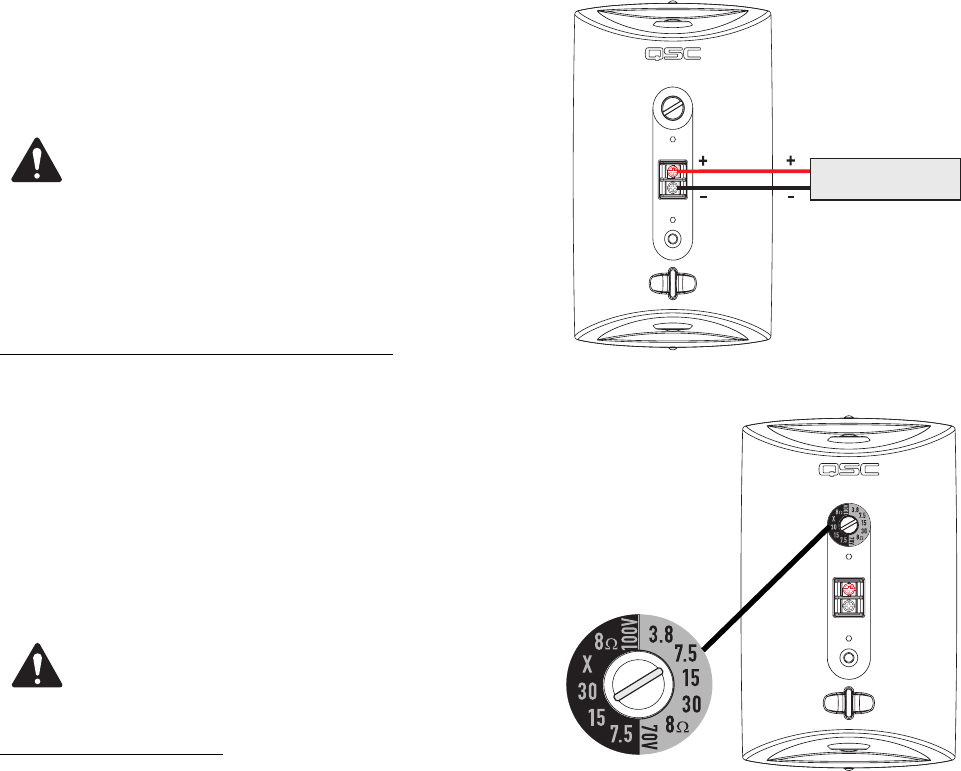
AD-S32T 70V/100V Transformer Tap Selection
AD-S32T models are equipped with a 70V/100V matching transformer for distributed audio systems. There is a transformer tap
selector switch on the rear panel for setting the power level of the loudspeaker. The switch may also be set for
8 ohm operation, bypassing the transformer completely.
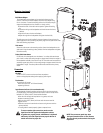
To select the power level, align the slot with the desired power setting number. Use a coin or flat tip
screwdriver to operate the switch.
70V distributed systems: use the right side markings. Select from 3.8, 7.5, 15, or 30 watts.
100V distributed systems: use the left side markings. Select from 7.5, 15, or 30 watts. the “X” position
should not be used.
NOTE! 8 ohm setting should be used for 8 ohm audio systems only.
Do not use 8 ohm setting when connecting the AD-S32T loud-
speaker to 70V/100V distributed audio systems.
Painting the Loudspeaker
The loudspeaker enclosure, grill, and mount can be painted to match any decor, provided the following precautions are observed.
The cabinet is made of high impact polystyrene which requires controlled painting procedures in order to obtain good results. Use a
paint “system” designed for high impact polystyrene from any reputable paint supplier.
1- Remove the grill.
2- If painting mount and loudspeaker as a unit: Attach the ball mount or yoke mount.
3- Mask the loudspeaker’s input connector.
4- Mask the woofer, tweeter, and port being certain not to apply tape directly to the drivers. Alternatively, the outside of the grill can
be completely masked and set in place on the loudspeaker enclosure for painting.
5- Wash the components to be painted with a mild soap and hot water. Be careful not to get water on or into either of the drivers or
the input connections. Rinse with hot water. Allow to dry thoroughly.
6- Scuff-sand the components to be painted using red Scotchbrite® pad or 320 - 400 grit sandpaper.
7- Using compressed air, remove all dust from the components to be painted. Do not blow compressed air directly into either driver.
8- Clean the components to be painted.
9- Using a clean, lint-free, white cloth, wipe the components to be painted with suitable prep solution.
10- Apply primer topcoat.
12- Apply paint.
13- Allow to dry according to paint instructions before handling.
AMPLIFIER