15
<PRB1289>
BEFORE
OPERATING
BASIC
OPERATIONS
VARIOUS
OPERATIONS
VARIOUS
OPERATIONS
()
TRACK
SET
3
DISC
SET
5
783
RANDOM
DISC
SET
TRACK
SET
TIME/
CHARA
HI-LITE BEST
PREVIOUS
MODE CLEARPGMREPEAT
Î
FILE-TYPE CD PLAYER
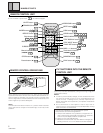
REMOTE CONTROL UNIT
TITLE
DISPLAY
TITLE
INPUT
1¡4¢
DISC
–
+
CURSOR
<>
PQRS
7
TUV
8
MARK
0
WXYZ
9
GHI
4
JKL
5
MNO
6
1
ABC
2
DEF
3
VARIOUS OPERATIONS
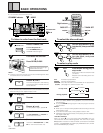
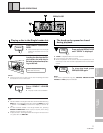
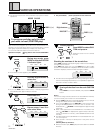
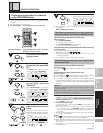
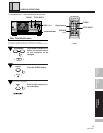
To program tracks/discs in a desired
order (PROGRAM play)
÷ The remote control is the most convenient way to perform these
operations.
÷ You can program up to 36 steps.
÷ The parenthesis ( ) show operations for the main unit.
Press 3.
The program play starts from the
track that was programmed first.
Press PGM (PROGRAM) dur-
ing stop mode.
Use the digit buttons to se-
lect the track, and press
TRACK SET.
(Use 41/¡¢ to select the
track number, then press PROGRAM.)
Repeat steps 2 and 3 to pro-
gram additional discs and
tracks.
Once the track times have been
added, the PGM indicator stops blink-
ing and the following display appears
(Total Time).
Use the digit buttons to se-
lect the disc, then press DISC
SET.
(Use DISC (–/+) to select the disc
number, then press PROGRAM.)
4
3
2
1
5
«
\
3
5
1
2
3
2
PGM
2
DISC
SET
«
7
TRACK
SET
( = )
The PGM indicator starts to blink.
Operation example: Programming disc 2, track 7 as step 1,
and disc 5, track 3 as step 2.
TRACK MIN SECDISC
PGM
TRACK MIN SECDISC
PGM
TRACK MIN SECDISC
PGM
TRACK MIN SECDISC
PGM
TRACK MIN SECDISC
PGM
3
\
( == = )
( = )
PROGRAM
()
PROGRAM
PROGRAM
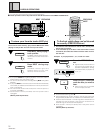
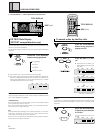
The following operations can only be performed
during normal play, HI-LITE scan or PREVIOUS scan
1
23
4
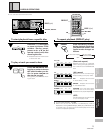
<Programming tracks during normal play>
(Direct program)
1. Press PGM (PROGRAM).
• Program mode is activated.
2. Press PGM (PROGRAM) during playback.
• The current track is programmed.
<Programming during normal playback
(remote control only)
>
(Preprogramming)
You can program during normal playback.
(\Operation example )
• The player changes to program play when the current track
finishes playing back.
• To change to program mode directly, press 3.
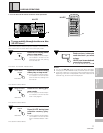
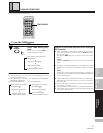
The following operations can only be performed
during stop mode
5
<Programming an entire disc as one step>
(Disc all program)
If you skip step of the operation example, disc 2 is programmed
as step 1.
<Programming a pause
(remote control only)
>
(Pause program)
If you press 8 at step , you can program a pause. When you press
8, “PA” appears in the display instead of the disc number.
÷ For example, when making a program for recording both sides of
a cassette tape, press 8 to insert a pause after programming the
tracks for one side. After turning the tape over, press 8 to resume
recording.
Notes!!
÷
You cannot program a pause as the first step, or program two
pauses in a row.
÷
When you program a pause, it counts as 1 step and reduces the
total number of tracks you can program.
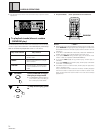
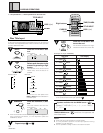
÷ To erase a program...
Press 7 twice during playback (or once in stop mode). You can also
erase the program by pressing MODE, RANDOM, PREVIOUS, or
SINGLE LOADER PLAY in either play or stop mode (or by
pressing BEST in stop mode).
÷ To cancel a program step
In stop mode, each time you press CLEAR, the last step in the
program is erased.
÷ If a programmed disc is missing or inserted backwards
during program play, “ NO DISC” appears in the display,
the step is automatically erased, and playback proceeds to the
next step.
÷ Program contents are stored in memory even when the power
is turned off (STANDBY).
Notes!!
÷
If step is carried out before the accumulated time is displayed,
the program play starts and the time is not displayed.
÷
When UNLOAD is pressed while a program has been entered, the
disc for the 1st program step comes on the center position and the
hood opens.
÷
The display is not shown if the total time of the program is 100
minutes or more.
3
4
÷ Items stored in memory are saved, even if the power cord is
unplugged.
(Memory Back-Up Function).
PROGRAM PROGRAM
DISC
41 ¡¢
DISC
41 ¡¢
6
6


