


10
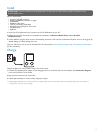
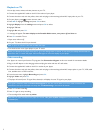
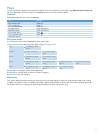
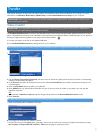
4 Adjust the required start date using 1 and 2.
5 Then use 3 and 4 to move down to start time and stop time. Adjust the time using 1 and 2. The time is changed in 5
minute increments.
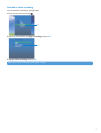
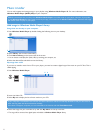
6 Move down to timer recording on and press OK to turn it on. If you want to turn off the timer then simply press OK again.
> When scheduled time and date take place, the video recording will begin automatically.
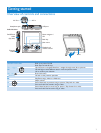
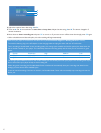
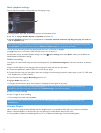
Make sure your player is connected to the video source (see Connection diagram in Getting started for details).
To avoid low battery, plug in the AC adaptor to the charging socket and plug the other end into AC wall outlet.
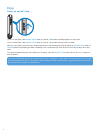
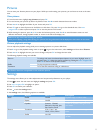
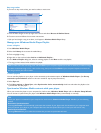
Timer recording is limited based on the recording quality, the storage space available and the file system (this determines the
size of the file created) on your player. This relationship between recording quality and the time you can record for is given
below.
The storage space available is based on the number of files you have already stored on your player. The recording time may be
less in cases where your player already is close to being full.
While using timer recording, the Portable Media Center interface will automatically limit your recording time based on the
settings you have chosen & the available space.
In case of manual recording, if the limit is reached , the Portable Media Center will automatically stop recording and save the
file for you.
4
5
6
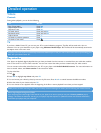
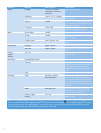
Quality Resolution High Medium Low
VGA 640 x 480 3 hours 4 hours 5 hours
QVGA 320 x 240 6 hours 7 hours 8 hours