


49
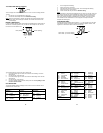
Have both the indoor display unit and the outdoor transmitter (sensor) inside and
five to six feet apart with nothing between them.
Remove all power from both units.
Press any one of the buttons on the display unit at least 20 times to clear all
memory. Verify that the display is blank before proceeding. Let the units sit for
ten minutes before installing batteries.
Batteries: Use good quality alkaline batteries with an expiration date of at least
six years into the future or newer. If you are using questionable batteries, be sure
they measure at least 1.48 on a voltmeter. Generic or store brand batteries, and
batteries labeled super, ultra, max, heavy duty, lithium and rechargeable should
be avoided. These batteries provide their power at a different rate than plain
alkaline batteries. This may cause problems, especially with the display unit. It is
not always a low battery that causes problems. It may be an overpowered battery.
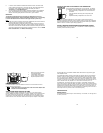
Place the batteries into the outdoor remote sensor first, making sure they are
installed according to the diagram in the battery compartment. Next, taking care
not to press any buttons, install the batteries in the indoor display unit according to
the diagram in the battery compartment.
Do not press any buttons for at least 15 minutes after installing the batteries. This
is because the sensor assigns a random security code at start-up, and this code
50
must be received and stored by the indoor station in the first few minutes of power
supplying.
A temperature and humidity reading should be showing on your display in the
“outdoor” portion of your display. Because the sensor detects the temperature at
the location where it is placed, and because the setup generally takes place
indoors, your indoor and outdoor temperature will match within a couple of
degrees.
After you have completed this setup and placed your sensor outside, the
temperature reading will adjust to the outdoor temperature. The temperature will
be displayed on your indoor unit.
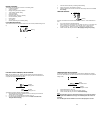
Setting the Alarm Time
Press and hold the ALM button for five seconds. The alarm time will begin to
flash.
Press and release the CH/+ button to adjust the hour (watch for am or pm). Press
and release the ALM button and the minutes will flash. Press and release the
CH/+ button to adjust the minutes.
Press SNOOZE/SUN bar to return to normal display.
Activating and Deactivating the Alarm:
Press and release the ALM button to activate the alarm.
51
When ((●)) is showing above the time, the alarm is activated. To turn off the
alarm, press ALM button. The icon will no longer appear when the alarm is
deactivated.
TROUBLE-SHOOTING GUIDE
If you continue to experience problems with your Weather Station after a Proper
Restart and Initial Set-up, please see if your problem is described in this Trouble-
Shooting Guide and follow the suggestions to attempt to correct the problem
before contacting technical support.
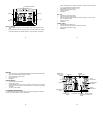
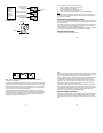
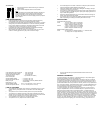
Please familiarize yourself with the function buttons. These are located on the
right, left and top edges of the clock. They are: SET, MIN/MAX, ALM , CH/+, and
the SNOOZE/SUN bar. These buttons will be used in the trouble-shooting guide.
Outdoor Readings
Outdoor Temperature Displays as --.- (dashes)
Placement of Sensor: The maximum transmission range is 330 feet in a straight
line (line of sight). Trees, walls, windows, and obstructions will reduce
transmission range by as much as half. (An obstruction would include anything
that is in the line of sight like a roof, walls, floors, ceilings, trees, etc.). Certain
building materials such as glass, stucco, and metal framework or siding, can
greatly reduce the range.
52
In order to get an accurate reading and to prolong the life of your sensor, we
recommend that you place the sensor in a sheltered area out of the sun and direct
rain. Fog and mist will not affect the sensor, but a soaking in water may.
Sensor is wet: If your sensor becomes soaked, bring the unit inside, remove the
batteries and allow the unit to dry overnight; then restart the station using the
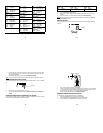
Proper Restart instructions. You can mount the sensor outside under an eave of
your house or any other suitable place that will keep it out of the sun and rain. Do
not wrap the sensor in plastic or seal it in a plastic bag. You may also put it in a
two-sided bird feeder with a roof.
Restart: Remove batteries from all units and follow the Proper Restart directions.
If this does not correct the problem, continue to the next step.
Outdoor Temperature is Inaccurate or Missing
Batteries: Be sure you have good alkaline batteries for both the sensor and the
base station.
Placement: The sensor will measure the temperature in the location where it is
placed. Therefore, the unit must be placed outside to register the outdoor
temperature.