


INSTALLING YOUR XR650-CXi
COAXIALS IN FACTORY LOCATIONS:
Run the supplied speaker wires to the desired
mounting location. If you are running wires into a
door,use existing factory wiring boots whenever
possible. If you are drilling new holes, file their
edges and install rubber grommets into each hole.
Then,cover the wires with a protective PVC sleeve
and run them through the door jamb. Make sure
that the wires will clear door hinges and other
structures in the door. If you are unsure about any
part of this process, please contact your JL AUDIO
dealer for installation help.
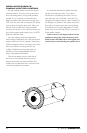
Your new speakers have been designed to
install,without modifications, into most vehicles that
accept a 6.50-inch (160 mm) speaker. Most factory
6.50-inch speakers use four mounting screws which
will line up with the mounting holes on your
woofers. Multiple sets of mounting holes are
available to accommodate different vehicles’
factory hole patterns/orientations.
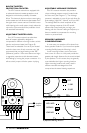
Connect the speaker wires to both sets of
terminals on each speaker, observing correct
polarity and making sure that the tweeter and
woofer wires correspond to the correct terminals
on both the speaker and crossover.
It is absolutely vital that the speaker frame fits
into the mounting hole cleanly. This must be
checked prior to tightening the screws. Do not
force the frame into a hole that is too small! Do
not tighten the speaker onto an uneven surface! This
will damage your speakers. The speaker should also
fit so that no air leaks around the mounting flange.
Air leaks will cause a severe degradation in sound
quality. Seal any air leaks with silicone, rope caulk or
similar sealant material.
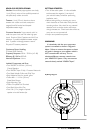
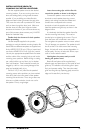
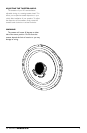
Install as shown in the diagram below.Use the
supplied mounting clips unless the factory holes
already feature threaded inserts.Hand-tighten the
screws evenly to avoid bending the speaker frame!
4 JL AUDIO XR650-CXi