8
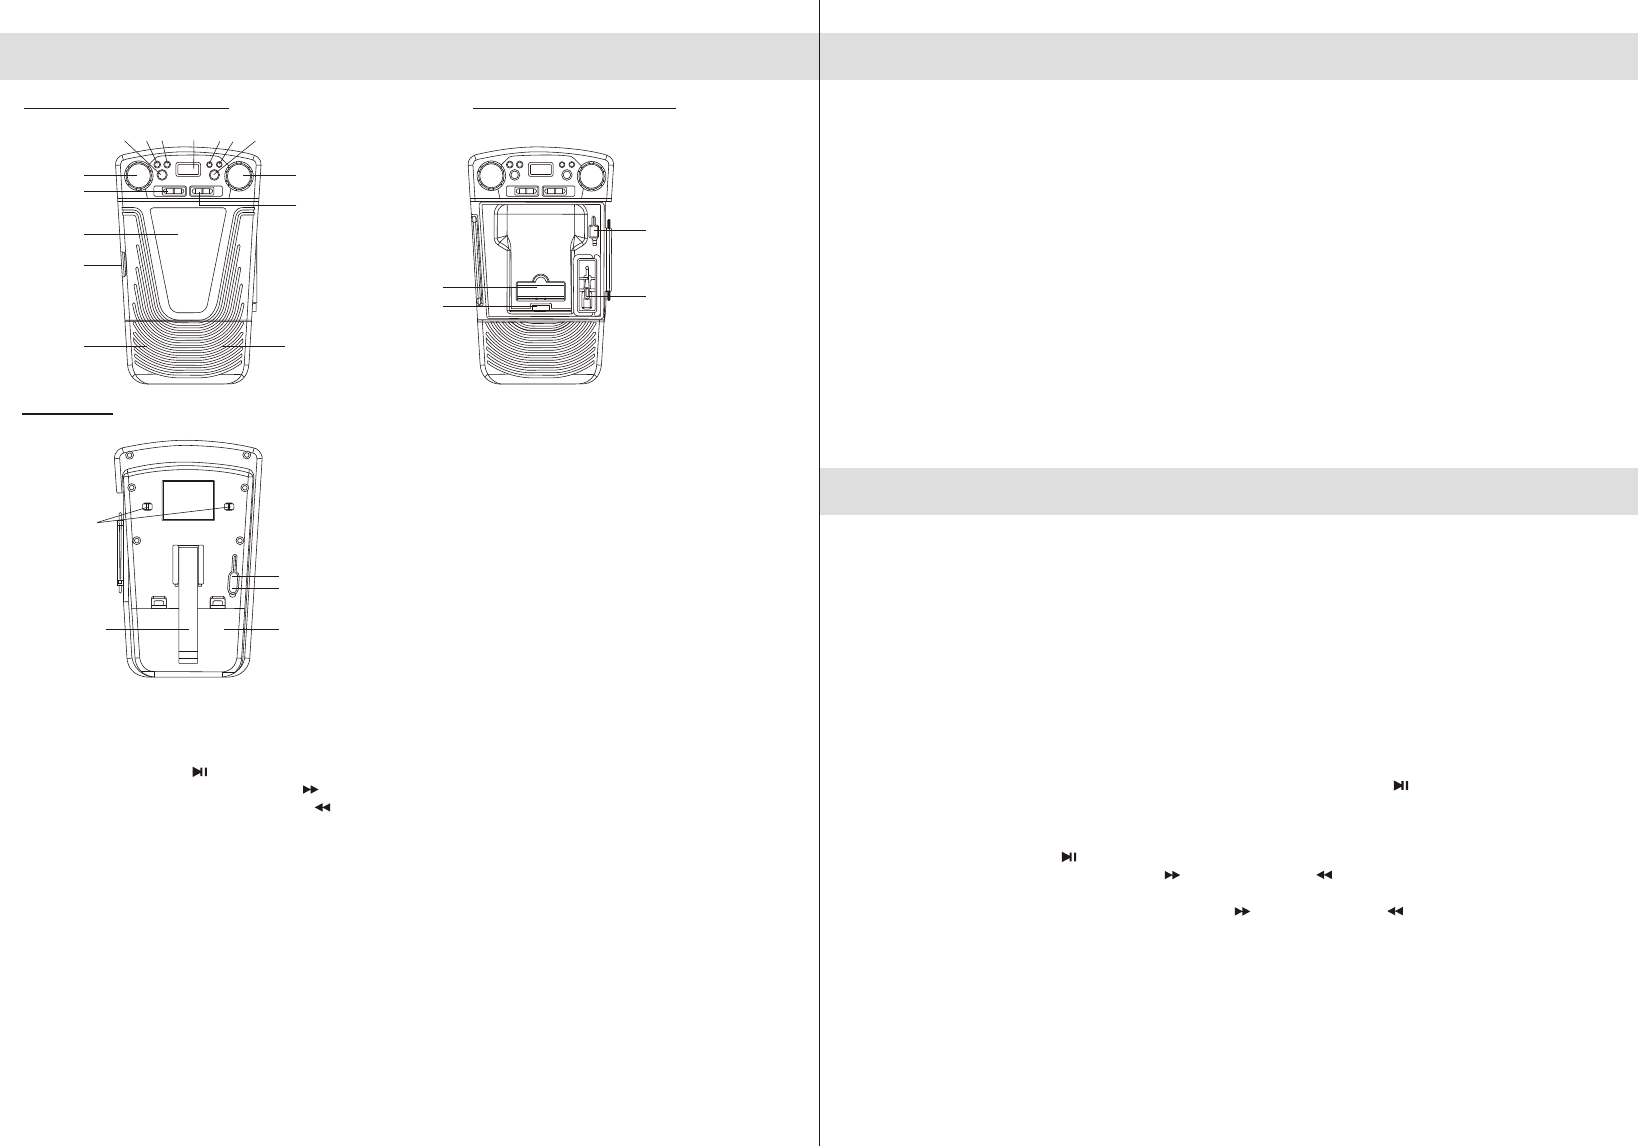
LOCATION OF CONTROLS
Front View (Door Close)
Front View (Door Open)
Rear View
1.FUNCTION SELECTOR: POWER OFF; Select iPod/ RADIO/ AUX modes.
2.AM/FM RADIO BAND SELECTOR: Select between FM STEREO/FM(mono)/AM.
3.VOLUME DIAL: Adjust the volume level up or down.
4.TUNING DIAL: Adjust the radio channel frequency up or down.
5.iPod PLAY/PAUSE BUTTON
6.iPod SKIP / SEARCH FORWARD BUTTON
7.iPod SKIP / SEARCH BACKWARD BUTTON
8.LCD DISPLAY
9.TIME SET BUTTON: Select clock setting mode.
10.HOUR BUTTON: Set hour value of clock.
11.MIN BUTTON: Set minute value of clock.
12.iPod DOCKING COMPARTMENT
13.COMPARTMENT DOOR LOCK
14.SPEAKERS
15.iPod DOCKING CONNECTOR
16.AUX IN ---- An Audio Cable with a 3.5mm stereo plug for the connection of external audio device.
17.FOLDING PLATFORM ---- A sitting platform for the external audio device.
18.CLOCK BATTERY COMPARTMENT
19.DC JACK ---- To connect to external DC power supply.
20.STEREO HEADPHONES JACK
21.MAIN BATTERY COMPARTMENT ---- To install main batteries for the Radio / Speaker operation.
22. DETACHABLE STAND ---- A plastic stand for the desk top sitting.
23.ROPE HOLDER ---- For attaching hanger rope.
9
RADIO OPERATIONS
1.Slide the FUNCTION selector to Radio mode.
2.Slide the AM/FM BAND selector to select desired radio band.
3.Rotate the TUNING dial until the desired broadcasting is received.
4.Rotate the VOLUME dial to adjust the sound level.
REMINDER :
Make sure the FUNCTION selector at OFF position when the radio is not in use.
TIPS FOR THE BEST RECEPTION :
To obtain the best AM/FM reception, slightly rotate the unit until the clearest signal is received or
place it near outdoor.
NOTE :
(1) When weak FM radio signal is received, the unit will automatically switch to FM mono mode
even if the BAND selector is set at the FM stereo position.
(2) The iPod may cause interference to the AM reception if it is docked and turned ON. You should
turn off the iPod manually or remove it from the unit for better reception.
(3) Due to the use of high efficiency AC adaptor in this product, it may cause some interference to
AM radio. We strongly recommend you use battery when listening to AM.
IPOD DOCKING
®
1.Release the iPod DOCKING COMPARTMENT DOOR LOCK.
2.Open the compartment door.
3.Insert your iPod with its connector faced downward and directly over the dock connector inside
the compartment.
CAUTION : Please be careful when seating the iPod into the docking to avoid damaging the
30-pin connector on iPod or the docking system.
4.Close and lock the compartment door.
5.Slide the FUNCTION selector to iPod position. The iPod will start playing automatically.
6.Rotate the VOLUME dial to adjust volume to your desired level.
NOTE : The volume level cannot be adjusted by the volume of your iPod after being docked.
7.The iPod is charging even in playback state.
NOTE : The iPod recharge function operates in iPod and AUX modes when the unit is
powered by external AC adaptor. When the unit is operated by the main battery
alone, the iPod recharge function disabled.
8.To remove the iPod from the unit, press and hold the PLAY/PAUSE button for three seconds
to switch off the device and then gently take the device out.
You may control the playback of your iPod by :
- Press the PLAY/PAUSE button to pause or resume the iPod playback.
- Press the SKIP/SEARCH FORWARD or BACKWARD button to skip to next or previous
song.
- Press and hold the SKIP/SEARCH FORWARD or BACKWARD button for fast-forwarding
or fast-rewinding during playback.
NOTE : To avoid water damage inside the docking compartment or water damage to your iPod,
please make sure your hands are dry and you only open the docking compartment when
you are not near water. It is important to tightly lock the compartment door properly
before using near water.
1
2
3 4
56
7
89 10
11
12
13
14 14
15
16
18
17
19
20
2122
23


