


change the batteries on the
remote control unit.)
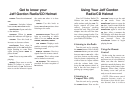
Always keep in mind that the
remote control works best when
pointed directly at the remote
sensor on the front of the unit
(located just under the LED dis-
play.) The remote will function
consistently when used within a
distance of roughly 18 feet
(6m.)
Do not expose the remote sen-
sor to strong light (direct sun-
light or artificial lighting) and
make sure that there are no
obstacles between the sensor
and the remote control.
The remote control features
six buttons, three of which are
also located on the helmet itself.
Those are PLAY, PAUSE and STOP
and they function exactly as the
buttons located on the unit. The
other three buttons are unique to
the remote control and provide
for even more control over the
CDs that you listen to.
Buttons on the
Remote Control
R-SKIP: The R-SKIP button
will cycle through CD tracks in
reverse. Therefore, if you’d like
to listen to a previous track, use
the R-SKIP button. You can also
use R-SKIP to rewind through a
track by pressing and holding it
while the track plays.
F-SKIP: The F-SKIP button
functions just like the R-SKIP
button only forward. This button
allows you to cycle through
tracks in order. You can also use
F-SKIP to fast-forward through a
track by pressing and holding it
while the track plays.
REPEAT: Press this button
once to instruct the helmet to
play the current track over and
over. This track will play repeat-
edly until the helmet is instruct-
ed otherwise. The
REPEAT indi-
cator light on the helmet will
begin to blink. Press REPEAT
again to have the entire CD
repeated when it is done playing
through all the tracks. Now, the
REPEAT indicator light will stay
lit. Press one more time to turn
REPEAT off. The indicator light
will turn off.
PROGRAM: This button allows
you to program the order in
which the CD tracks will be
played. When the CD is in stop
mode, press PROGRAM to begin
selecting the order in which you
want tracks to play. The track
number and PROGRAM indicator
light will flash. Use the R-
SKIP/F-SKIP buttons to cycle
through tracks until you have
found the track that you’d like to
play first. Press PROGRAM again
and this track will be registered
and you may continue. Keep
selecting tracks using the PRO-
GRAM button to register them in
the order that you desire. You
may program up to 19 tracks in
any order you wish. If you use
all 19 slots the diplay will flash
with “- -”. If the STOP button is
pressed during PROGRAM MODE,
the unit will remove the content
of the program and cancels pro-
gram mode.
89
CD Precautions
If the CD is scratched, dirty, or
incorrectly placed on the disc
tray, it will not play properly.
Bear in mind the following
points since any dirt, scratches
or warping of the disc can cause
broker or intermittent sound and
noise.
When holding a CD, try to
keep your hands off of the play-
ing surface. Hold the CD by its
edges.
Do not place discs in the fol-
lowing locations:
• Near a heating device or a
place where the temperature is
high.
• Damp or dusty areas.
Never use chemicals such as
record sprays, anti-static sprays,
benzene or cleaning fluid on
your CDS.
Should there be any finger-
prints or other smudges on the
playing surface of the CD
(opposite the side with the label)
wipe gently using a soft cloth
making sure to wipe from the
inside out or from the center of
the CD to the outer edge.