


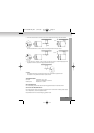


WAKE TO RADIO OR BUZZER
1. Select the desired radio & volume level, please refer to —RADIO OPERATION— section for details.
2. Press & hold the Alarm Set/OFF button (3) & set the desired alarm hour & minute by pressing the Hour Set
button (5) & Minute Set button (6) respectively [For 12 hours display format unit, a "PM" indicator at the top-left
corner to indicate the afternoon time].
3. Slide the Function switch (7) to "AUTO" position. Then, the radio will be on automatically to wake you up at the
preset time.
4. To be waked by buzzer instead radio, turn the Alarm Buzzer Control (1) to "BUZZER" position.
5. To turn the radio or buzzer off (before or during the alarm activated):
A. Slide the Function switch (7) to the "OFF" position to terminate the alarm
B. Press the Alarm Set/OFF button (3) once to stop at alarm until the next day same preset time.
COUNT-DOWN TIMER
1. Slide the Function switch (7) to "OFF" position for activating the count-down timer only or switch to "ON" position
for activating the count-down timer & keep listening the radio at the same time.
2. switch the Count-Down Timer Control (2) to "ON" position, & the default setting of count-down duration "00:59"
will appear on the clock display (9).
3. To set the count-down duration, press the Minute Set button (6) to decrease the minute setting by 1 minute per
step. Press the Hour Set button (5) to set the setting by adding 1 hour more. [The count-down duration can be set
from 1 minute to 1 hour 59 minutes]
4. The buzzer will be activated when the count-down time setting due.
5. To terminate the activated buzzer, slide the Count-Down Timer Control (2) to "OFF" position.
6. To terminate the count-down counter before the buzzer activated; slide the Count-Down Timer Control (2) to
"OFF" position to turn off the timer function accordingly [Press any other clock keys during the count-down period
will interfere the timer function & display].
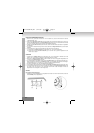
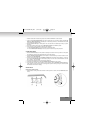
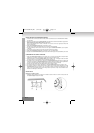
INSTALLATION
Under kitchen cabinet mounted:
1. Install the plastic mounting bracket onto the kitchen cabinet by screws as shown. [Turn both Stand Feet (14) as
shown]
9.
01-4250N-GE,GB 7/21/06 12:08 PM Page 9