


18.
INSTALLATION AND CONNECTIONS
Unpacking:
Carefully take the unit and the two speakers from the packaging. Please keep the packaging for further use.
Remove all adhesive strips and carefully remove the dirt on the laser lens in the CD drive.
Preparation of remote control prior use
Inserting the batteries into the remote control
1. Remove the cover from the battery compartment by slightly pressing it down and pushing it outward.
2. Insert two batteries of type "LR03 \ AAA \ UM-4".
Observe the displayed polarity in the battery compartment ( and ) when inserting the batteries.
3. Push the cover back on the compartment.
NOTE: Old batteries may swell or leak. To avoid damage to your unit, remove batteries when they become
exhausted or when you do not use the unit over a longer period of time.
Remarks concerning the remote control
• If the range of the remote control reduces, the batteries are exhausted. Replace the batteries.
• Do not attempt to recharge, short-circuit, disassemble or heat the batteries or throw into fire.
• Do not drop the remote control, do not step on it nor strike it hard elsewise. Malfunctions can result from
that.
• When not using the unit over a longer period of time, remove the batteries.
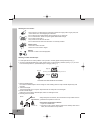
Operating range of the remote control
Press the buttons gently but firmly.
Point the remote control from a distance of not more than 6 meters and within an angle range of 60º to the
sensor at the front of the unit.
Remarks concerning the operating range of the remote control
• Do not point light lamps towards the sensor.
• The operating range depends on the brightness of the room.
• Objects between remote control and sensor will obstruct the transmission.
• Do not use the remote control simultaneously with remote controls of other units.
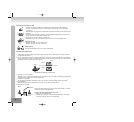
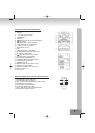
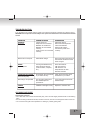
Connecting the speakers
Connect the speakers to the red and black terminals on the back of the
unit (see picture).
Connect the right speaker to the R-, R+ (right) terminals and the left speaker
to the L-, L+ (left) terminals.
Press down the red or black terminal, insert the the wires of the respective
speaker and then release the terminal in order to hold the wire at the right position.
Observe the right polarity when connecting the speakers. You have to connect the wires with the minus
symbol to the terminals R- and L-.
Connecting to the mains
First connect all components and speakers correctly.
You may only operate this unit with the voltage specified on the rating plate (AC 230V~50Hz).
Connect the mains plug to a wall outlet.
Earphones
Make sure the earphones have a 3.5 millimeter stereo jack and an operating impedance of 8-32 ohm. The
speakers automatically switch off when the earphones are connected.
R+ L+L-R-
+
-