


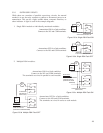

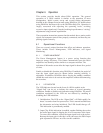
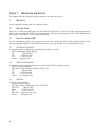
4. Provide attachment hardware and secure the supplied Wall Brackets
to the mounting structure, complying with all Danger and Caution
notes in Section 5.6.1.
NOTE: The Wall Brackets have a weld nut on one side. Be sure to
locate this weld nut to the right or left such that the Retainer Bolt can
be inserted into the opposite side of the Wall Bracket after the
module is mounted.
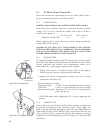
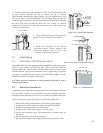
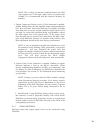
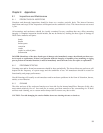
5.6.8 ENCLOSURE BRACKET INSTALLATION
Insert each supplied Enclosure Bracket into its slot near each end of the
enclosure, verifying the proper orientation of the enclosure. Insert a
supplied 3/8-16 x 2 in Enclosure Bracket Bolt with its lock washer into
each bracket bolt hole in the enclosure. Thread each bolt into the weld
nut on its Enclosure Bracket and hand-tighten.
Caution: Make sure the brackets are installed so the enclosure orientation
will be correct when the enclosure is mounted.
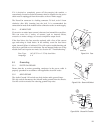
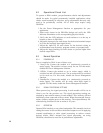
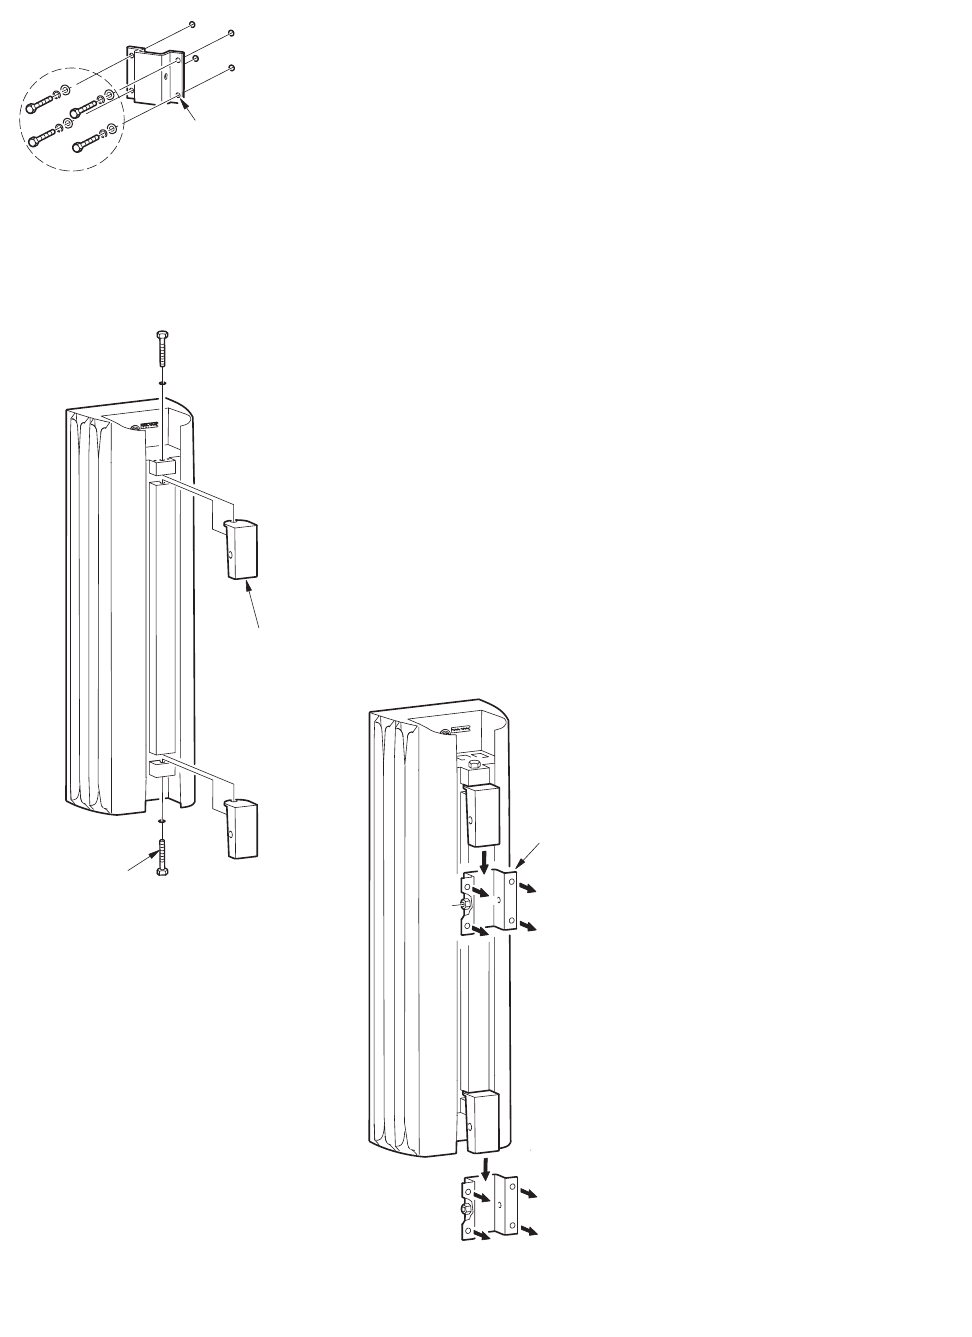
5.6.9 ENCLOSURE INSTALLATION
1. Lift the enclosure onto the structure-mounted Wall Brackets
DANGER: IT IS RECOMMENDED
THAT LIFTING THE ENCLOSURE IN
PLACE BE PERFORMED BY AT LEAST
TWO PEOPLE TO PREVENT IT FROM
FALLING DURING ITS INSTALLATION
AND CAUSING POSSIBLE EQUIP-
MENT DAMAGE, INJURY, OR DEATH.
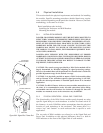
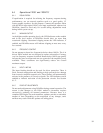
CAUTION: For DSAi Clusters with two
or more modules mounted one over the
other, it is recommended to make all
cable connections before lifting the mod-
ules onto the wall brackets. See Sections
5.2 through 5.5. Once the modules are
mounted, access to the connectors may
be difficult.
IMPORTANT: When installing modules
mounted vertically end to end, install the
lower module first.
26
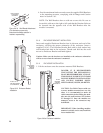
USER SUPPLIED
ATTACHMENT
HARDWARE
Ø 0.39 in
Ø 9.9 mm
Figure 5.6.7d Wall Bracket Attachment
(For illustration purpose only.
Attachment hardware selection is
installer’s responsibility.)
2X ENCLOSURE
MOUNTING
BRACKET
P/N 0006118
2X 3/8-16 X 2 LG
HEX HEAD SCREWS
& LOCK WASHERS
Figure 5.6.8 Enclosure Bracket
Installation
2X WALL
MOUNTING
BRACKET
P/N 000611
9
Figure 5.6.9a Enclosure Installation